Correcting Data Errors Upon Upload in Supplier One
Updated 2 years ago by Merch Transformation
This ability to correct data errors upon upload directly in Supplier One helps you save time by reducing the need to use a spreadsheet.
See How It Works
Follow These Steps
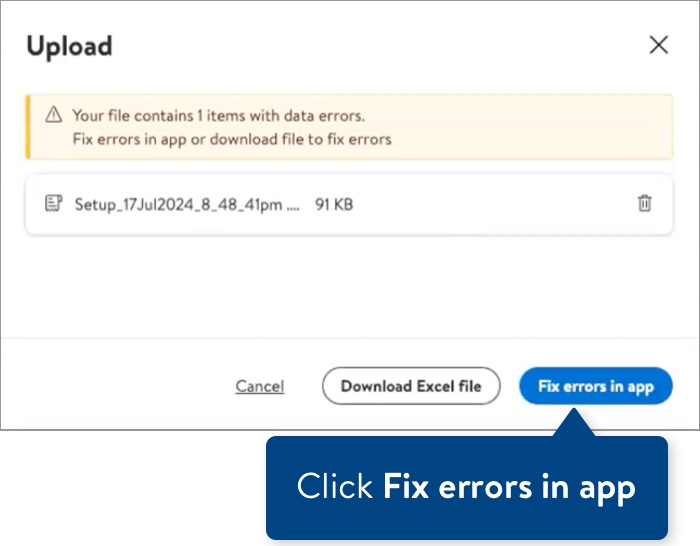
If upfront validations find errors in your item setup or maintenance spreadsheet upon upload, a message alerts you to the number of items with data errors. Click Fix errors in app to correct the errors directly in the Supplier One platform.
If you prefer to fix errors in the spreadsheet, that option is still available by clicking Download Excel file.
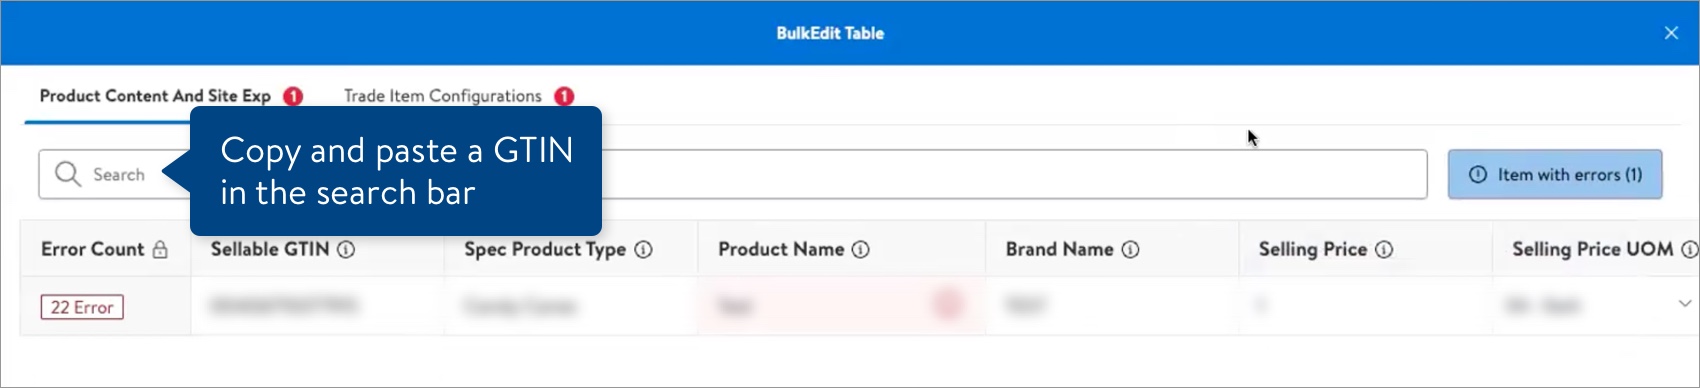
All items show the Product Content And Site Exp tab. Owned and DSD items also show the Trade Item Configurations tab. The number in the red circle indicates how many errors are on each tab.
The edit table shows one row for up to 50 items at a time in the upload. There are two ways to narrow down the list:
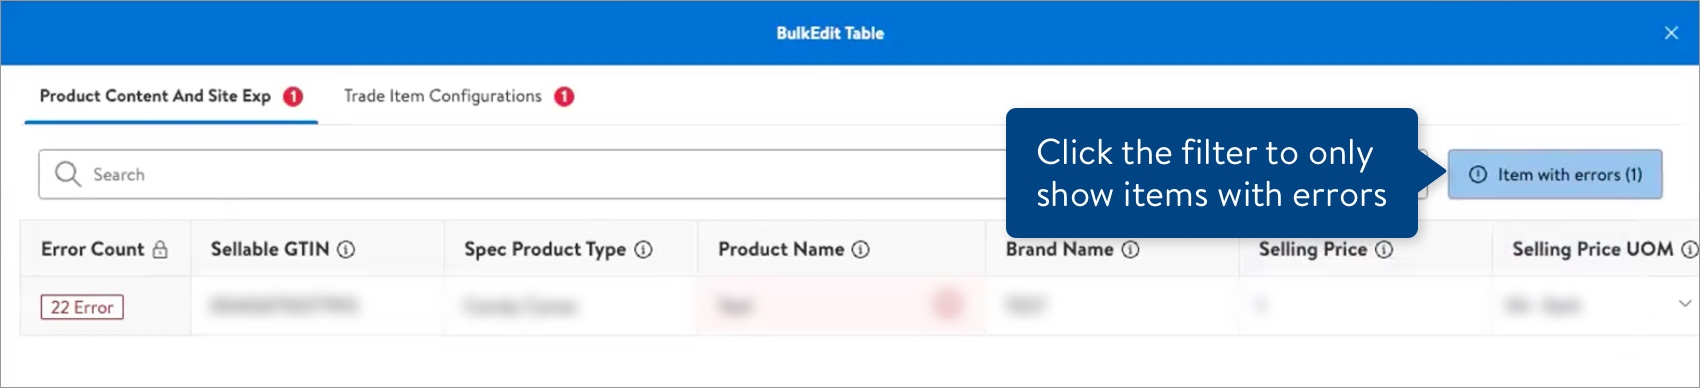
Click the Item with errors filter to only show the items that need to be corrected.
Copy and paste a GTIN in the search bar to find a specific item.
On each tab, the Error Count column shows the number of errors for each item in the upload.Scroll to find the attributes with data errors (i.e., red cells). Hover over the red information icon to learn more about the error and how to fix it.
We are adding Previous and Next buttons soon to make it easy to find the attributes with data errors.
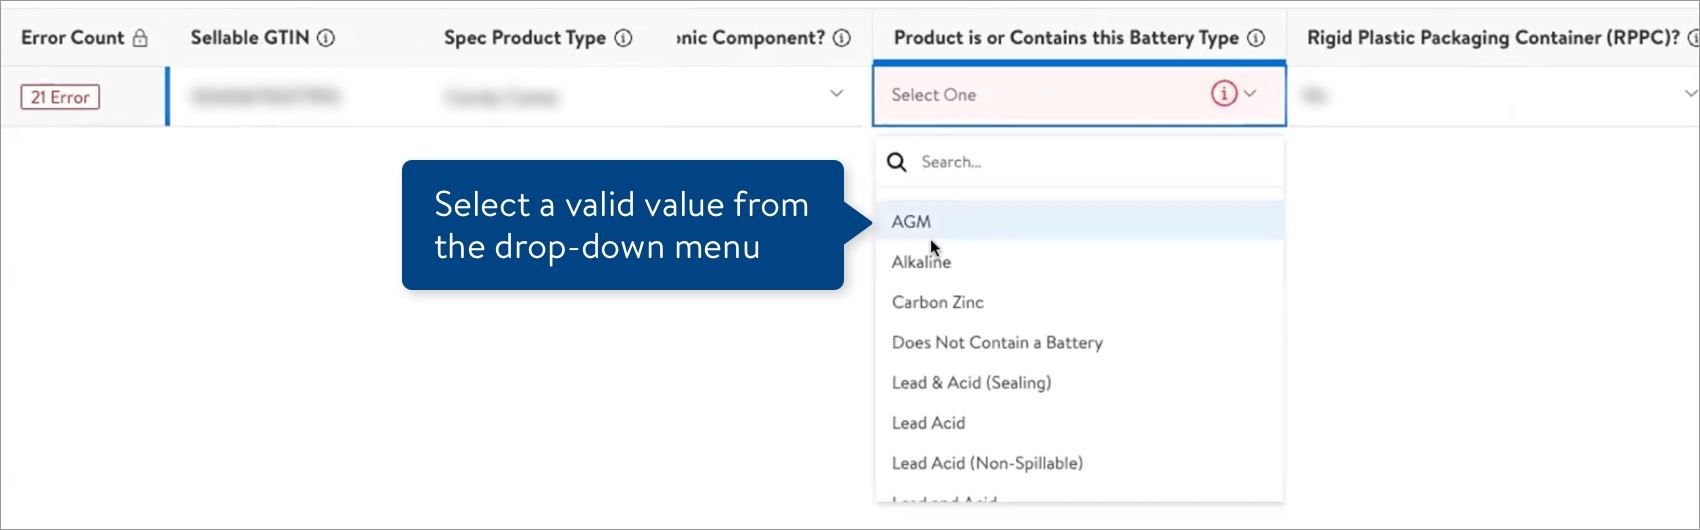
To fix an error, click the existing value in the table and enter a new value. Click outside of the cell to continue fixing more data errors.If the value has a closed list of options, select a valid value from the drop-down menu. Click outside of the cell to continue fixing more data errors.
For attribute definitions and requirements, click the information icon next to the attribute name in the column header.
As you correct data errors, the Error Count column updates to show your progress.
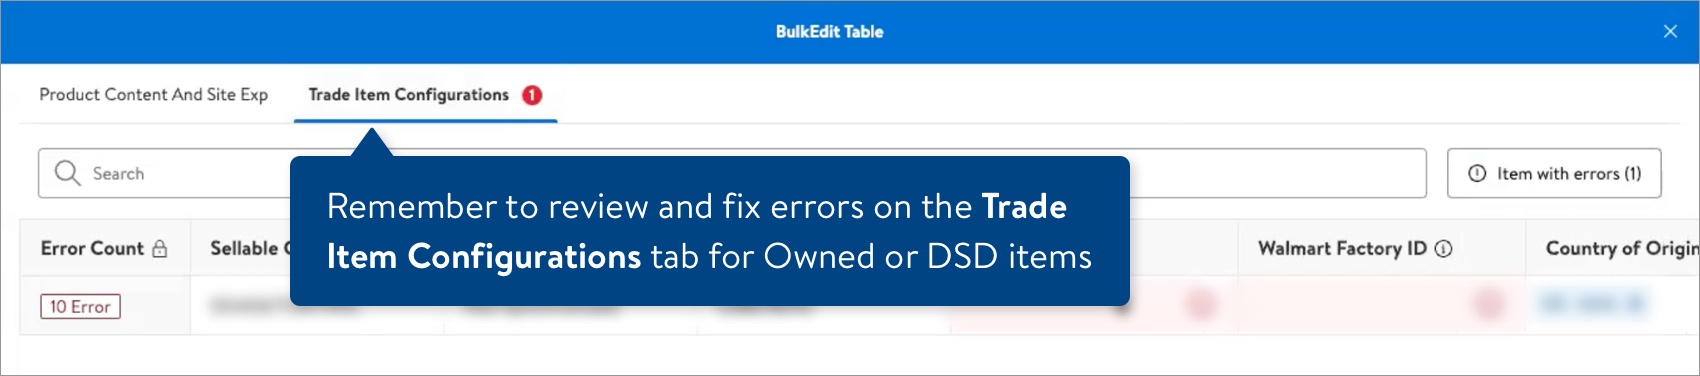
If your upload is for Owned or DSD items, remember to review and correct data errors on the Trade Item Configurations tab.
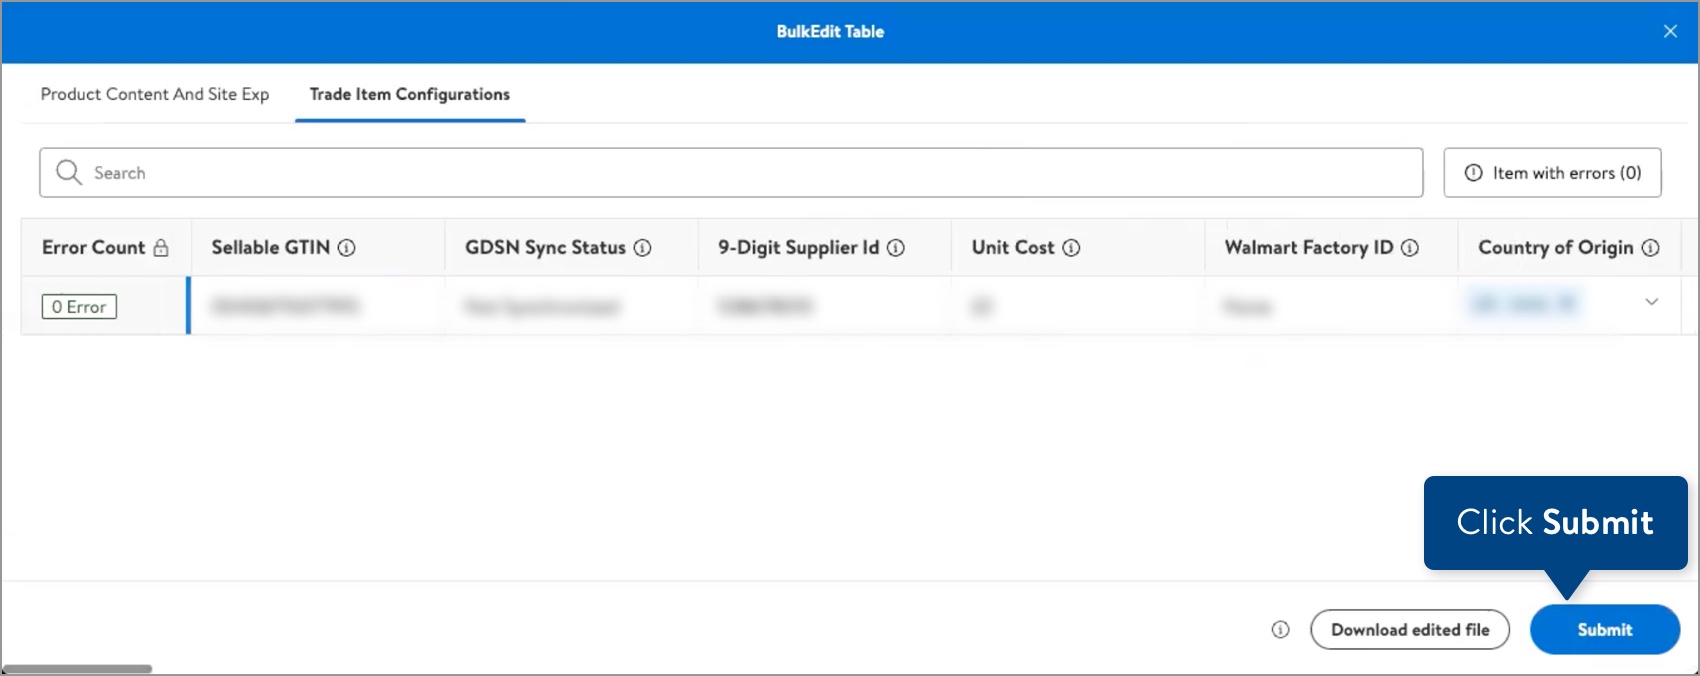
Once you have corrected all data errors, click Submit to apply your changes.
If you would like to review your changes and submit them later, click Download edited file.
If additional data errors are found, repeat Steps 3–8.
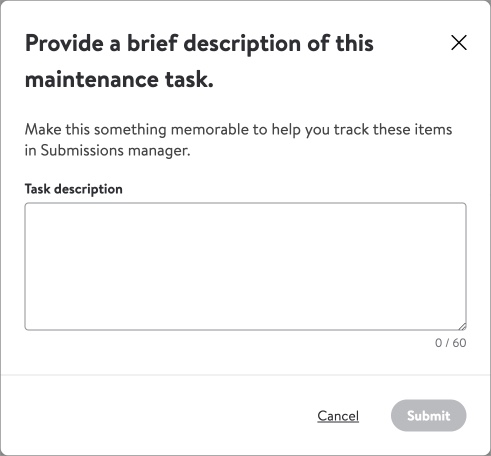
If no additional data errors are found, provide a submission description and click Submit.
Additional Errors Found After Submission
Once you have successfully submitted your item setup or maintenance in Supplier One, remember to check the status in the Submissions Manager. If additional errors are found, learn more by downloading the error spreadsheet from the submission details page.
The ability to correct data errors directly in the Supplier One Submissions Manager is coming soon.
Have Questions or Need Help?
If you experience any issues viewing and managing your catalog, please click "Help" in the top navigation menu and select "Manage tickets" to file a case ticket. Or, select "Chat" to get real-time help from our chat bot or click "Search articles" to search Supplier One HelpDocs.
Make sure to select the issue type Items and Inventory.
 If you prefer to fix errors in the spreadsheet, that option is still available by clicking Download Excel file.
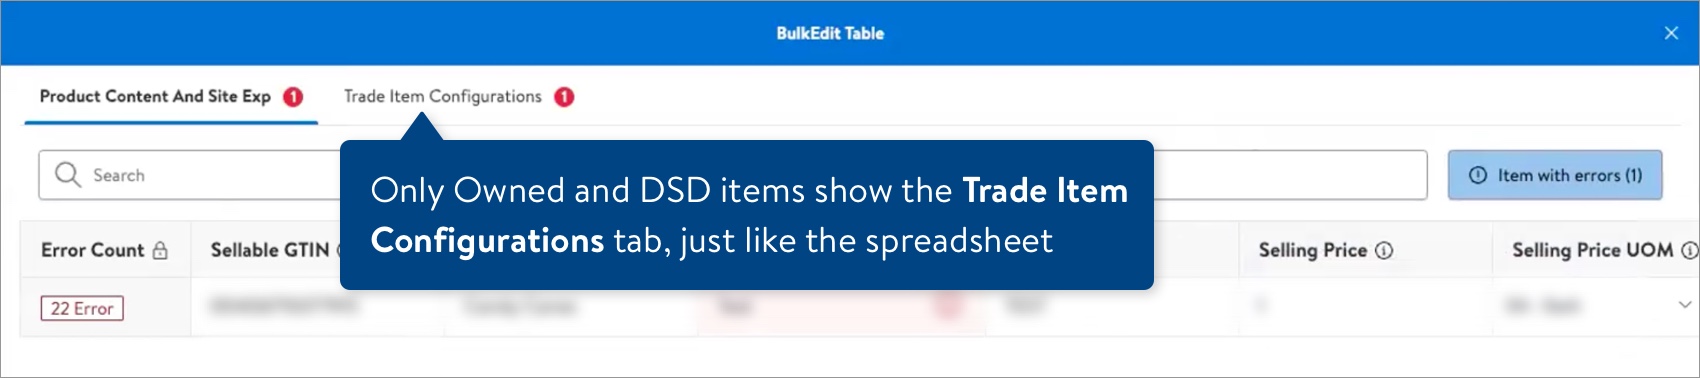

 We are adding Previous and Next buttons soon to make it easy to find the attributes with data errors.
 For attribute definitions and requirements, click the information icon next to the attribute name in the column header.
 If you would like to review your changes and submit them later, click Download edited file.