How to Extract .gzip Files
How to Extract .gzip Files on Windows PC
Locate the .gzip File
- Find where the .gzip file is saved on your Windows PC. Usually, it's in the Downloads folder.
Using a Program like 7-Zip
- Download 7-Zip
- Visit 7-Zip.org and download the 7-Zip installer. This platform is free and works well for handling .gzip files.
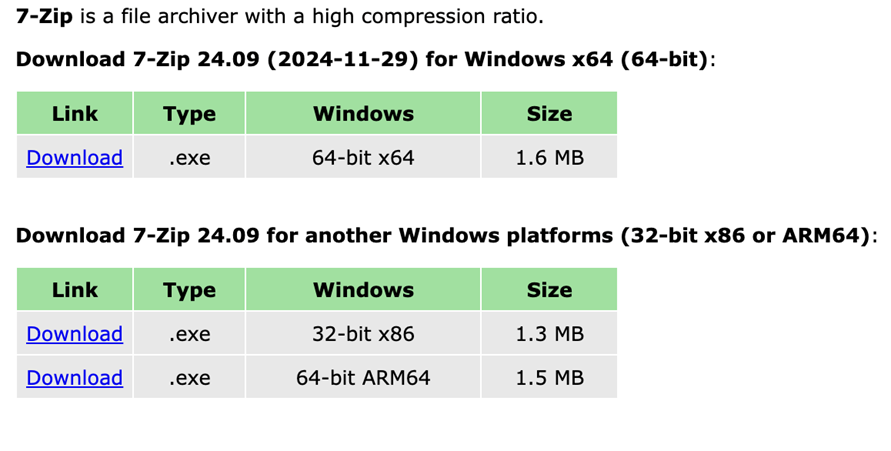
- Click the Download link for your version of windows. If you’re not sure whether you’re using 64-bit or 32-bit, check the Settings (Start -> Settings -> System -> About -> System type).
- Visit 7-Zip.org and download the 7-Zip installer. This platform is free and works well for handling .gzip files.
- Install 7-Zip
- Once downloaded, double-click the 7-Zip setup file.
- Click Yes when prompted and follow the on-screen instructions to install.
- Right-click on the .gzip file
- Once 7-Zip is installed, go to the .gzip file in your folder, right-click on it.
- From the context menu, choose 7-Zip > Extract Here to extract the contents in the same folder.If you prefer to extract the files into a different folder, you can choose Extract to “yourfile\”.
- Open the extracted file.
- You’ll see the extracted files in the same folder or the destination folder you selected.
How to Extract a .gzip files on Mac
Locate the .gzip File
- First, find where the .gzip file is saved on your Mac. It could be in your Downloads folder or another folder where you saved it.
Using Finder (Built-in Tool)
- Double-click the .gzip file
- On a Mac, .gzip files can typically be opened directly in Finder (the built-in file explorer). If you double-click it, macOS will automatically uncompress it.
- Once extracted, you will see the file (.csv) appear in the same folder.
- Open the extracted file.
- You’ll see the extracted files in the same folder or the destination folder you selected.