Export and Update Lag Time for DSV Items in Bulk
This functionality is only available to internal Walmart teams and select approved DSV suppliers only. If you don't see the Lag Time tile and would like to update DSV item-level lag times, please file a ticket within Supplier One.
Lag Time for DSV Items is not applicable to Canada suppliers.
Maintenance is not yet supported in Supplier One for: Assortments, Import Shippers (General Merchandise), Pharmacy, and Fees. Please continue using your current processes (e.g., legacy workflows or systems).
Read more about Fulfillment Lag Time. Select users can export a spreadsheet in the Maintenance Hub to update lag time for items in their facilities.
Which Facilities and Attributes Can You Download in this Export?
Facilities |
|
Attributes |
|
Create and Export Your Spreadsheet
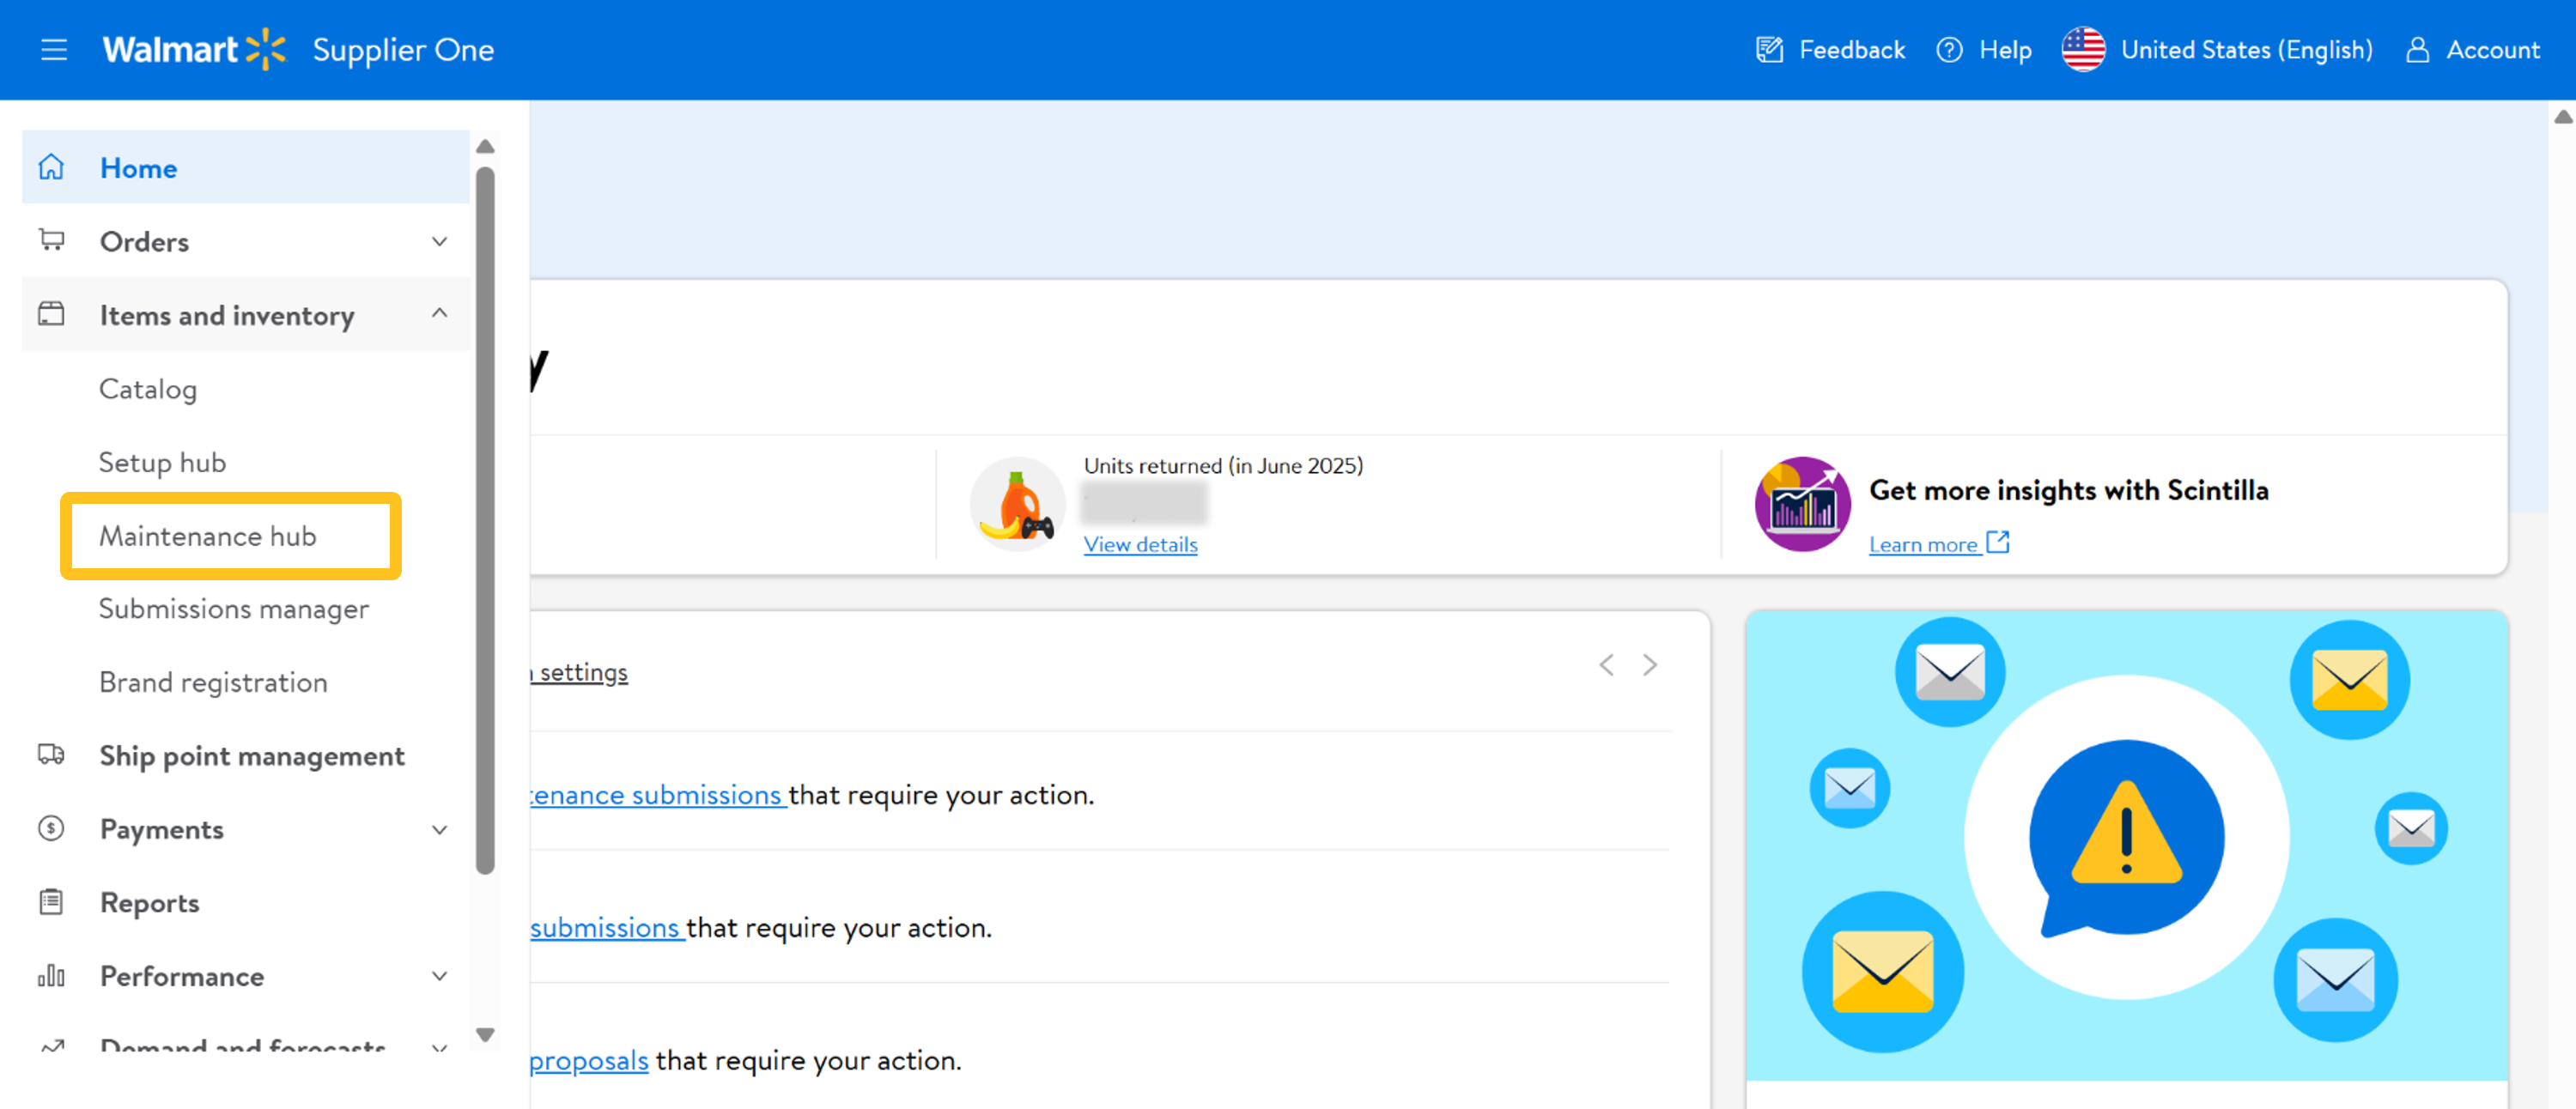
- In the left navigation menu, click Items and Inventory and select Maintenance Hub.
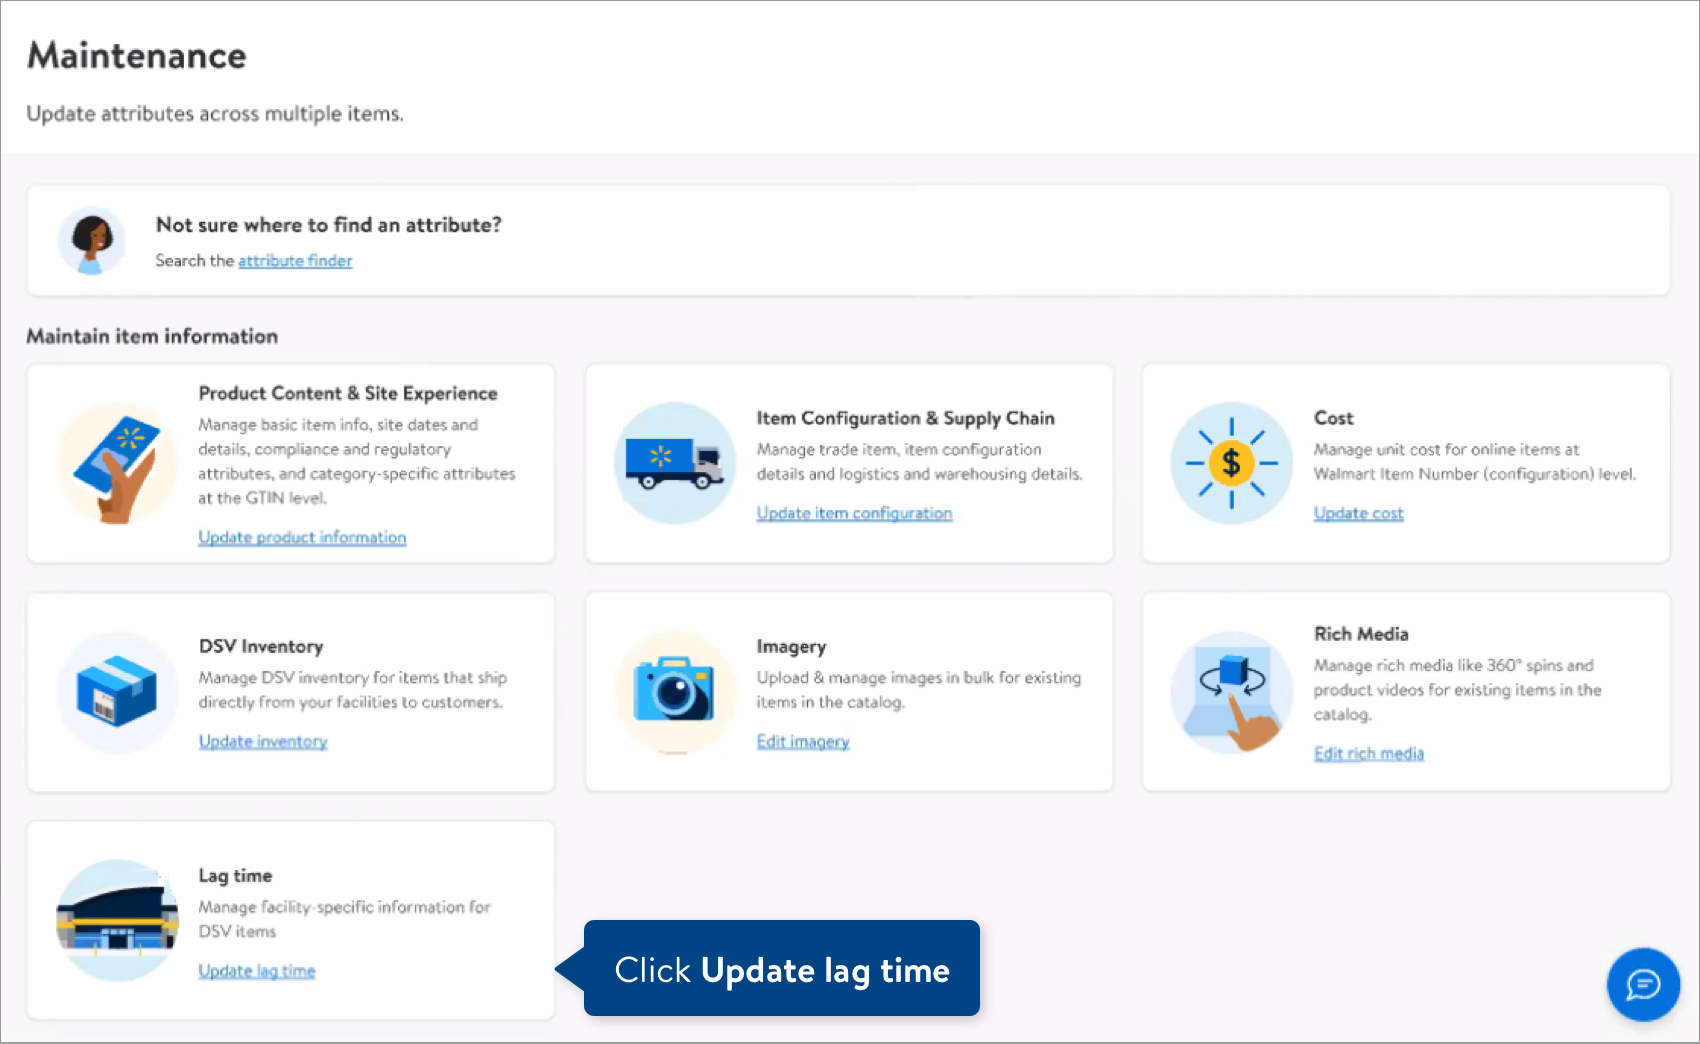
- On the Lag time tile, click Update lag time.
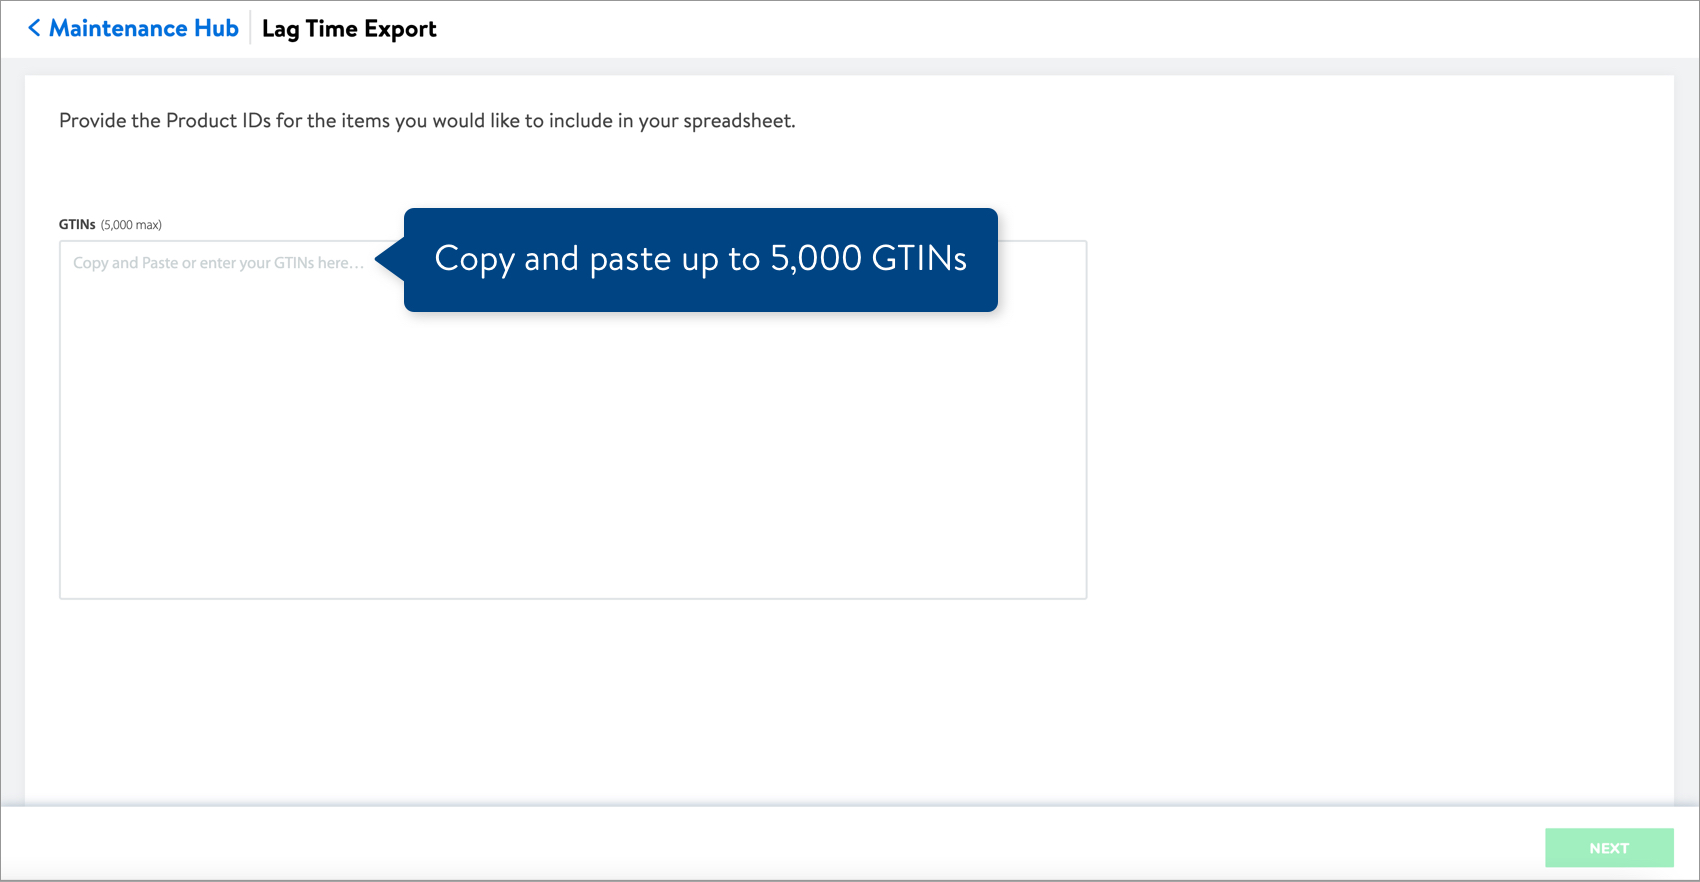
- Copy and paste up to 5,000 GTINs for the items that you are updating. Then, click the Next button.The primary identifier for DSV maintenance is changing from SKU to GTIN. You can find your item's GTIN in the Products view of the catalog.
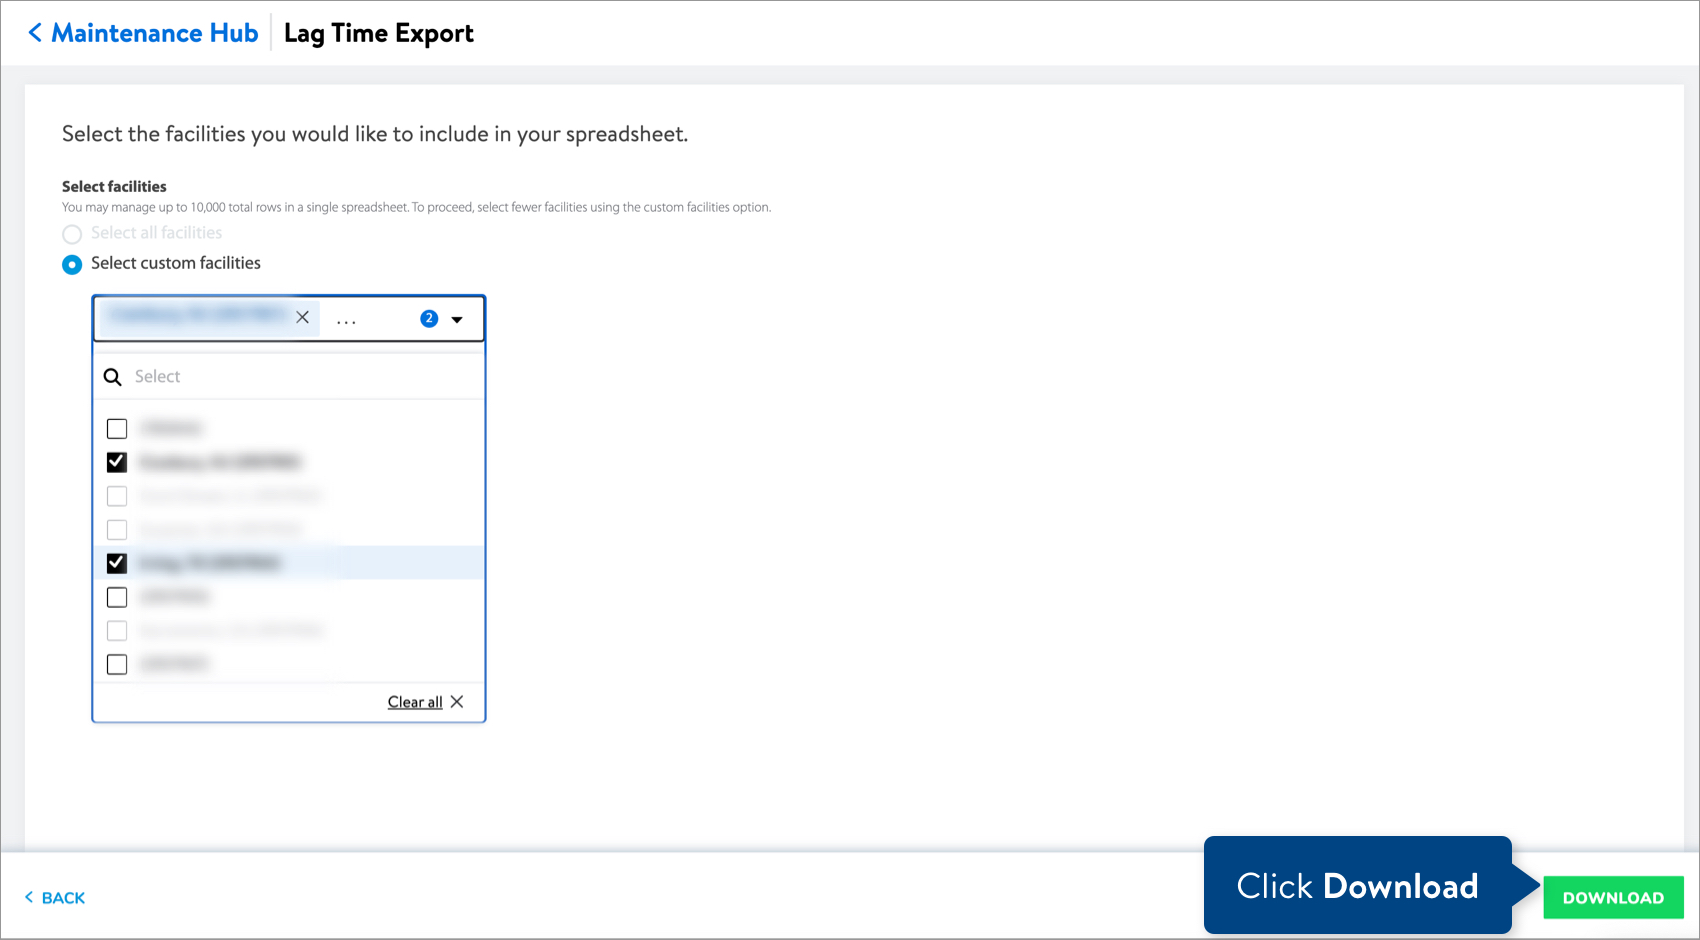
- You can either: Select all facilities or Select custom facilities.
 To select custom facilities, open the drop-down menu and select the DSV facilities.
 You may manage up to 10,000 total rows in a single spreadsheet. If you have selected facilities that will exceed 10,000 rows, try selecting fewer facilities.
 - Click the Download button.
Complete and Submit Your Spreadsheet
- Open the spreadsheet and fill in the new values for the attributes. Refer to Row 6 under the attribute names for definitions and data requirements.
 By default, your spreadsheet will be named with the date and time it is created. Remember to save your spreadsheet in Excel Workbook, or .xlsx, format when you're done.
 - To submit your file in Supplier One:
- Click the Upload button in the top navigation menu.
- Drag and drop your file into the upload window, or click Choose file to select the files.
- Upfront validations will check for common errors. If any are found, click the Download error file button to fix the errors before trying your upload again.
- If no common errors are found, click the Continue button.
- Provide a submission description.
- Click Submit.

Track Your Changes
Read Track Your Submissions.
Have Questions or Need Help?
If you experience any issues viewing and managing your catalog, please click "Help" in the top navigation menu and select "Manage tickets" to file a case ticket. Or, select "Chat" to get real-time help from our chat bot or click "Search articles" to search Supplier One HelpDocs.
Make sure to select the issue type Items and Inventory.
For detailed instructions, refer to Manage Case Tickets.