Team Management - Supplier One
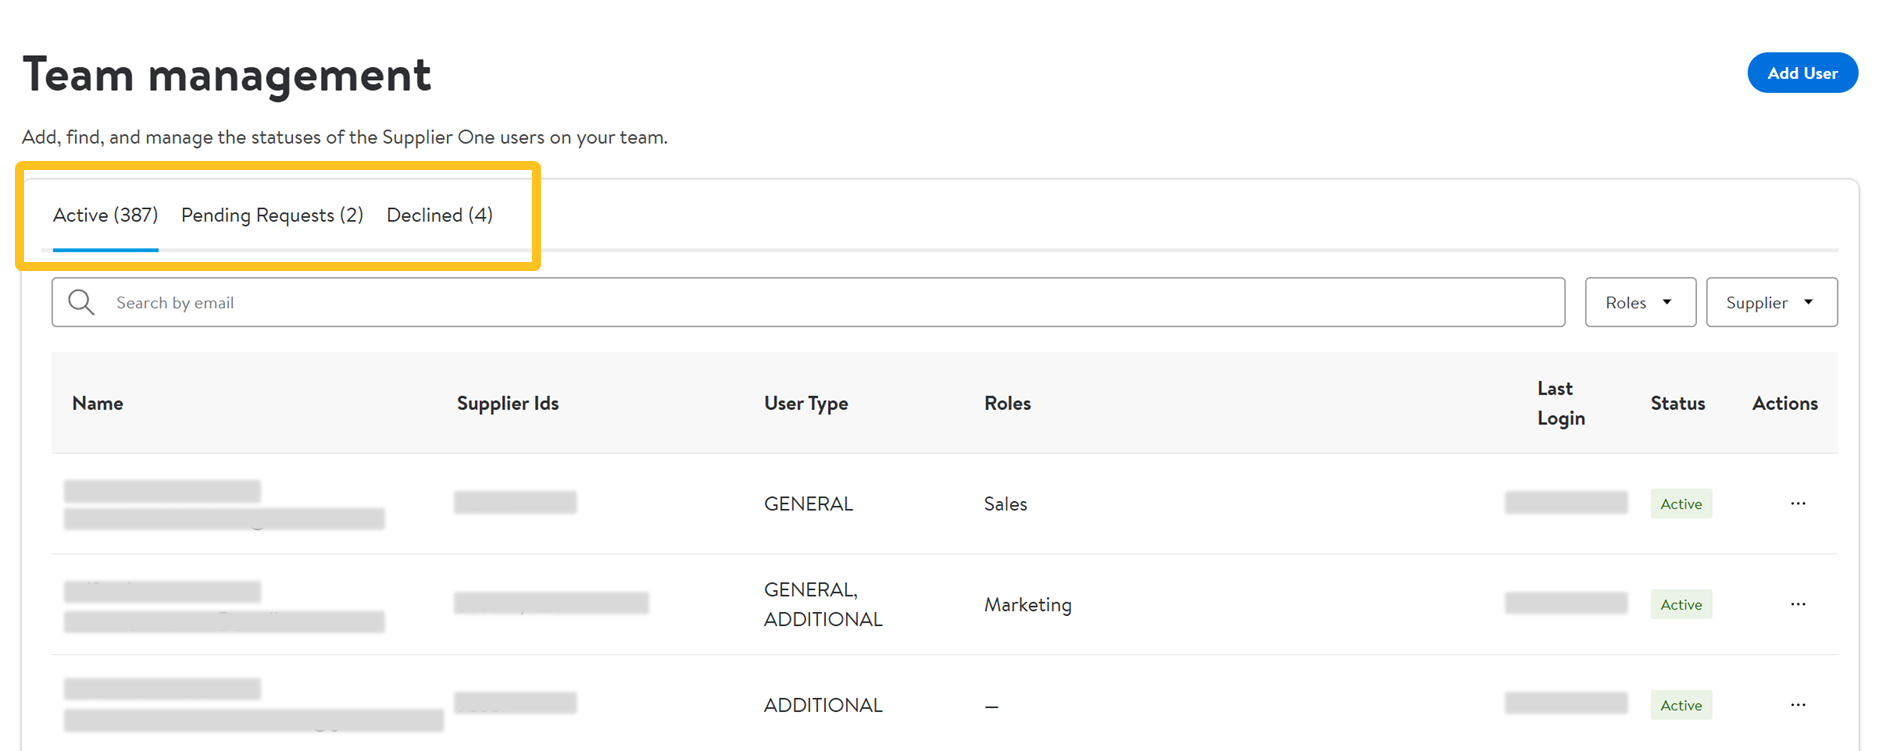
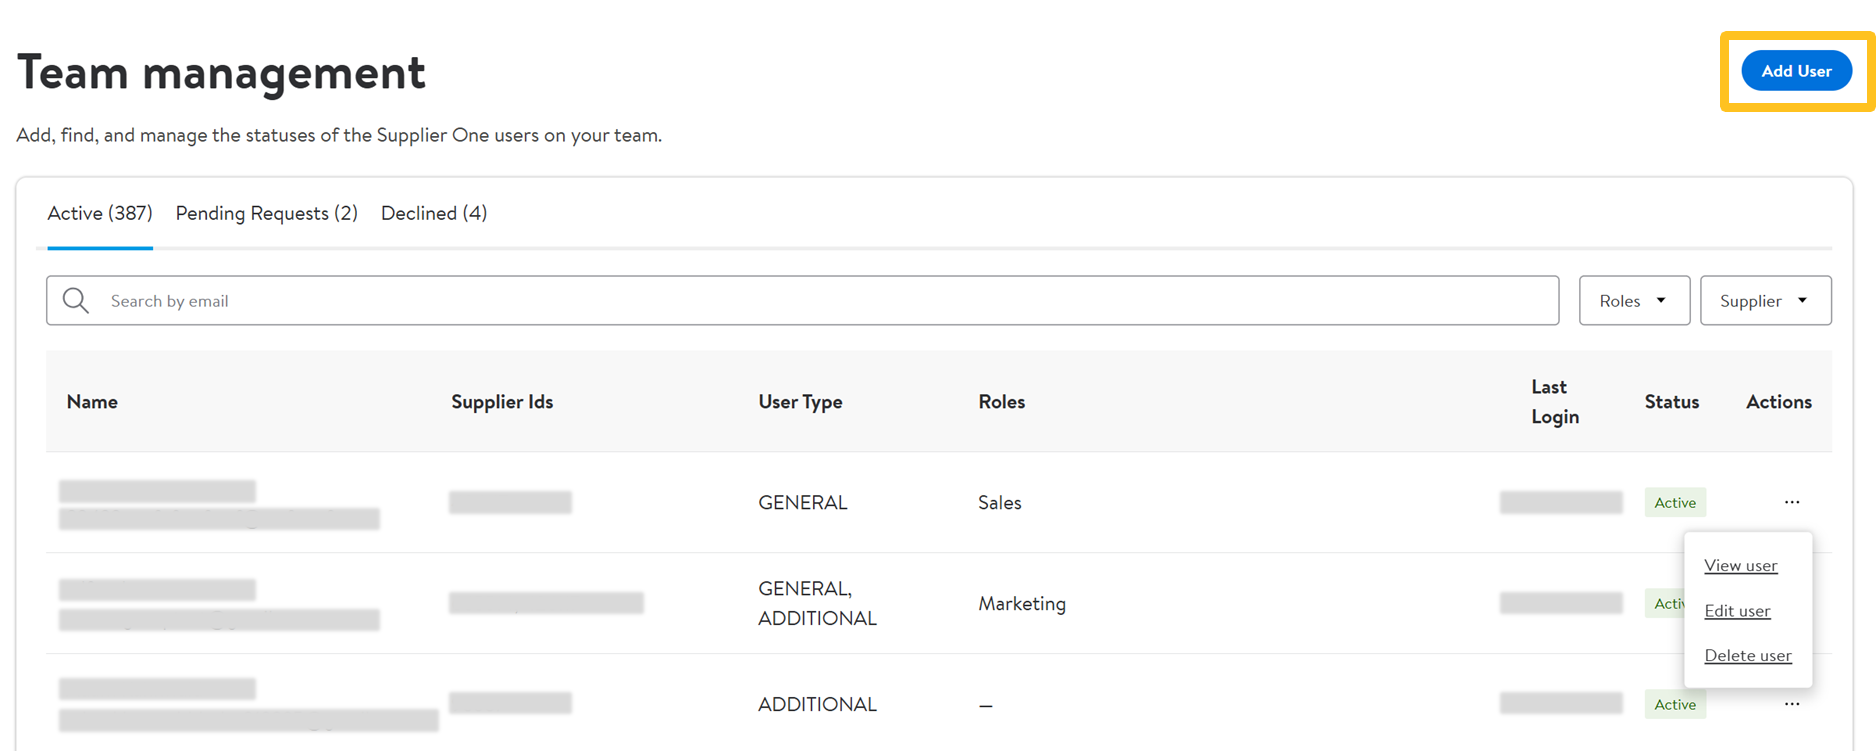
You can access user management from Supplier One by clicking Account at the top right corner and selecting Team management or Supplier Profile > My Team tile. In Team management, admins can view Active users, Pending requests and Declined requests.
Refer to this article if you have questions about Vendor Access Review.
The Supplier One Team Management page allows Account Administrators to view their organization’s users (i.e., users within the 6-digit accounts the Administrator has access to).
There are three possible user statuses:
- Active: Accounts (users) that are currently active and have access to the designated systems (Retail Link, Supplier One, etc.).
- Pending Requests: The accounts (users) that need approval from the Account Administrator or the Retail Link Help Desk team.
- Declined: The users that have been declined by the Help Desk team.
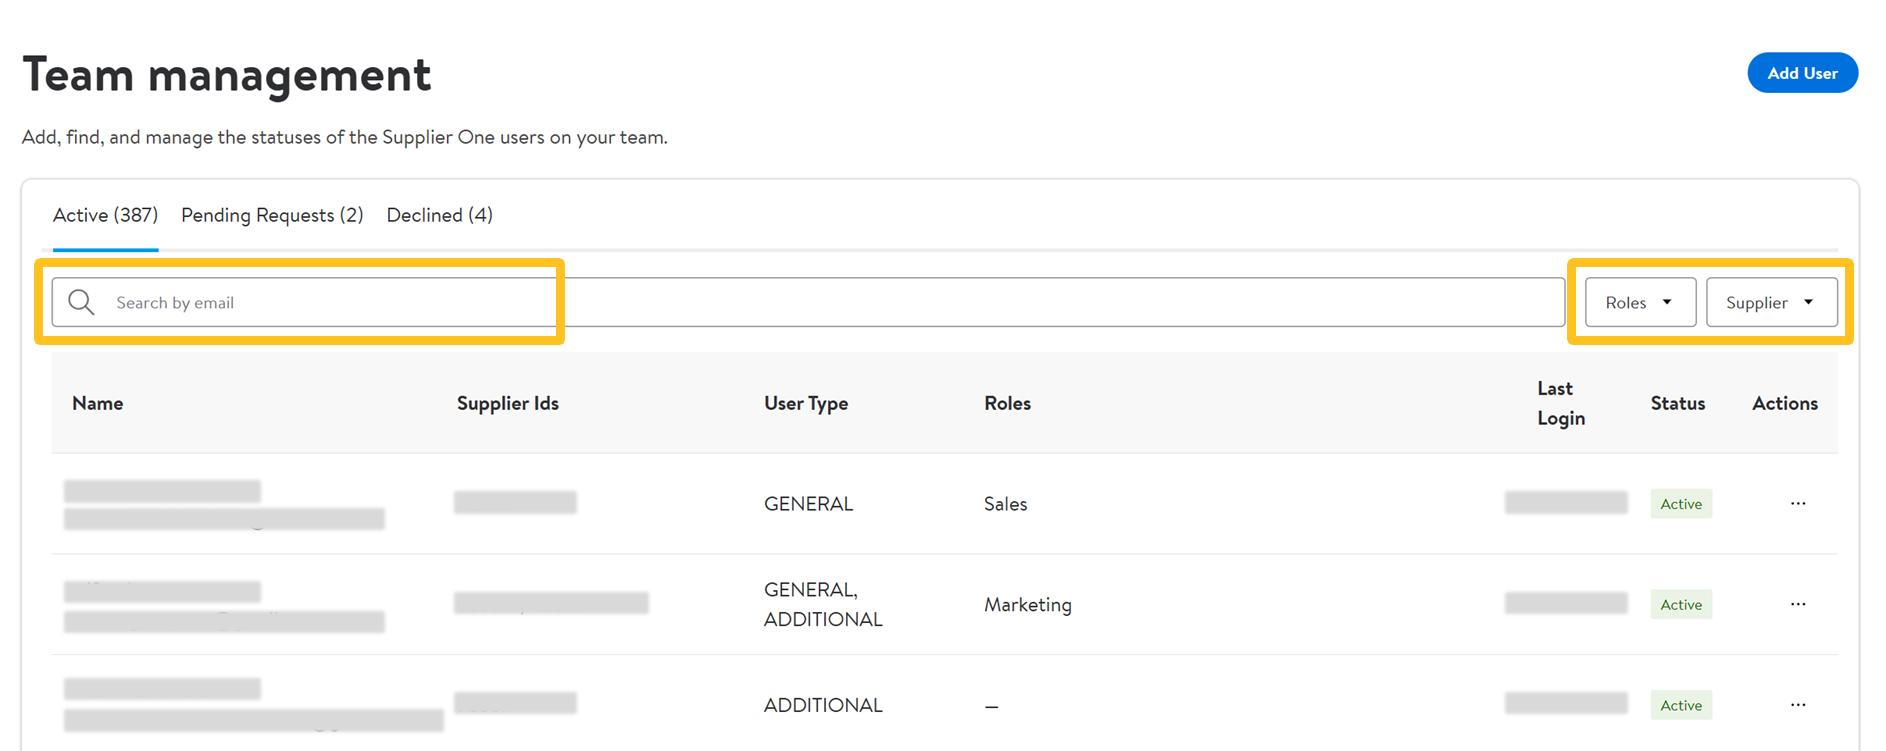
To search and filter users, you can search by email address, filter by clicking Roles and filter by Supplier ID.
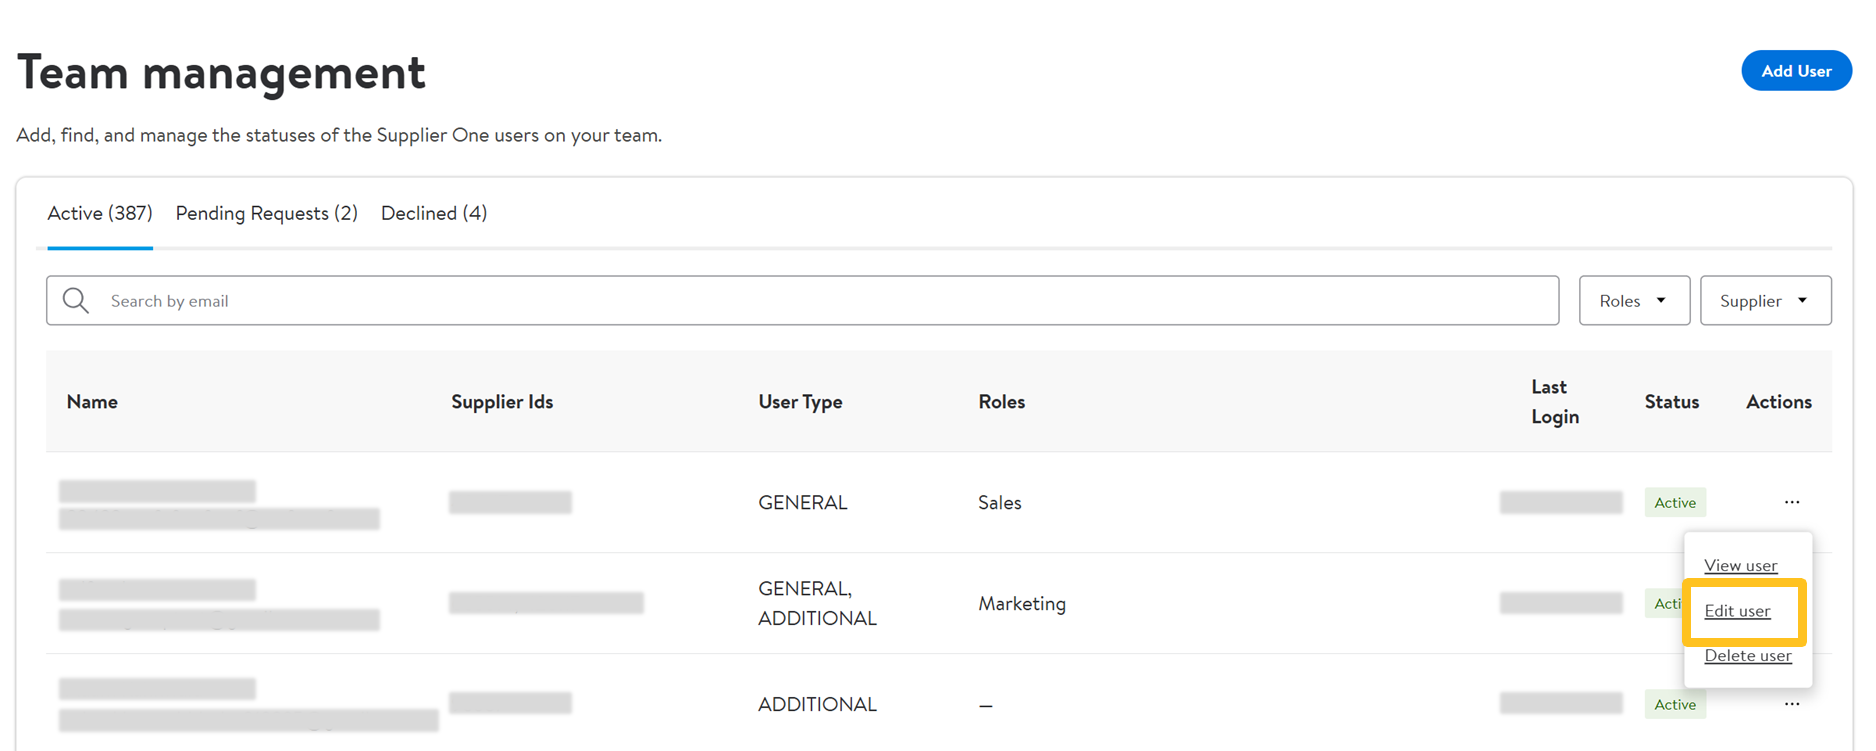
To view or change a user’s access or details, click the dots under Actions.
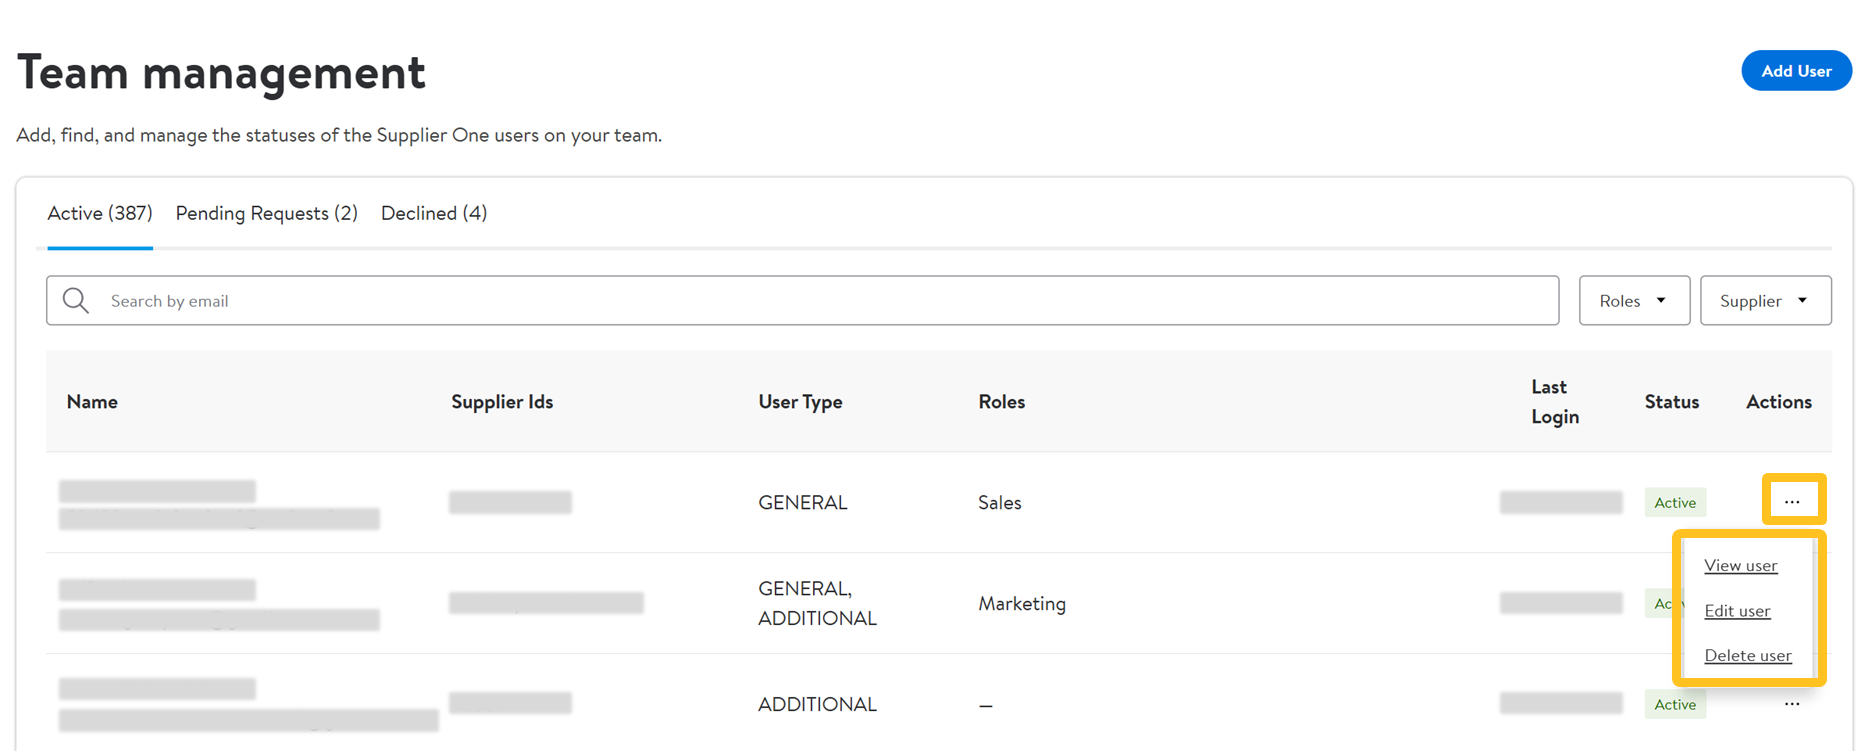
There are three options for each existing user:
- View User: View the profile of the user selected.
- Edit User: Edit the user selected to change the phone number, supplier number, and add or delete additional access.
- Delete User: This will remove the user from the company.If a user has access to a 6-digit account that the Administrator does not have access to, the Administrator cannot delete the user. The Administrator will only be able to remove the user's access to the 6-digit accounts that they manage.
Add a User
- Administrators can add and manage users for their organization. To add a user, click Add User in the top right corner of the Team management page. Fill out the user’s details on the next screen.
- Select the employee type.
- Direct Employee (General or Additional): The user being added is a direct employee of the company.
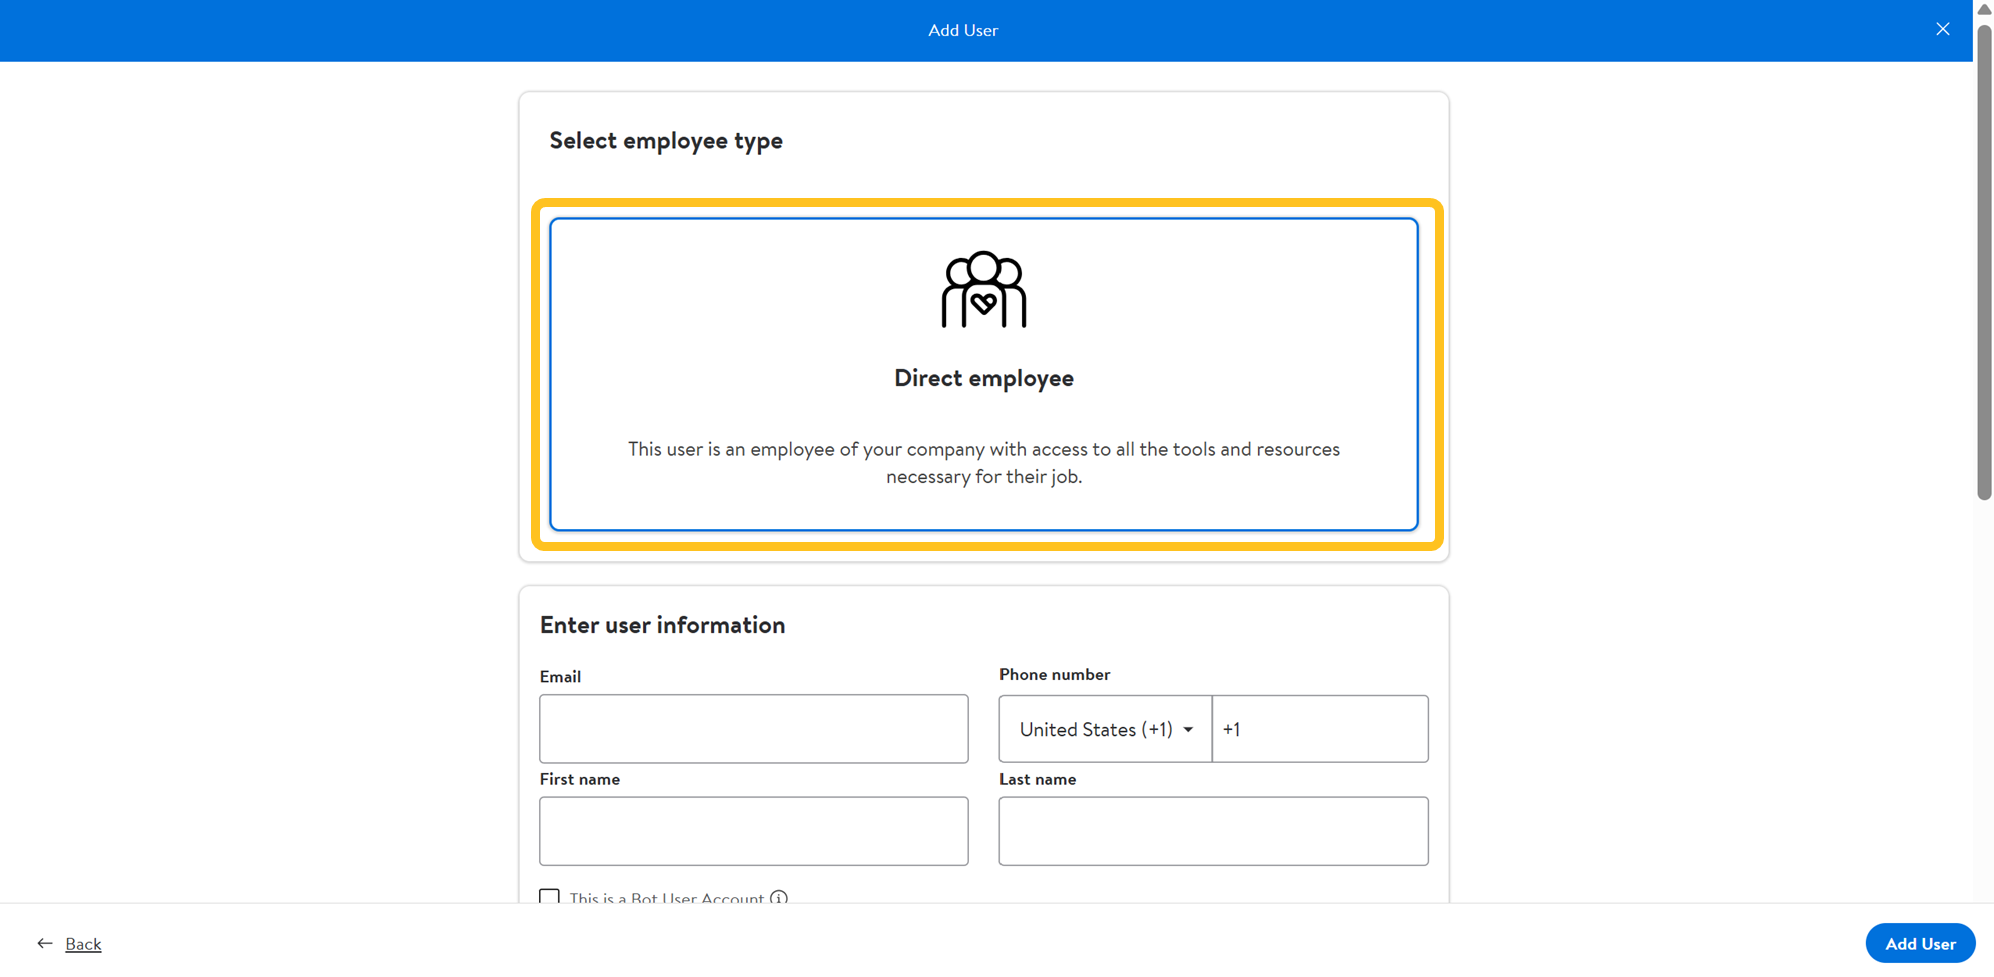
- Provide the user’s details. The following information is required when adding new users:
- Email: Enter the user's email address.
- Phone Number: Enter the user’s phone number.
- First Name: Enter the user’s first name.
- Last Name: Enter the user’s last name.
If you are creating a Bot user, select This is a Bot User Account. You cannot create a Bot user from an existing user.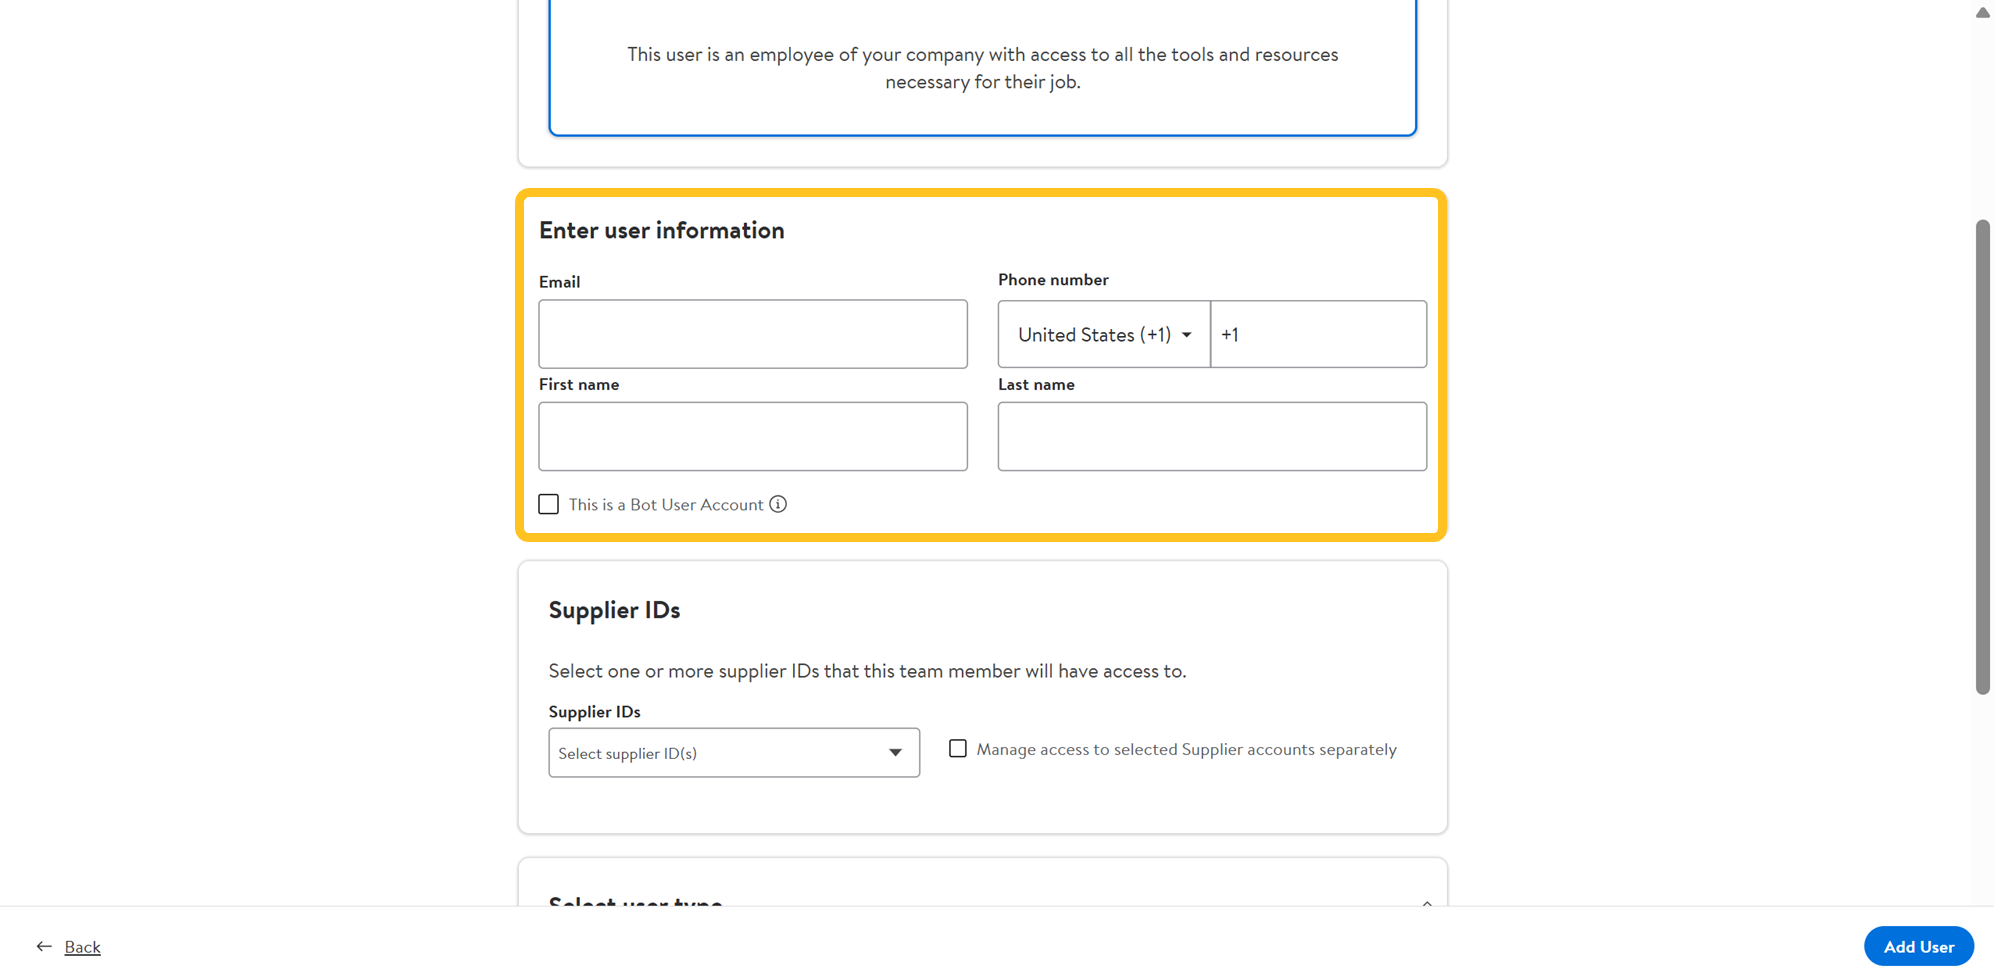
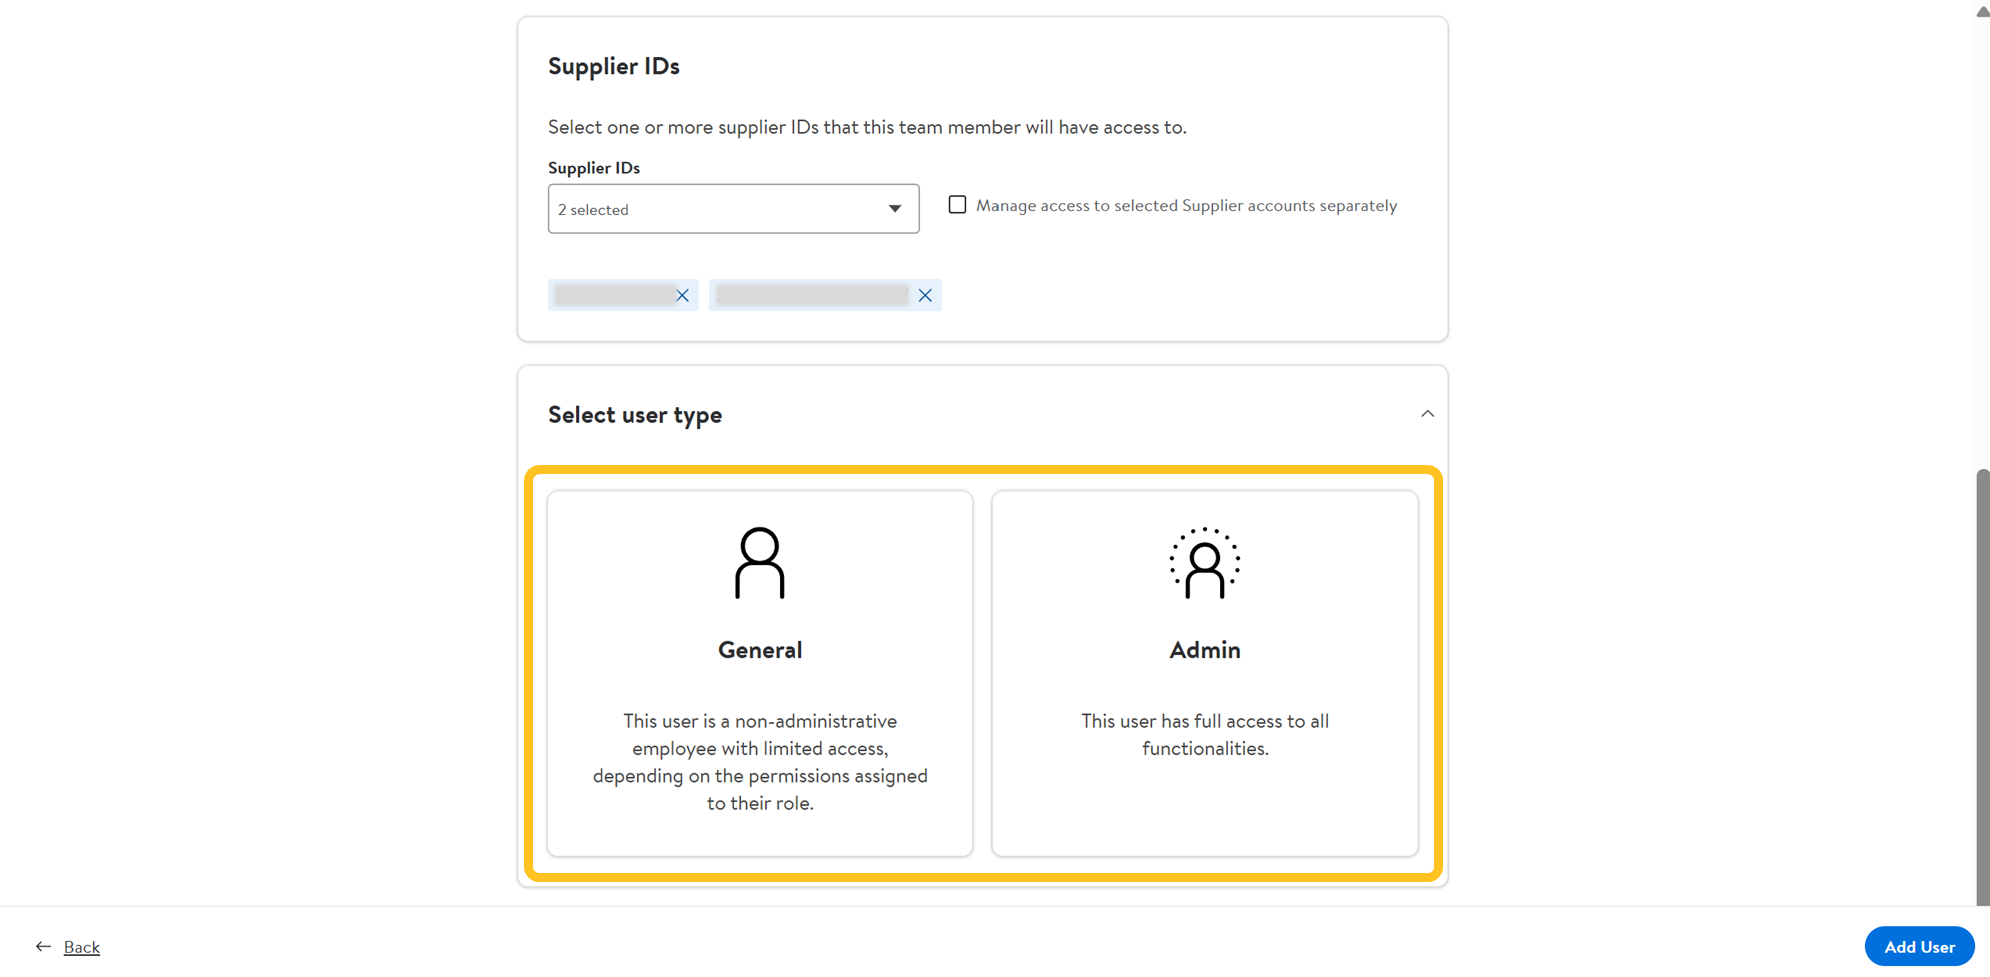
- Select applicable Supplier IDs.
- Supplier: Select the supplier number(s) of the accounts that the user will need to access (subsidiaries, sister/parent companies, etc.).
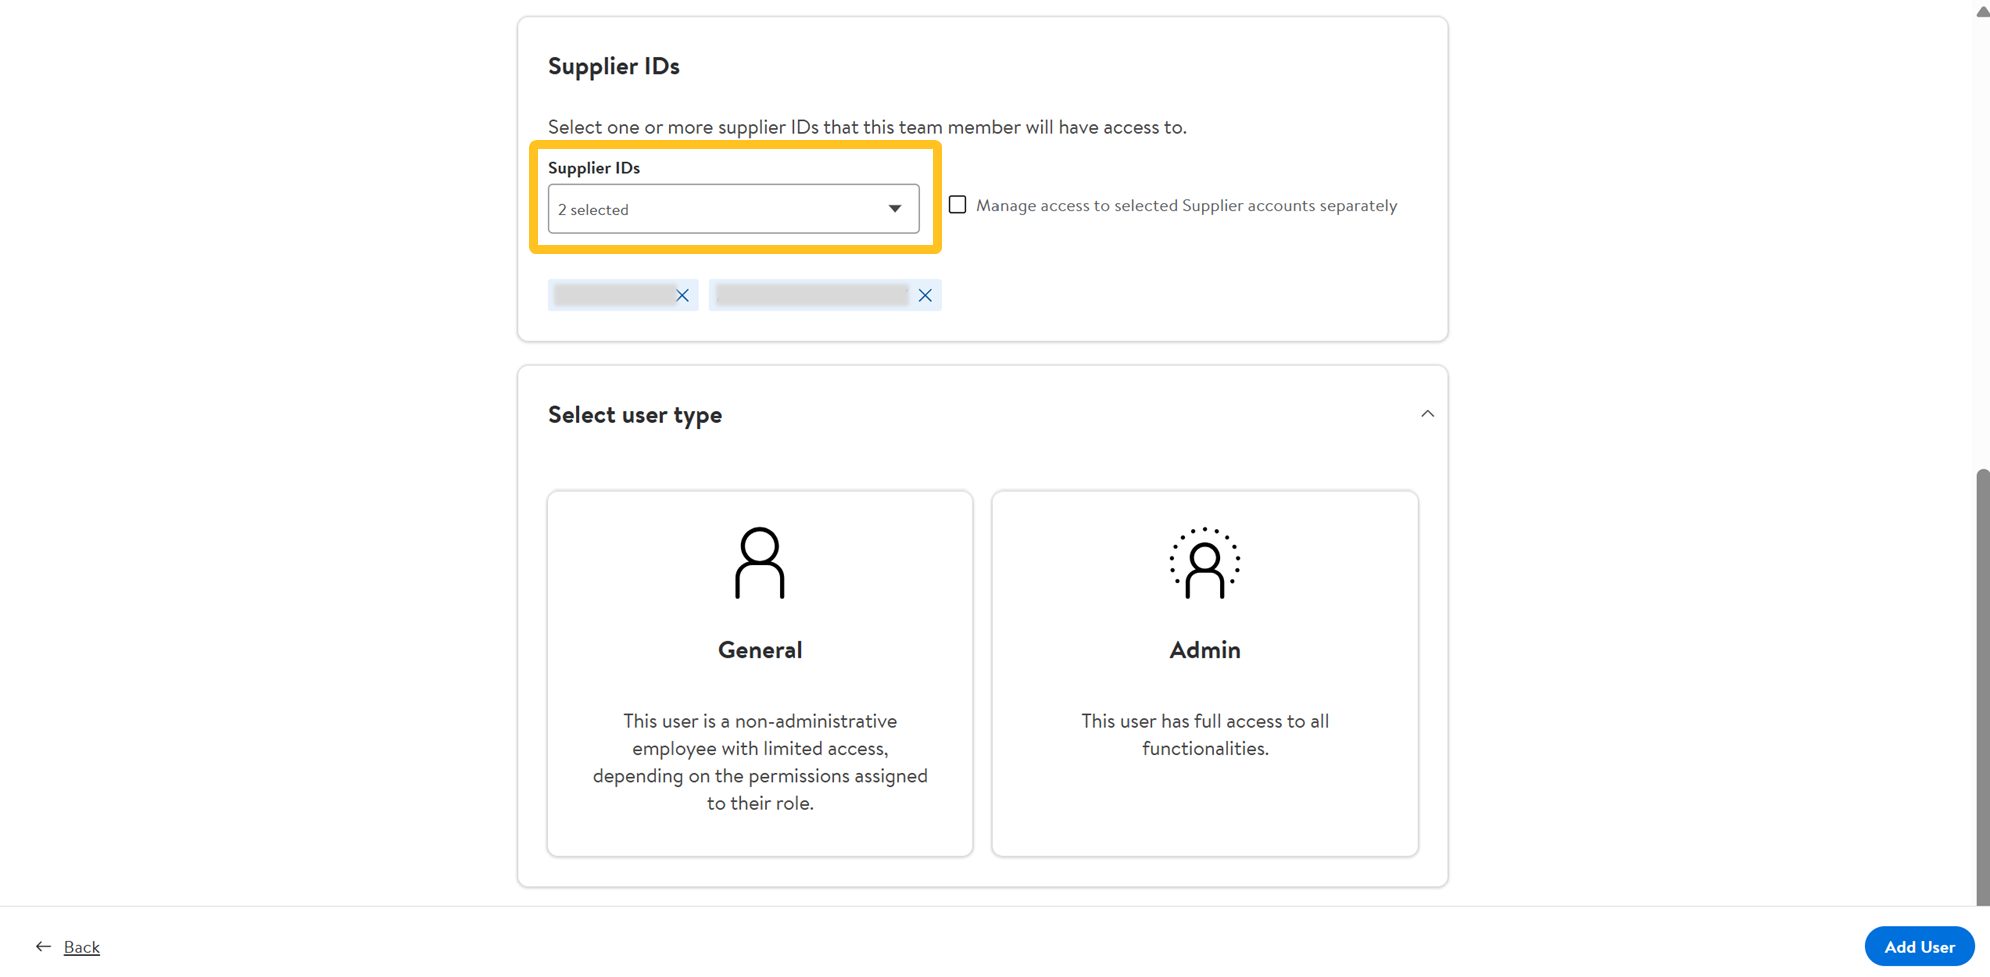
- If the user needs different access based on supplier ID, select Manage access to selected Supplier accounts separately.
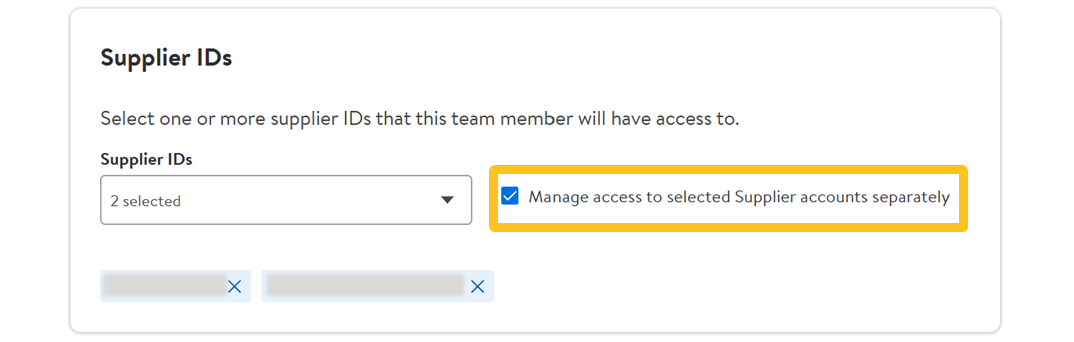
- Supplier: Select the supplier number(s) of the accounts that the user will need to access (subsidiaries, sister/parent companies, etc.).
- Select the user type (General or Admin).Bot users can only select General user type.
- To manage access by supplier accounts separately, expand each supplier ID to select the applicable user type.
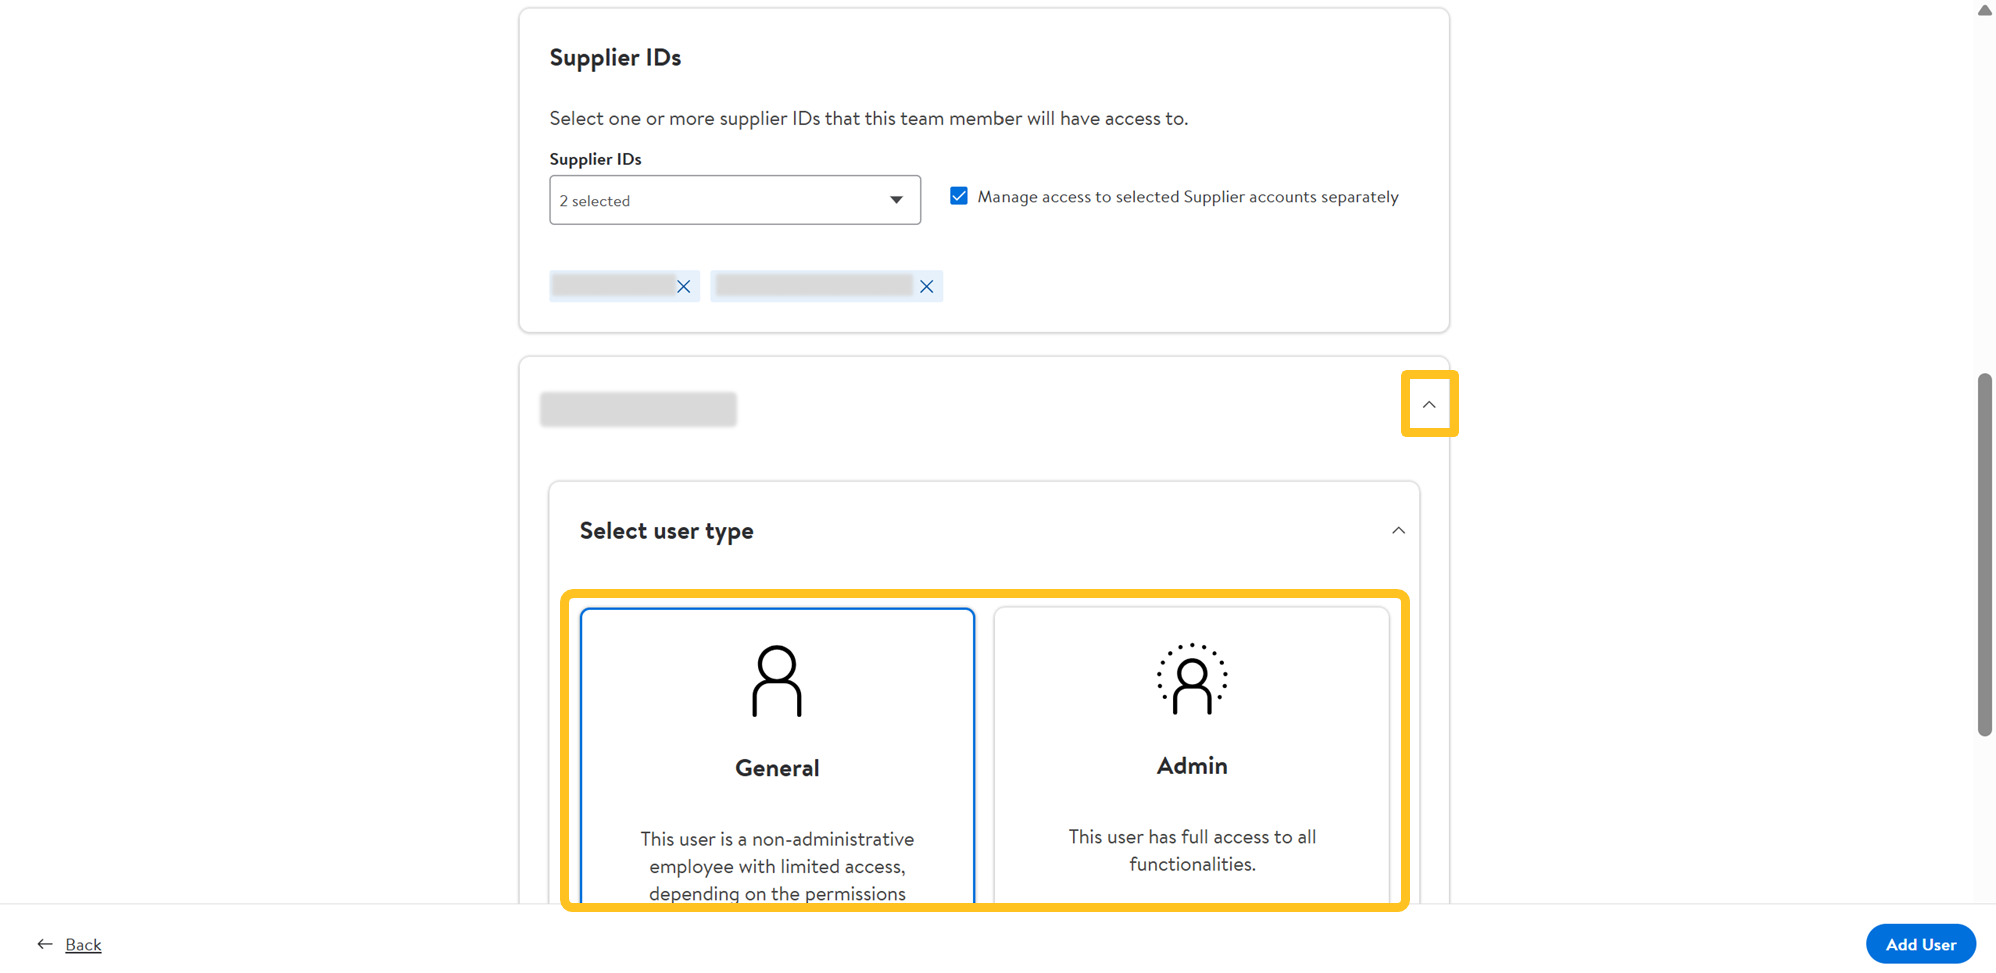
- To manage access by supplier accounts separately, expand each supplier ID to select the applicable user type.
- Select the Roles and responsibilities from the dropdown to determine the user's access level.Site admins can skip selecting roles and responsibilities. Users have the ability to make their selections.
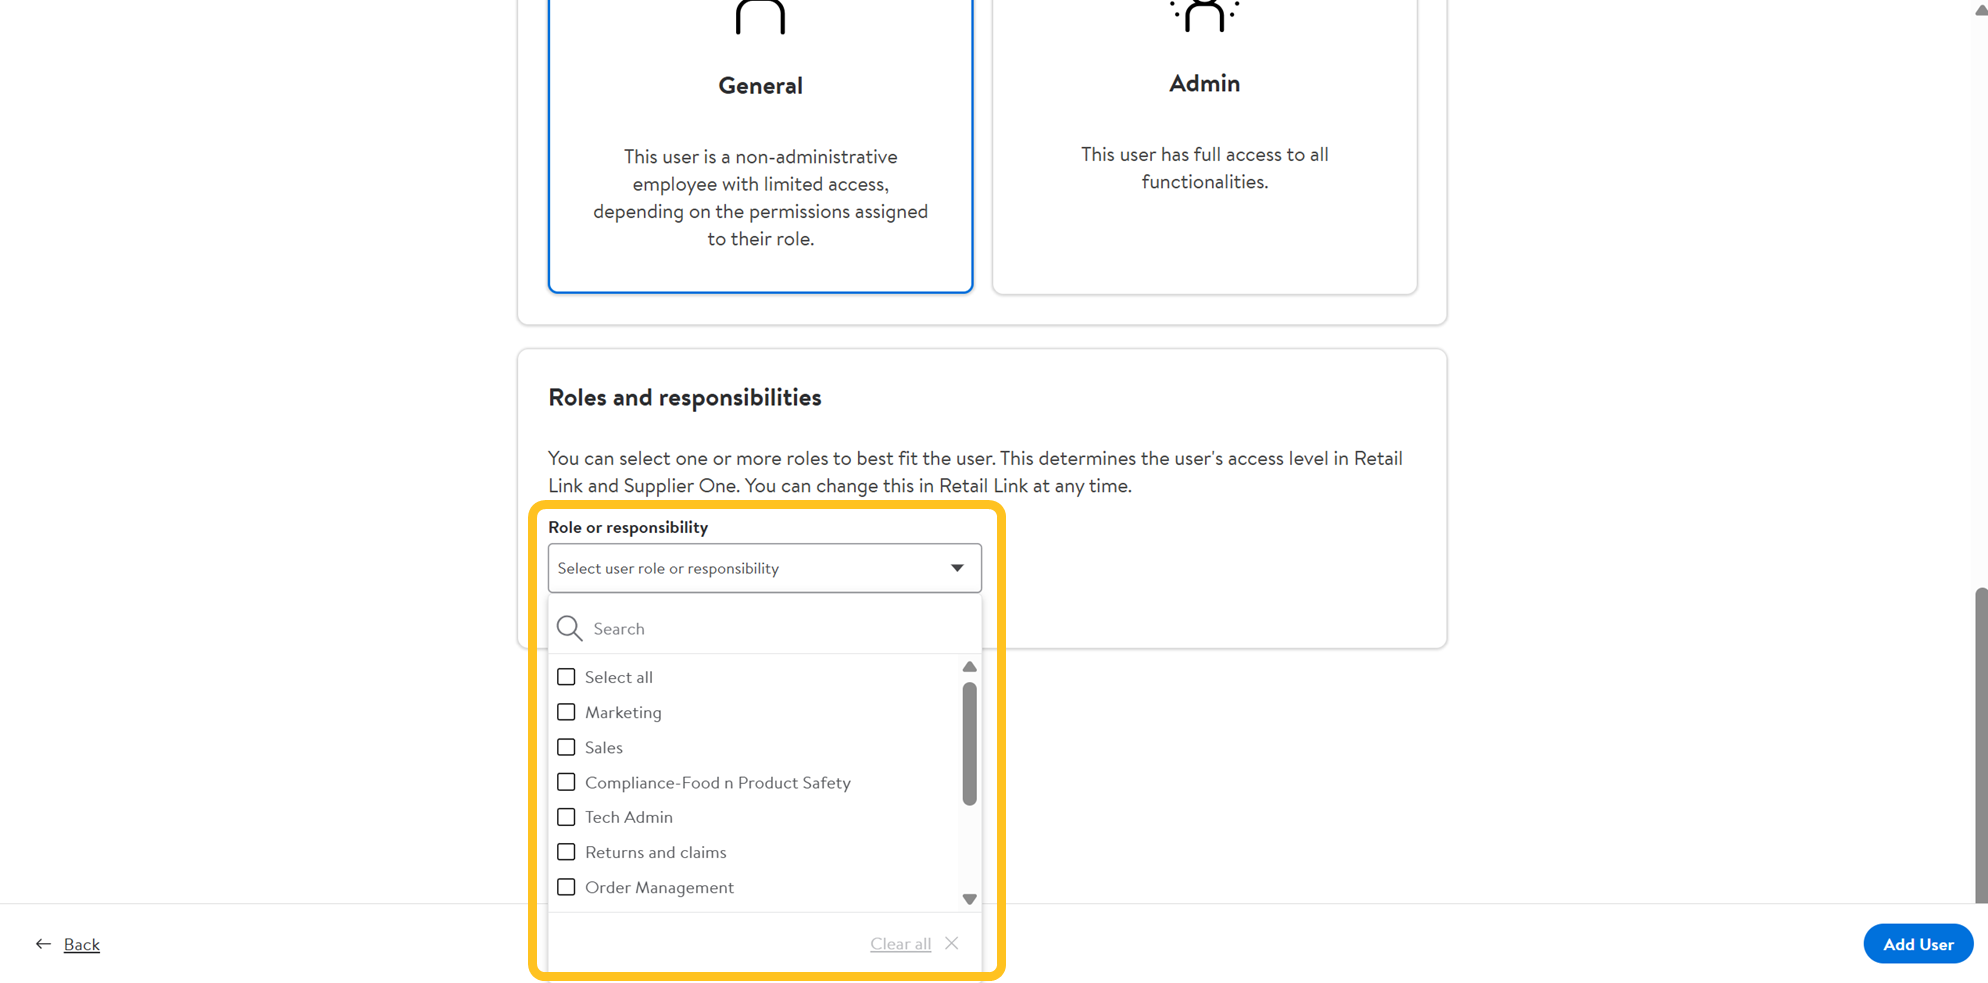
- You can view the permission level by page.
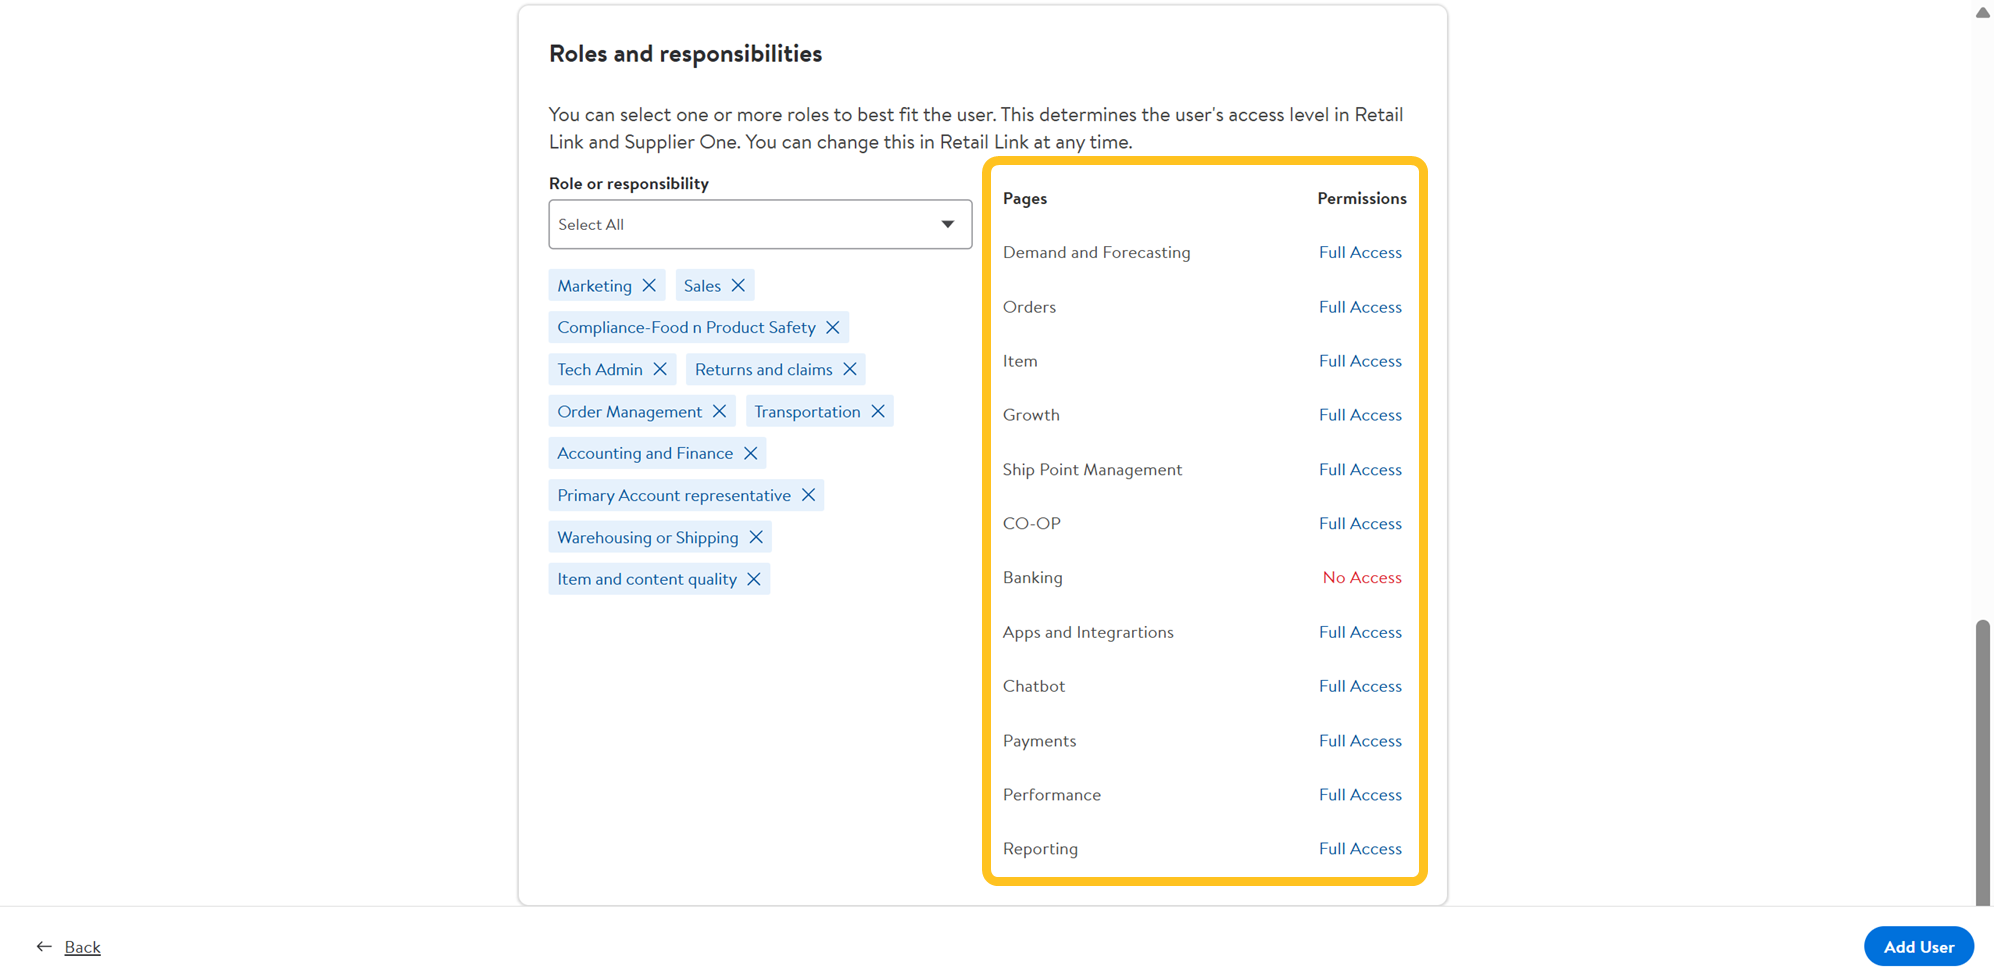
- You can view the permission level by page.
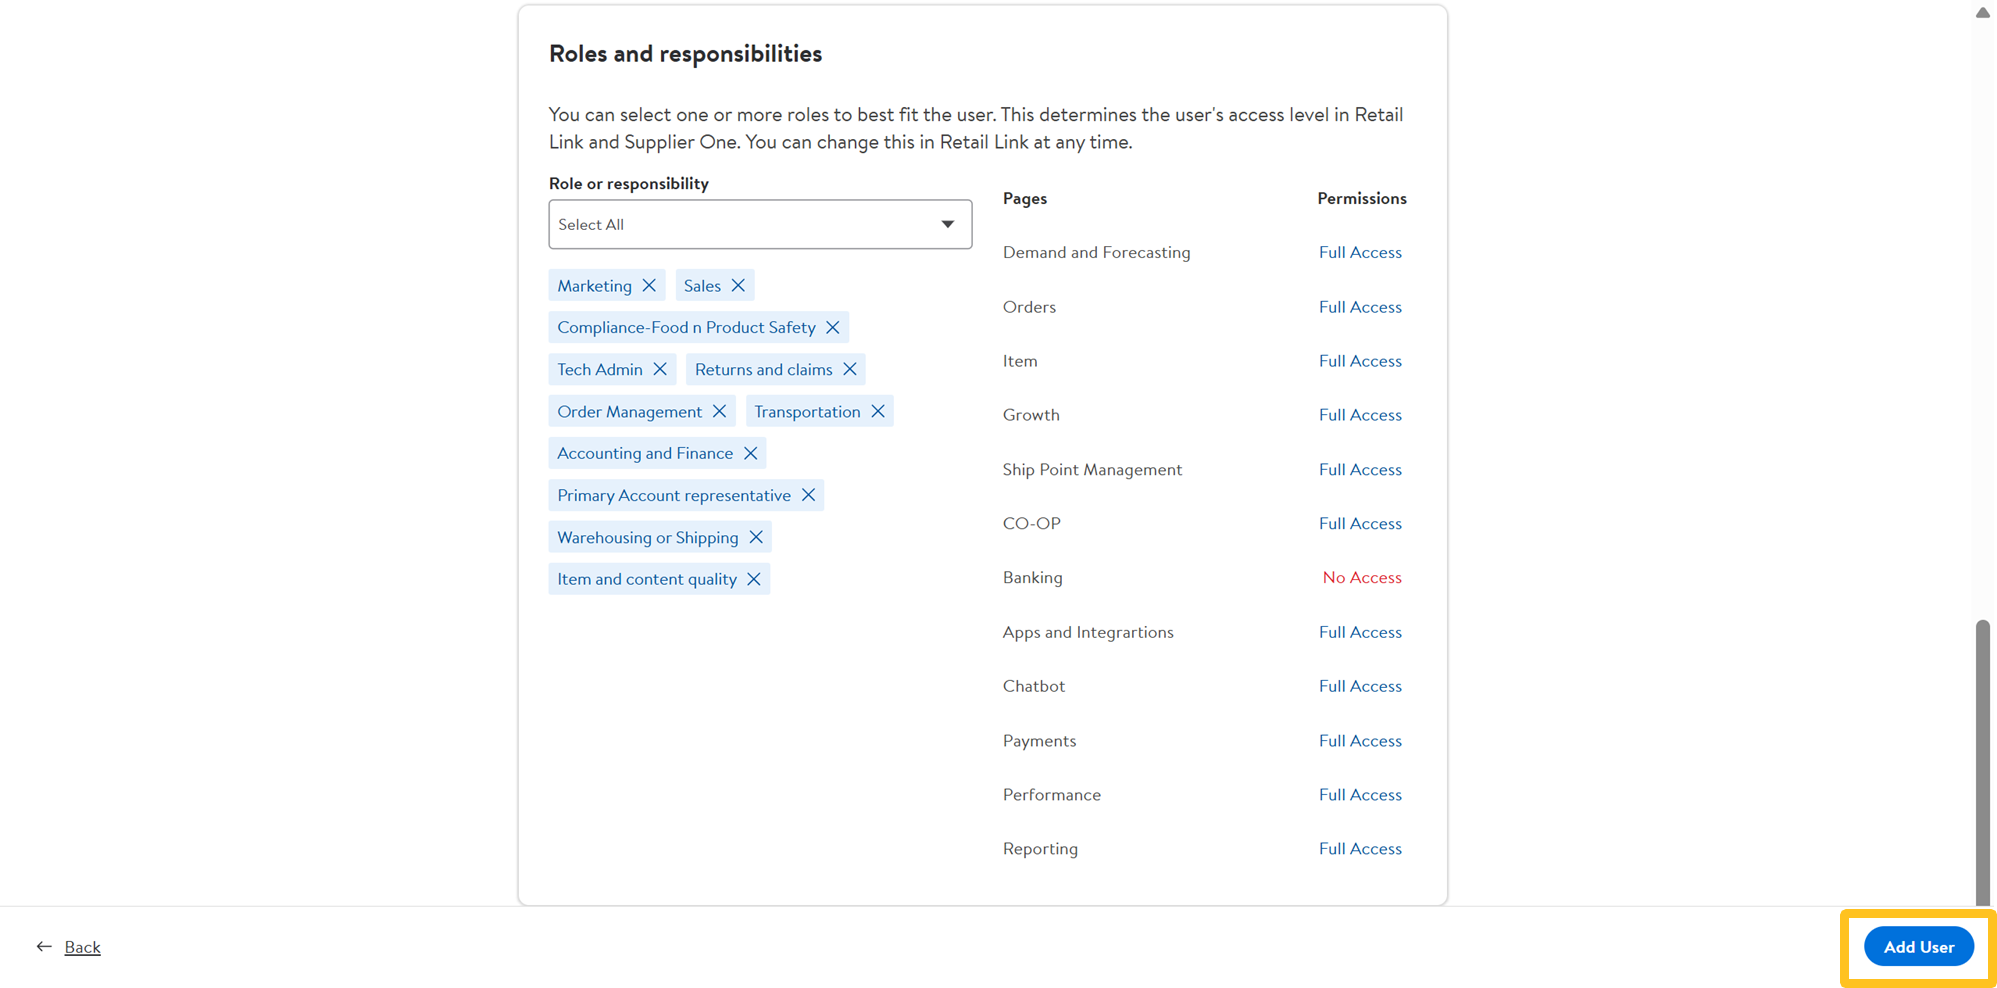
- Once the required fields are filled out, click Add User.
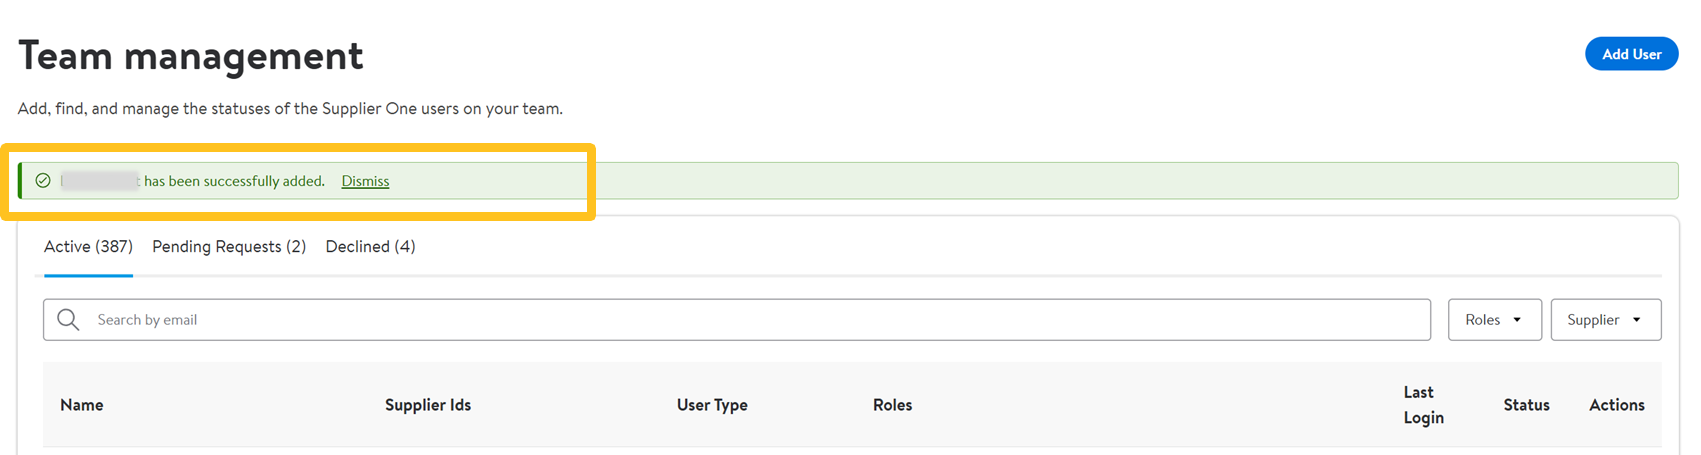
- A confirmation banner will appear on the Team Management page when a user is successfully added.
- For Bot users, you will see confirmation banner that a Bot Token has been successfully added.
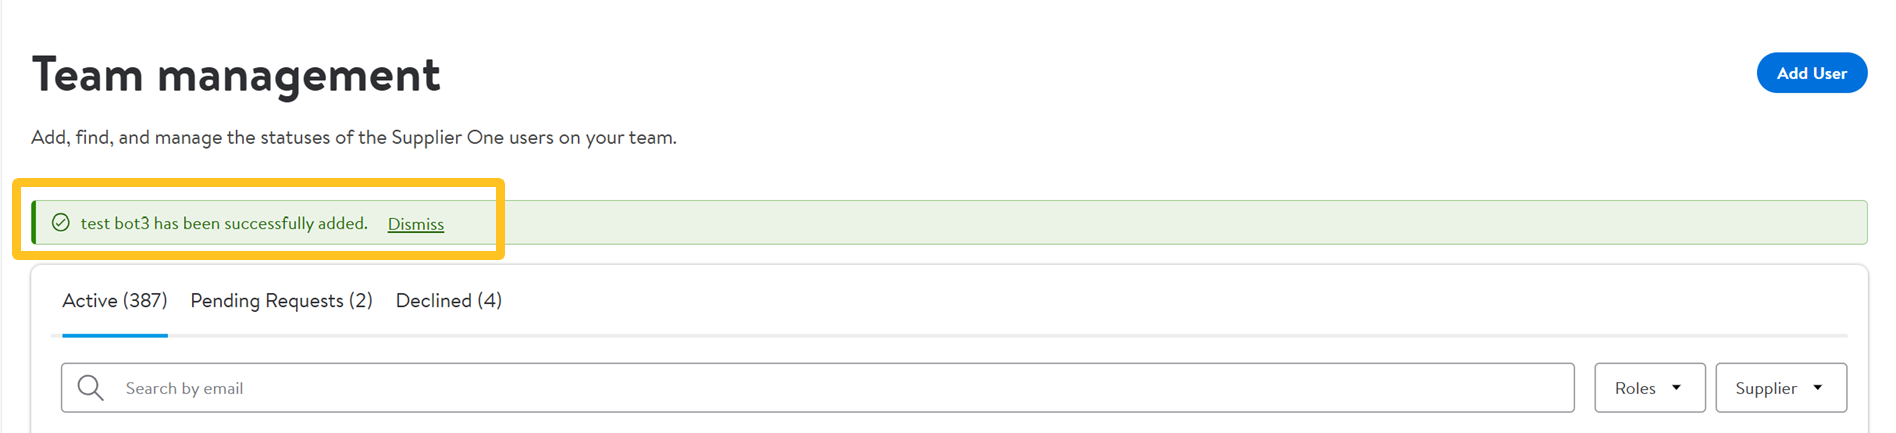
- For Bot users, you will see confirmation banner that a Bot Token has been successfully added.
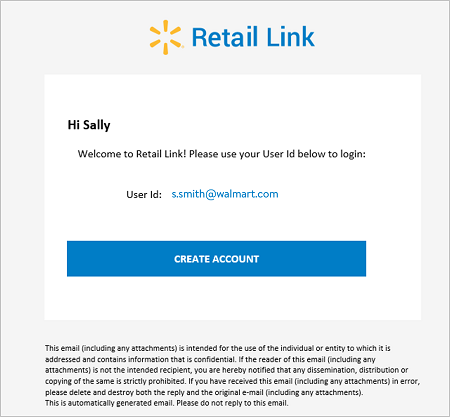
- The new user will receive a welcome email with the information to create their account. Their User ID will be the email address that was entered during the add user process. Upon receiving the welcome email, click Create Account.
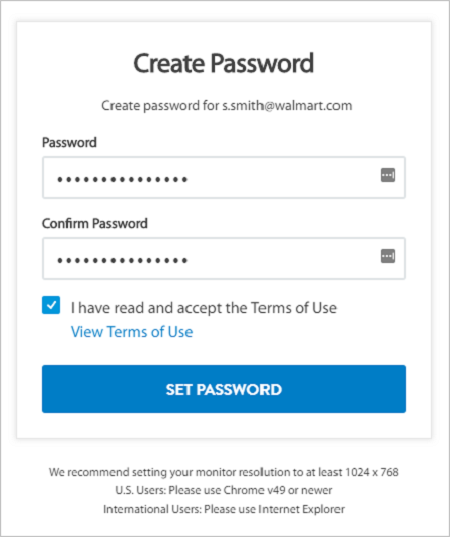
- Create a password with a minimum of eight alphanumeric characters (at least one number), re-enter the password in the next field, select the box next to “I have read and accept the Terms of Use”, and click Set Password.
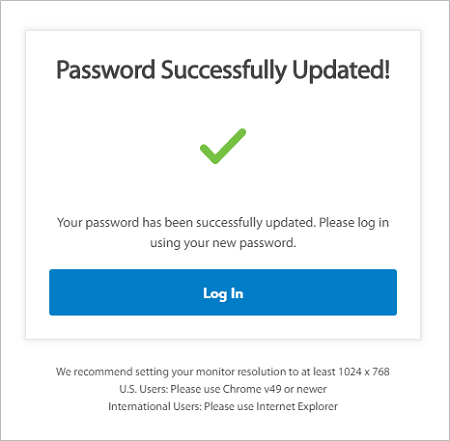
- You will receive confirmation when your password has been successfully created.
Edit a User
Make changes to existing users to update their contact information, account access, access level, permissions, etc.
- Go to the Team Management page and search for the individual by name or username (i.e., email address).
- Click the dots under Actions and select Edit User.
 You can also click on View user to open an overview of their access. To change any of these details, click Edit profile at the top right corner of the page.
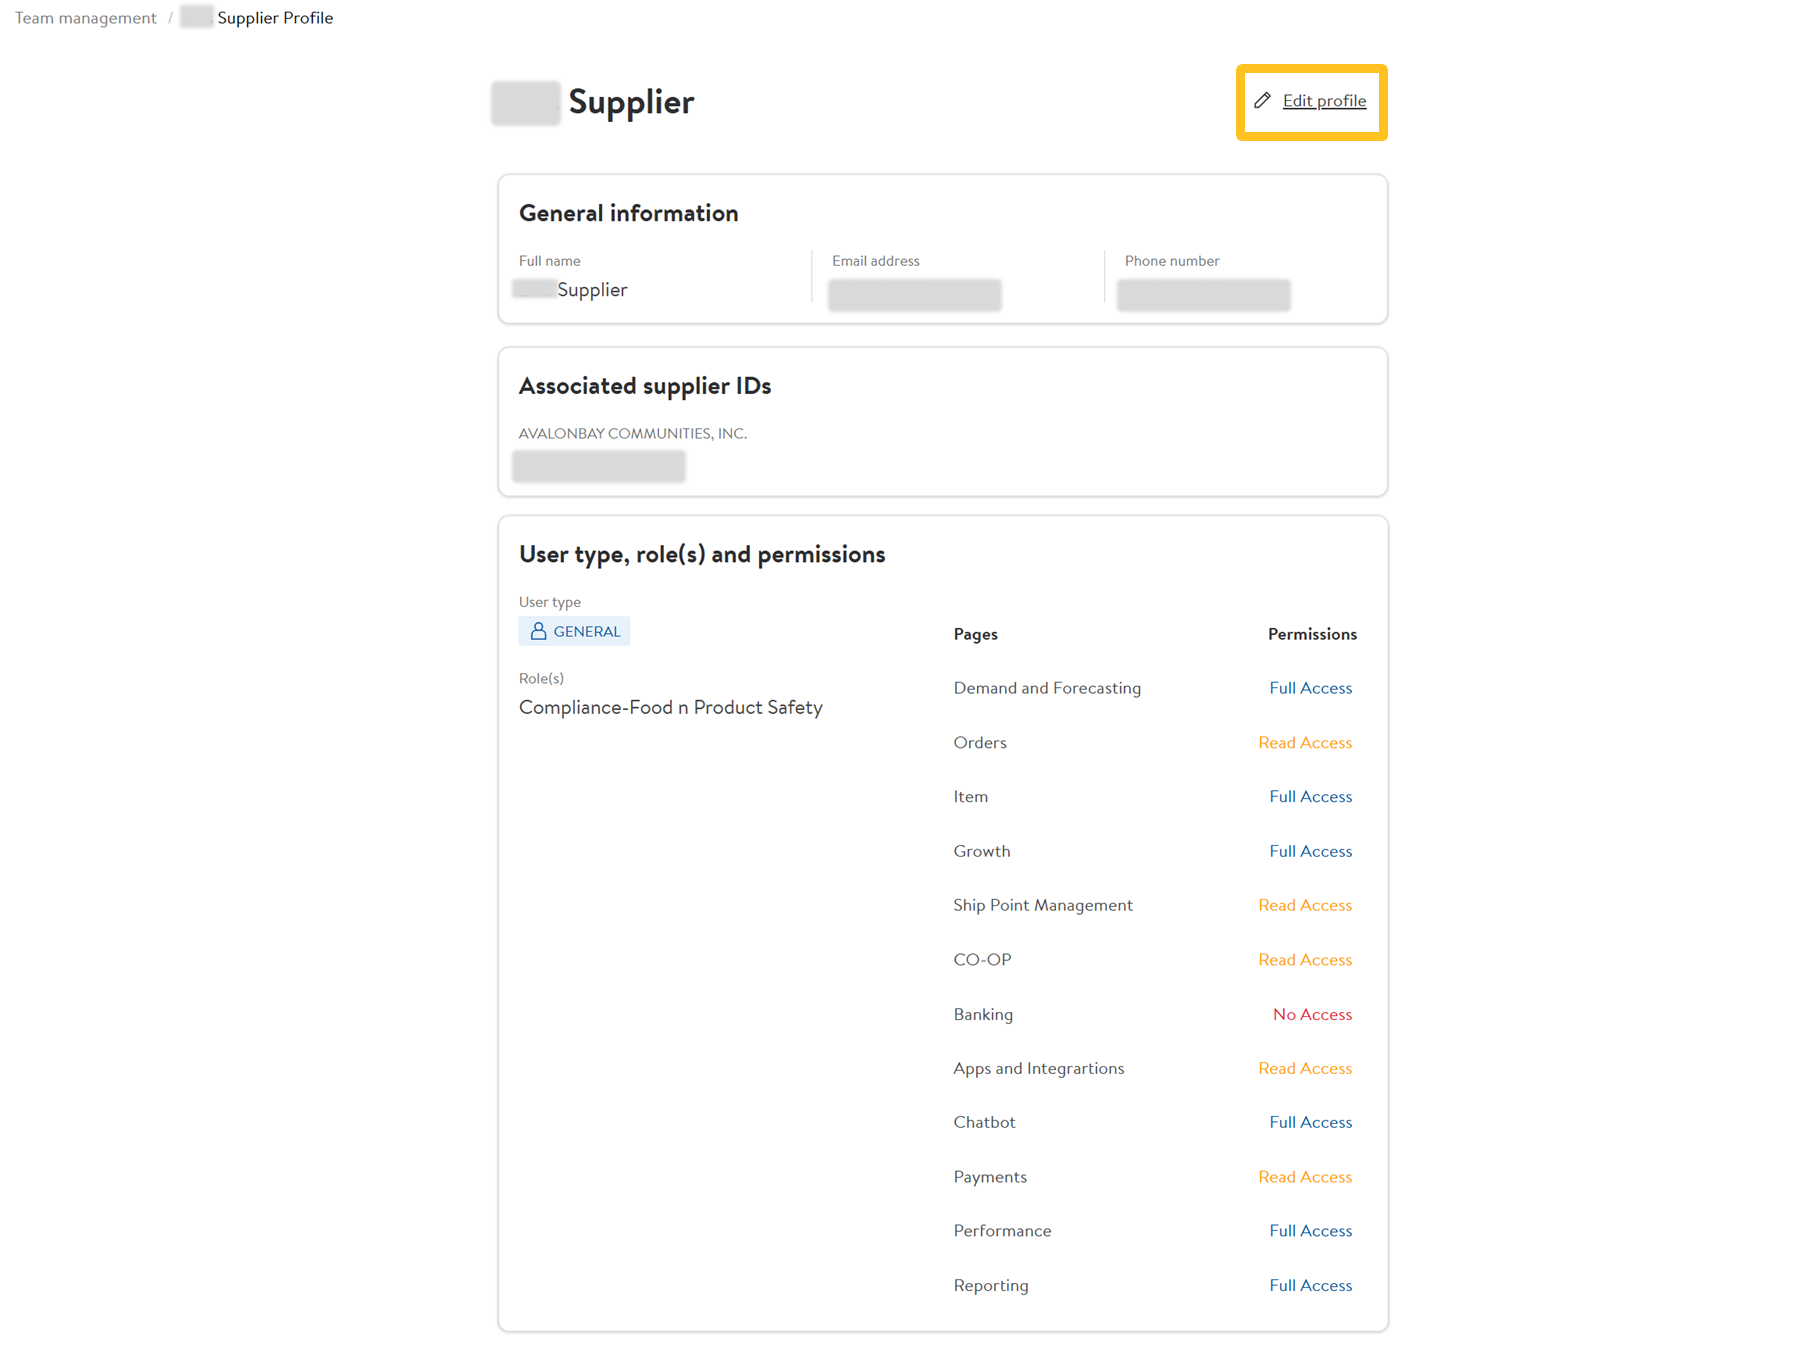
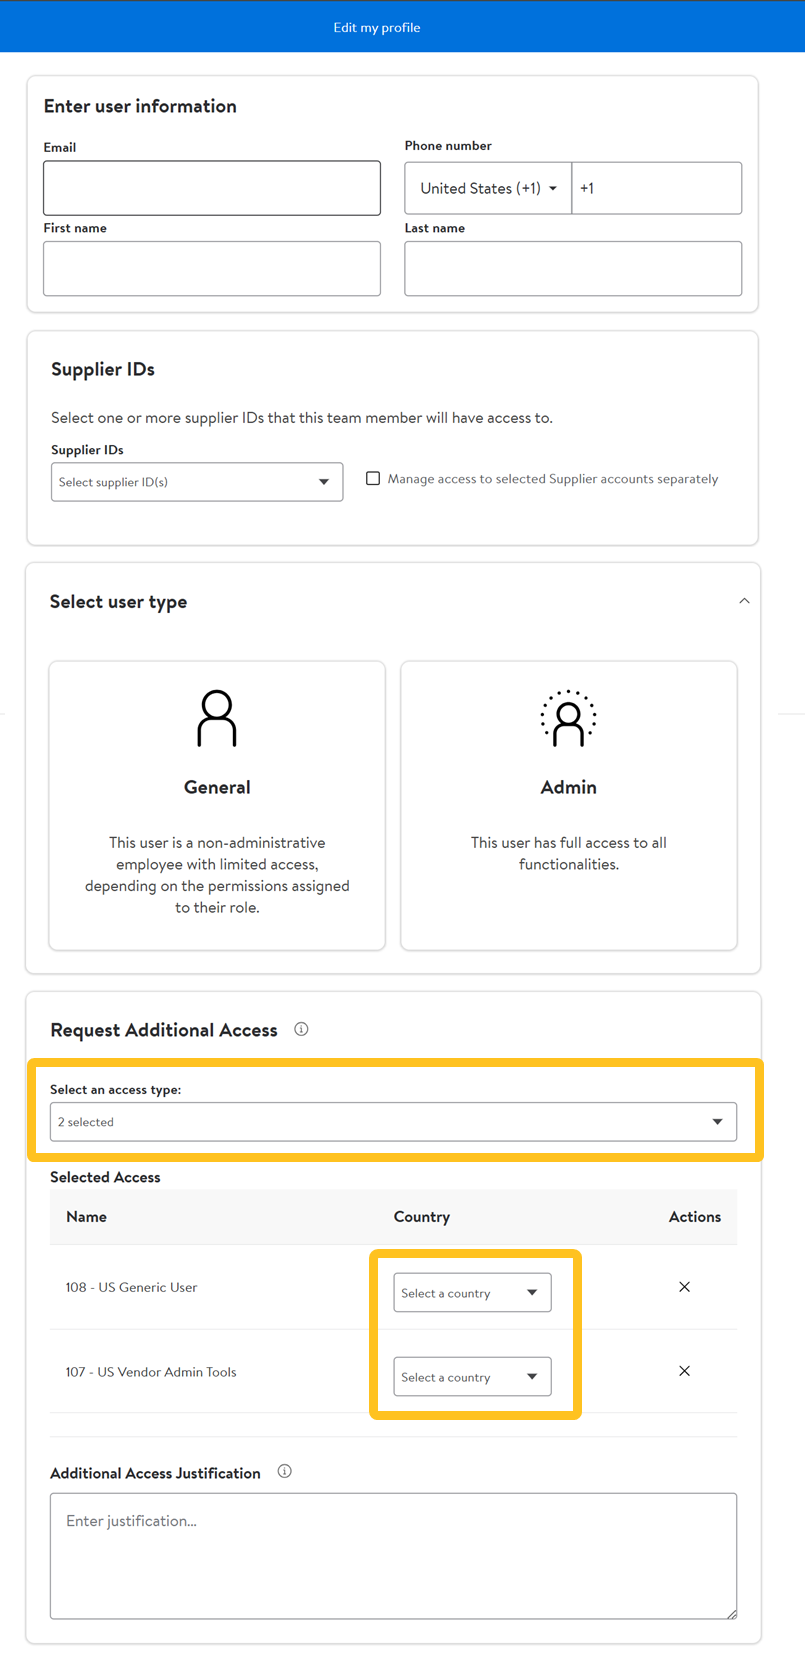
- You can update the user's email, first/last name, phone number, the supplier IDs that this individual has access to, user type (General or Admin), and request additional access with business justification.
- You can edit access by supplier accounts separately by expanding each supplier ID to select the applicable user type.
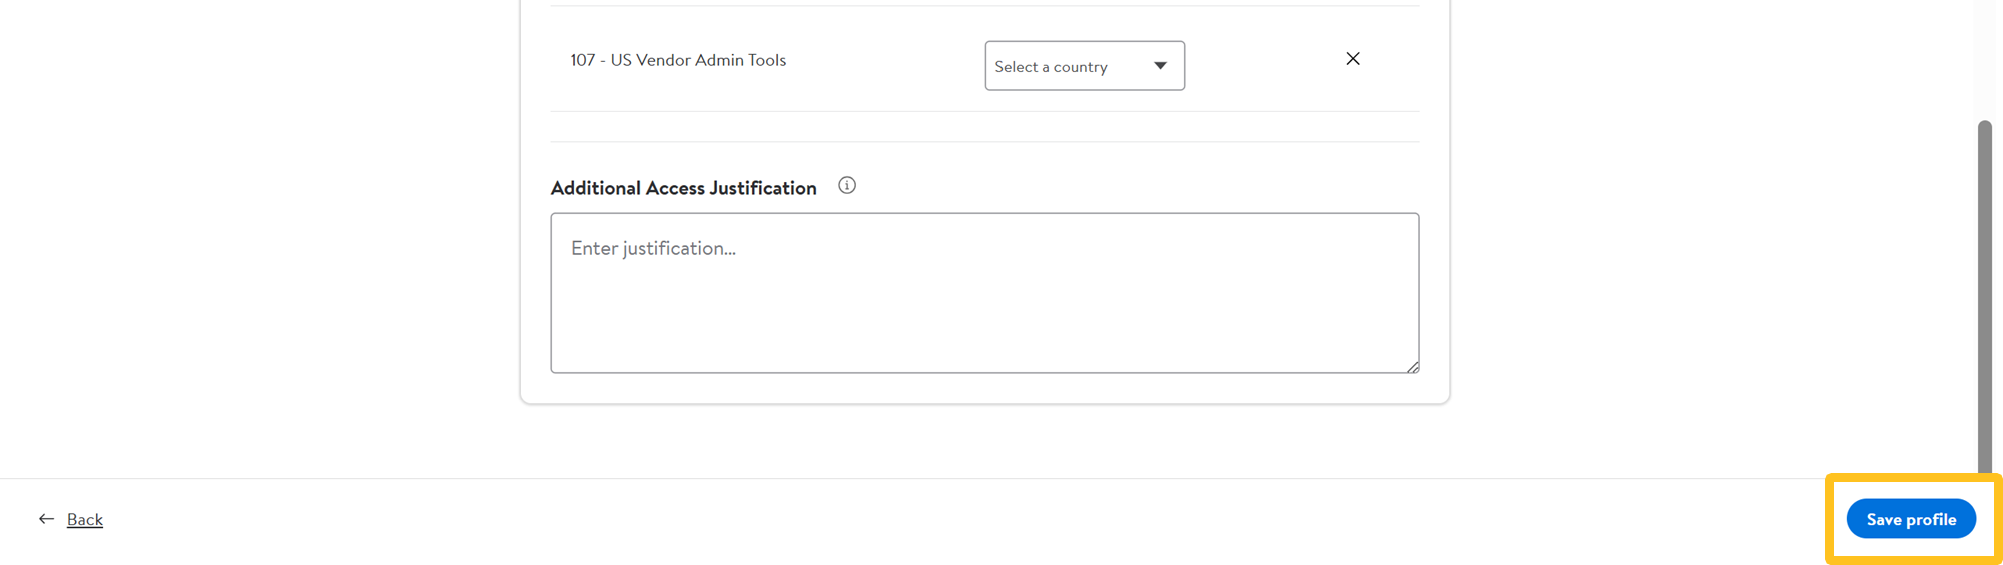
- When selecting additional access types, select a country (US or Non-US).A user must always be associated with at least one supplier.
- Click Save profile to update the user's profile.
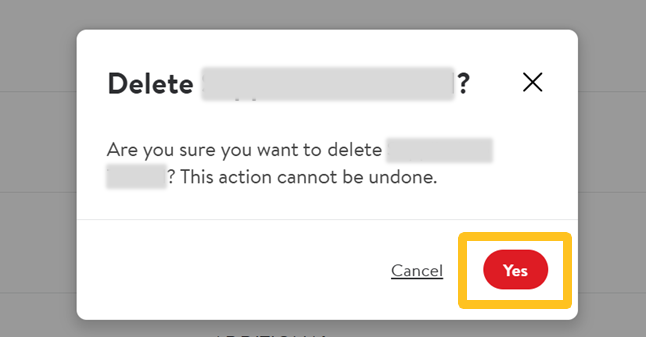
Delete a User
Remove a user’s access to Retail Link – typically when an individual has left the company or changed positions within the organization and no longer needs access to these tools.
- Go to the Team Management page and search for the individual by name or username (i.e., email address).
- Click the dots under Actions and select Delete User.
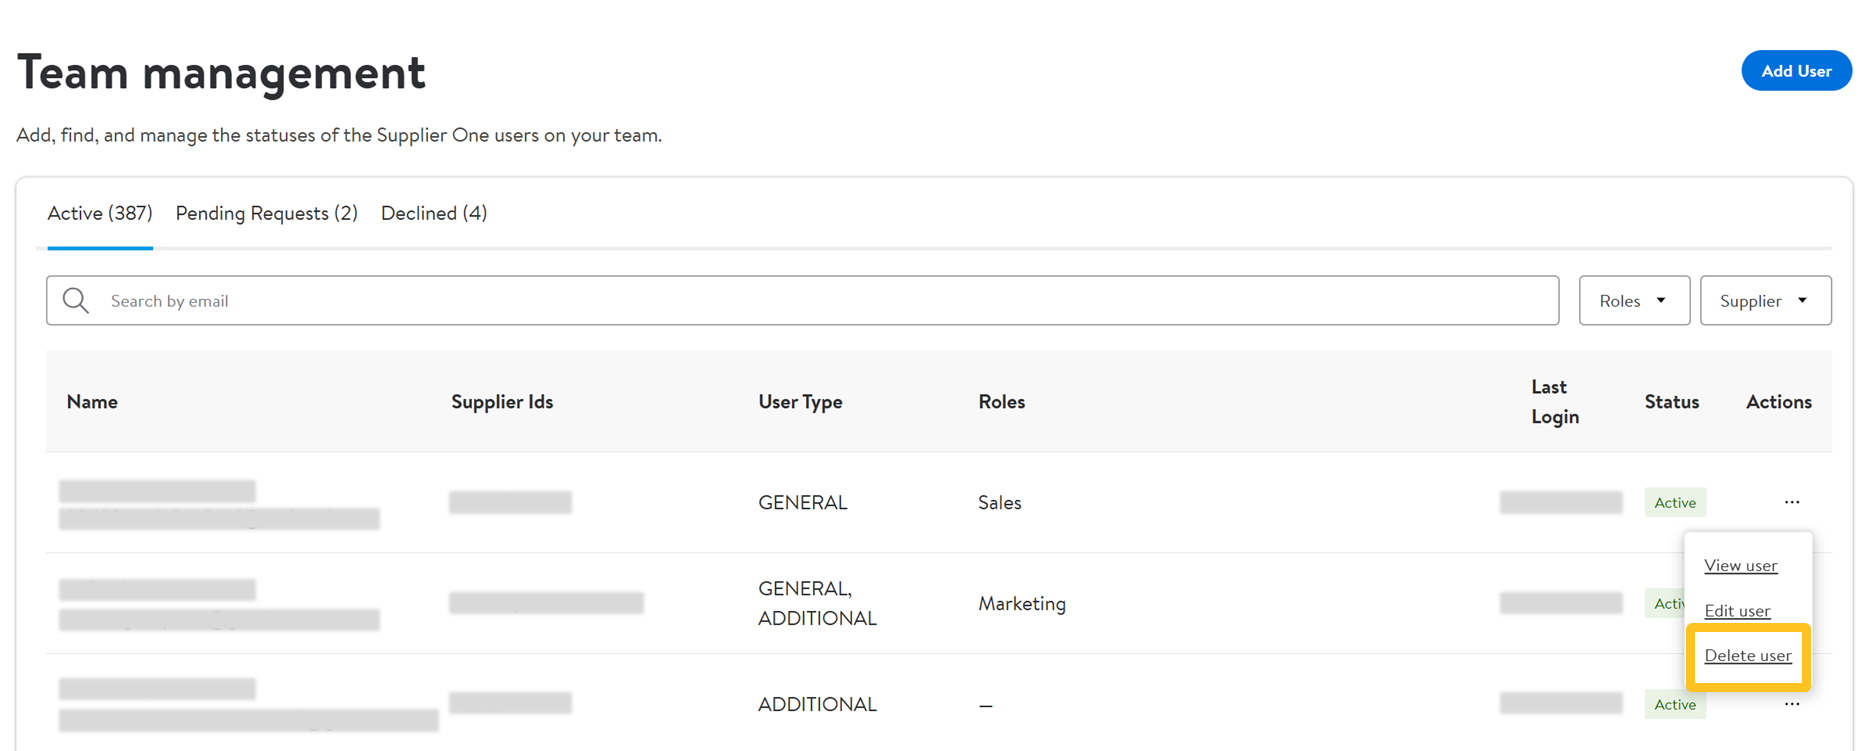
- Select Yes to confirm you want to remove the contact.