Follow these instructions to create domestic purchase orders (POs).
This process is currently only available for domestic Owned Orders. DSV suppliers should continue to use NOVA for PO creation.
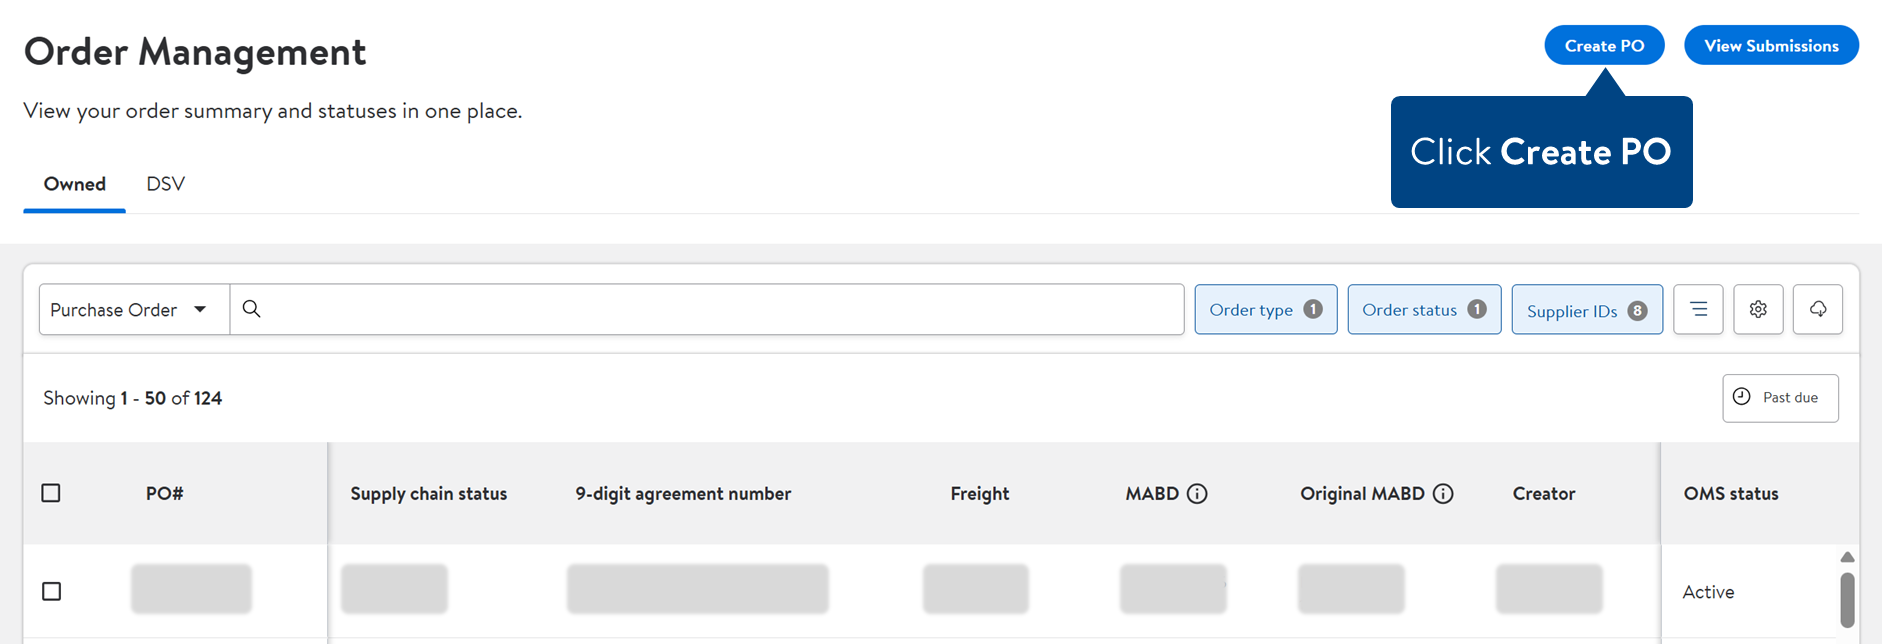
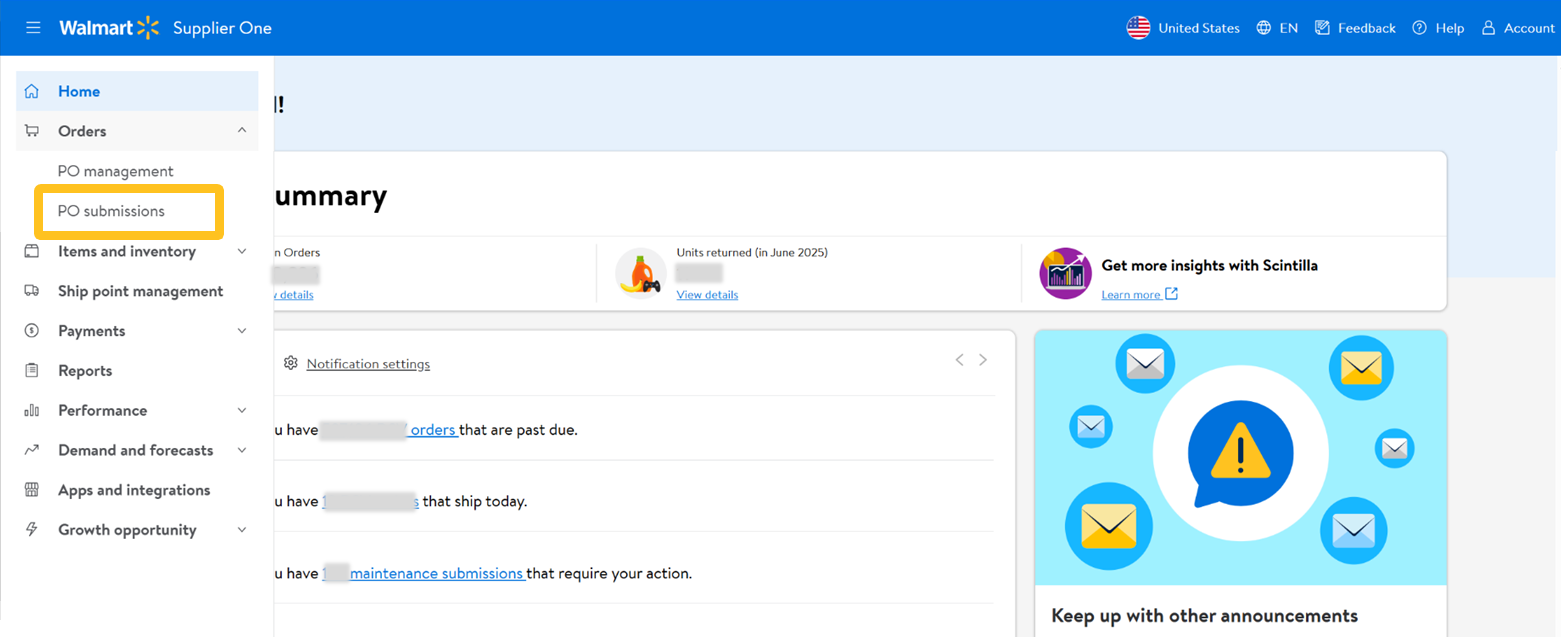
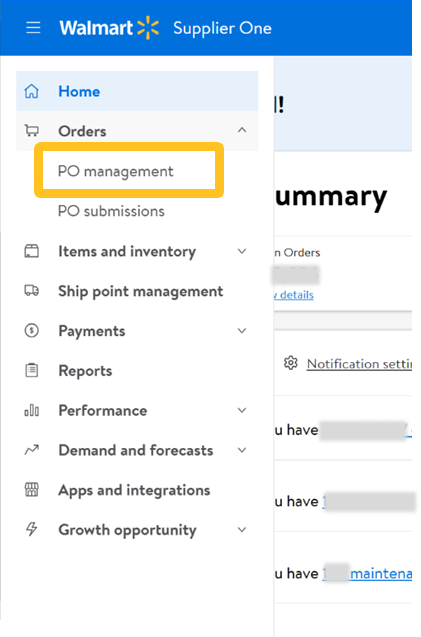
Click Orders > PO management in the left navigation menu to view all of your orders.
Click Create PO.
You can also begin the PO creation process on the PO submissions page.
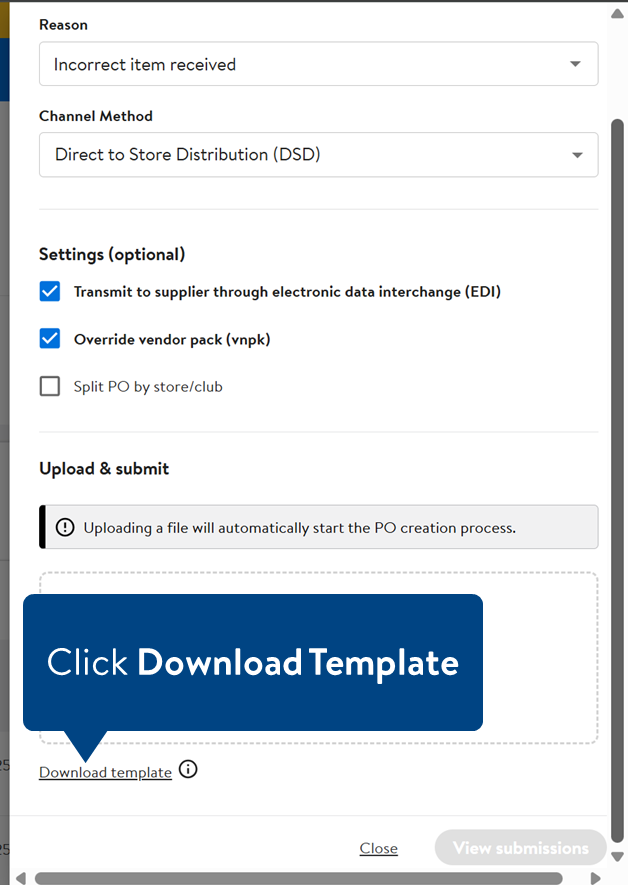
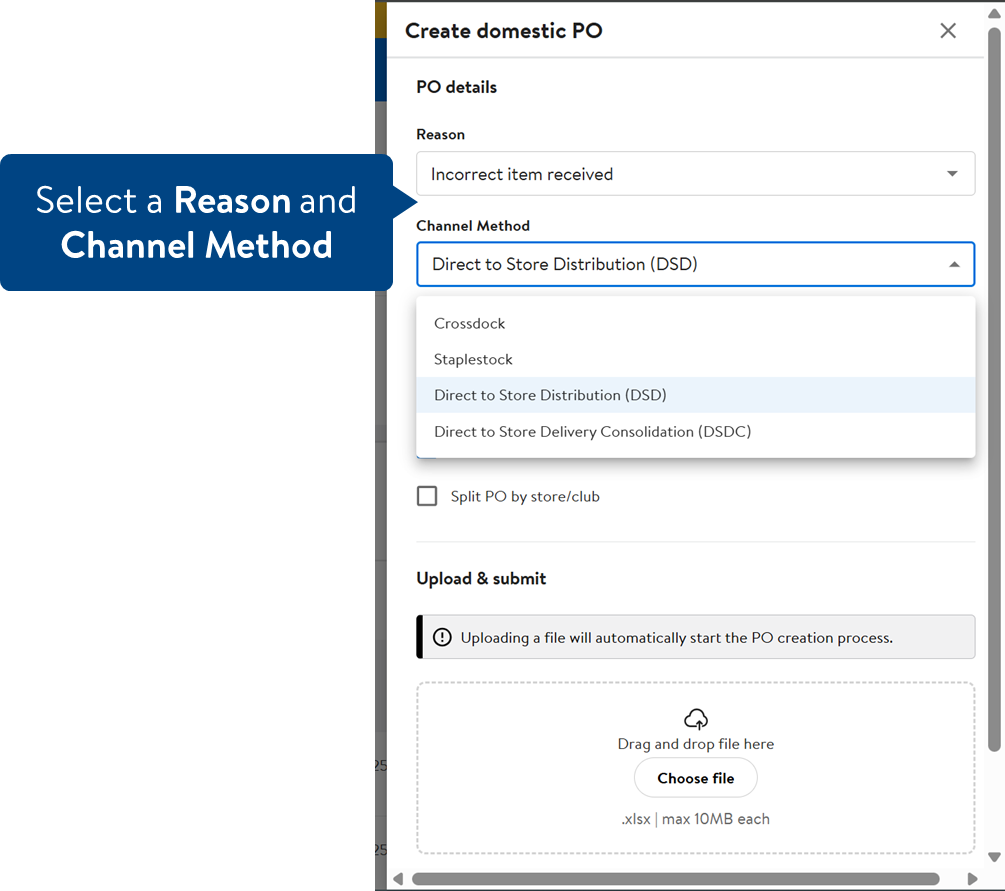
In the PO details, select a Reason and Channel Method from the dropdowns.Crossdock: PO Type 20 Staplestock: PO Type 3 DSD: PO Type 7 DSDC: PO Type 73
You can apply (optional) settings to the PO. The available settings will change based on the reason and channel method selected.
Use suggested date is based on supplier lead times.
If Use suggested dates is selected, do not populate DNSB, DNSA and MABD columns in the template.
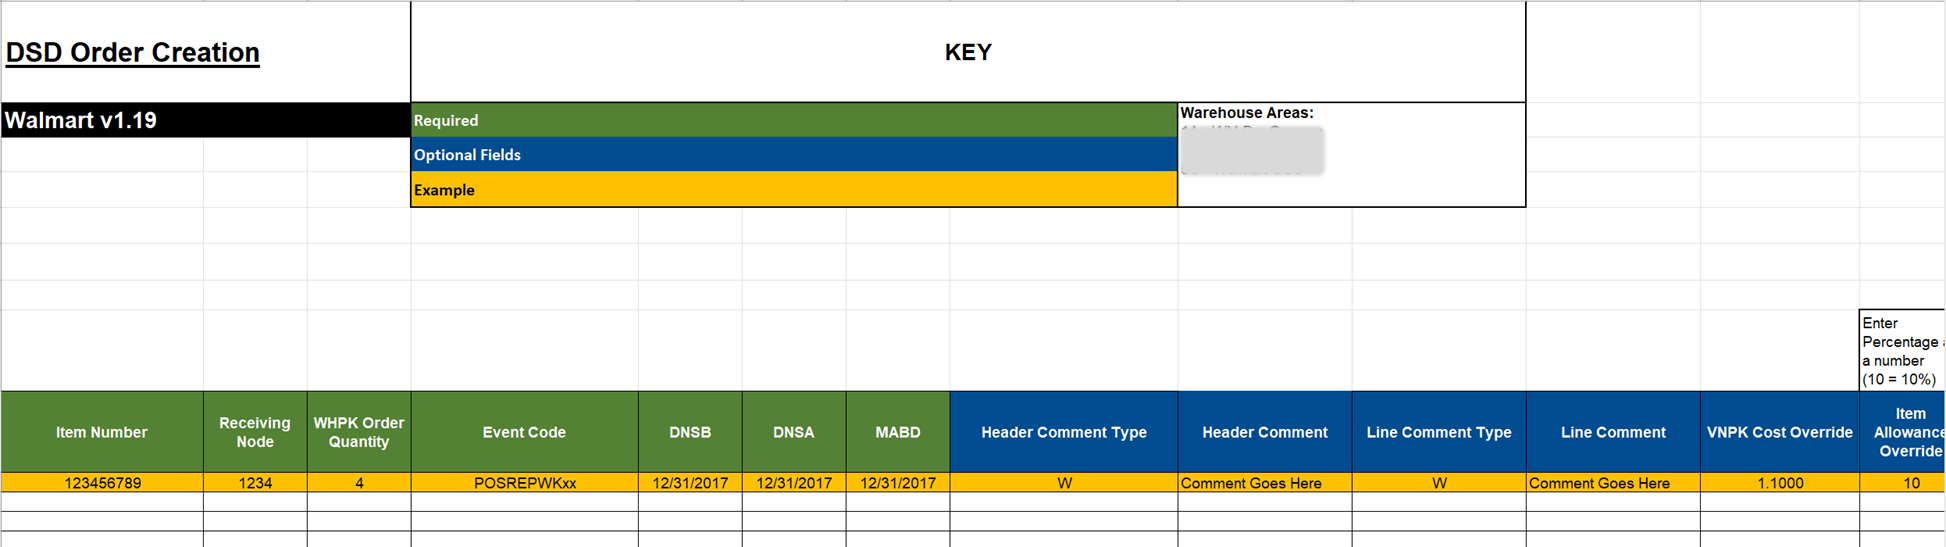
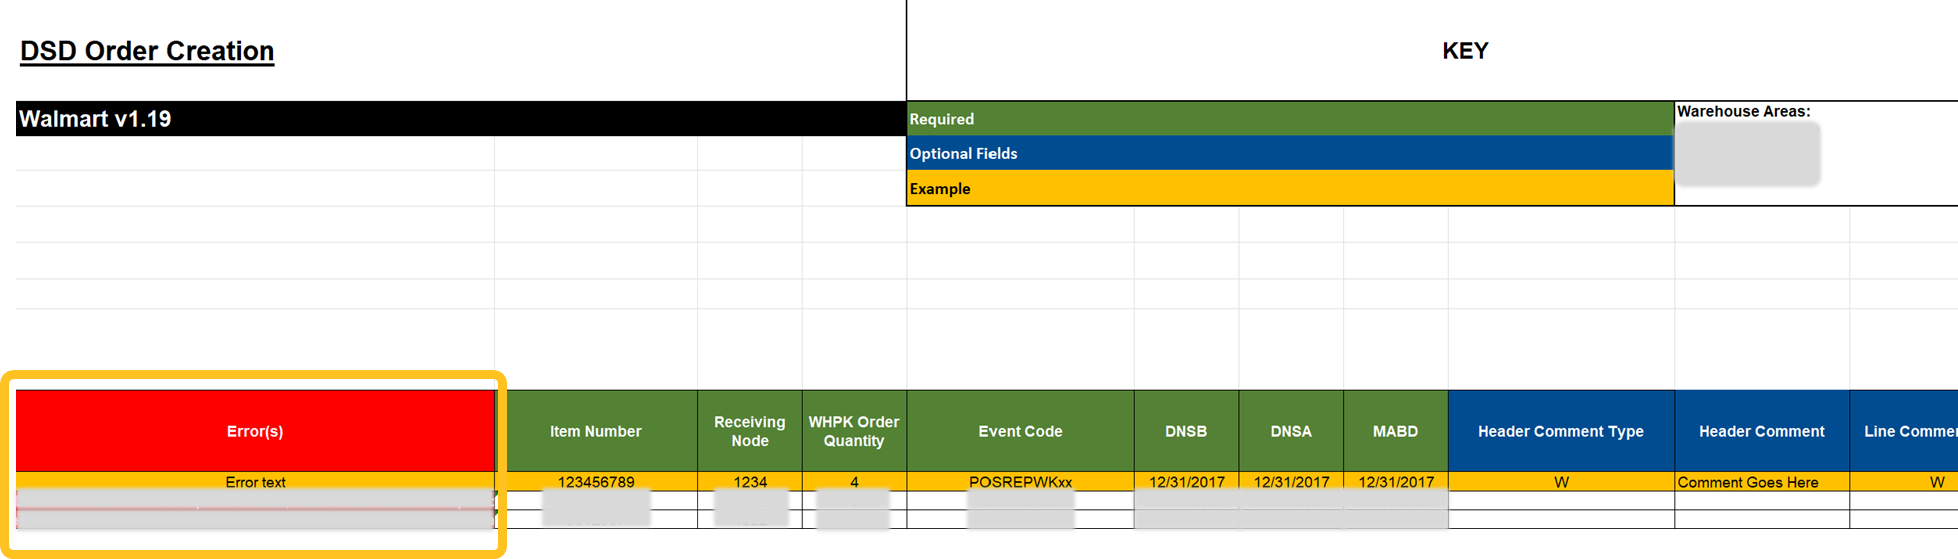
Click Download template to complete the PO details in the excel file.
Enter the Required and Optional Fields as needed in the template.
Your replenishment manager will provide the Event Code to use.
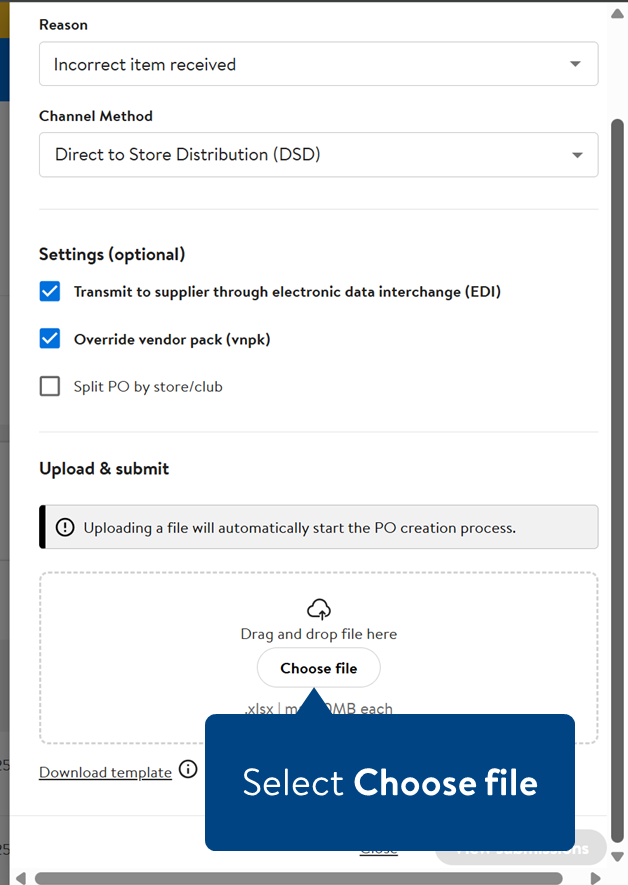
Once you've made changes to the file, save to your computer and close the file. Select Choose file to upload.
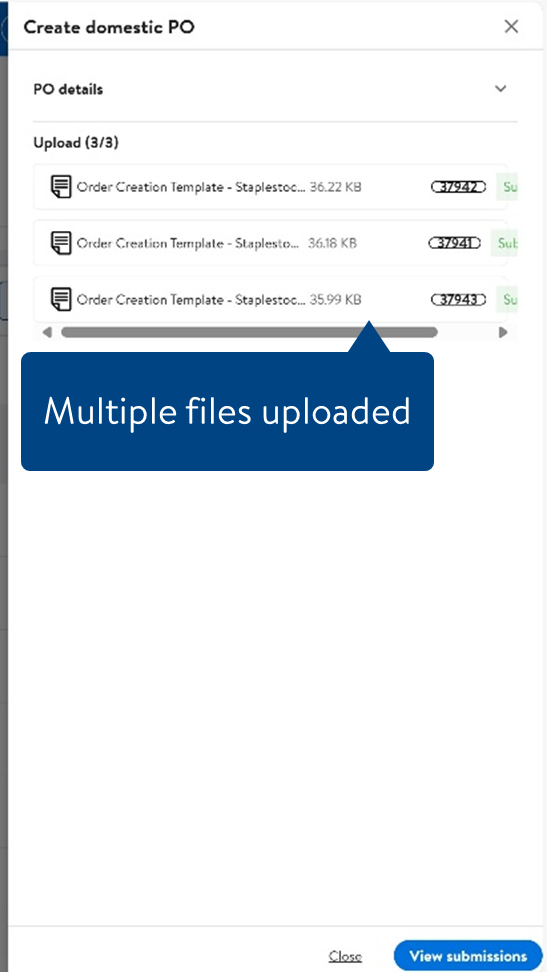
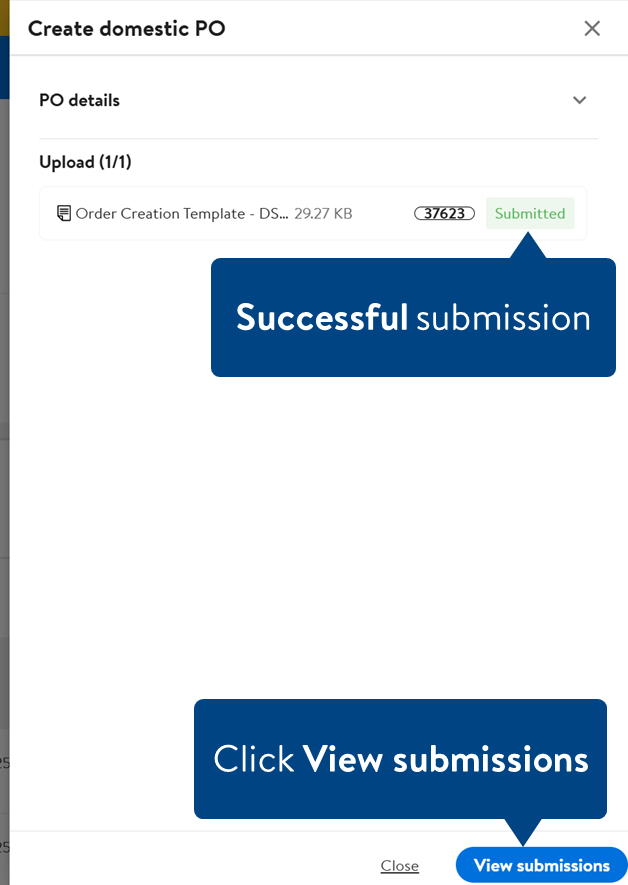
Uploading a file will automatically start the PO creation process.
You can also upload multiple files to save time.
You will see Submitted in green text if it was successfully uploaded. Click View submissions to view all PO creation requests.
If you need to cancel or modify a submission, you will manage that in NOVA.
Tracking Submissions
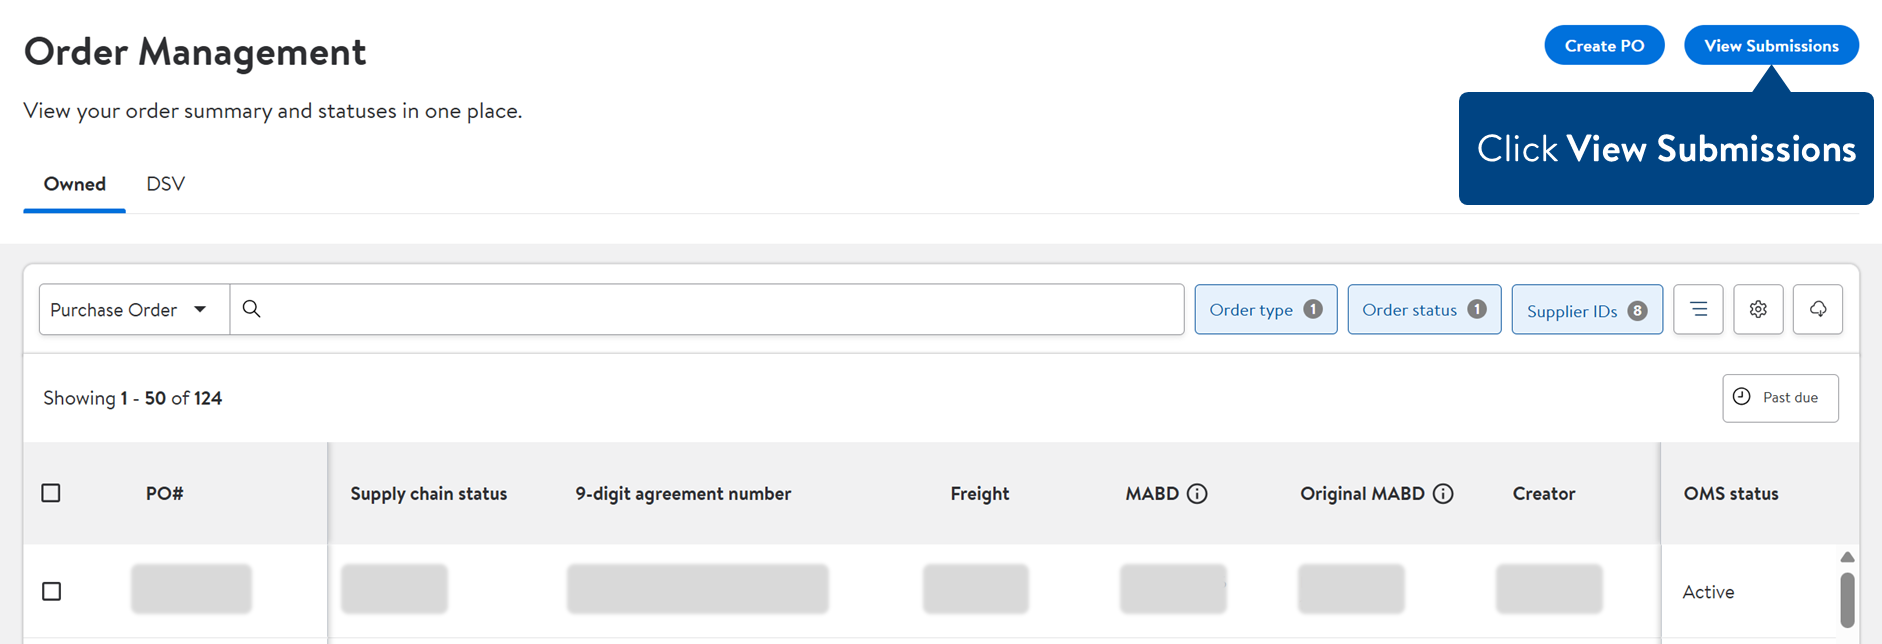
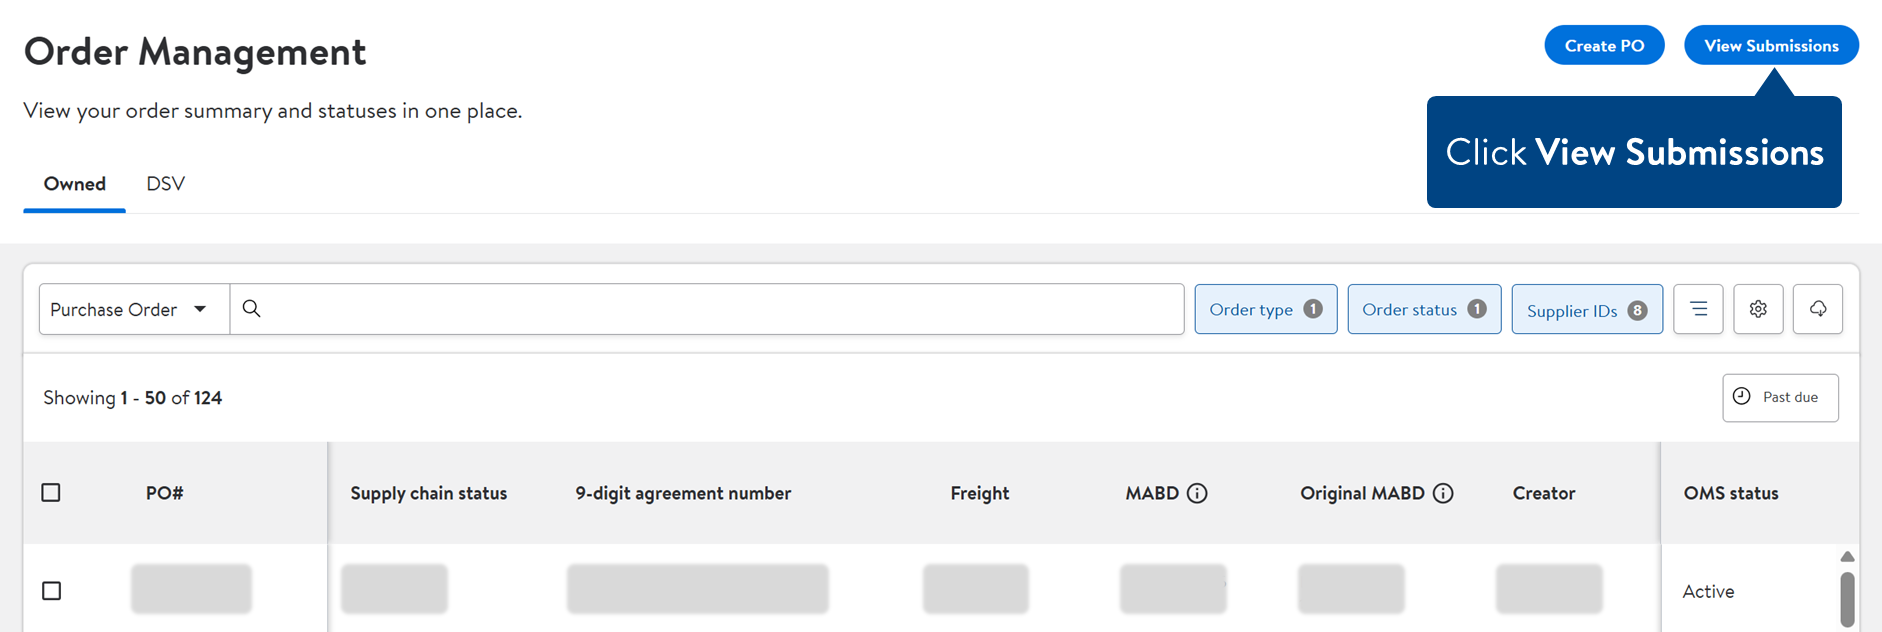
To track the status of your submission, click View Submissions on the Order Management page in Supplier One.
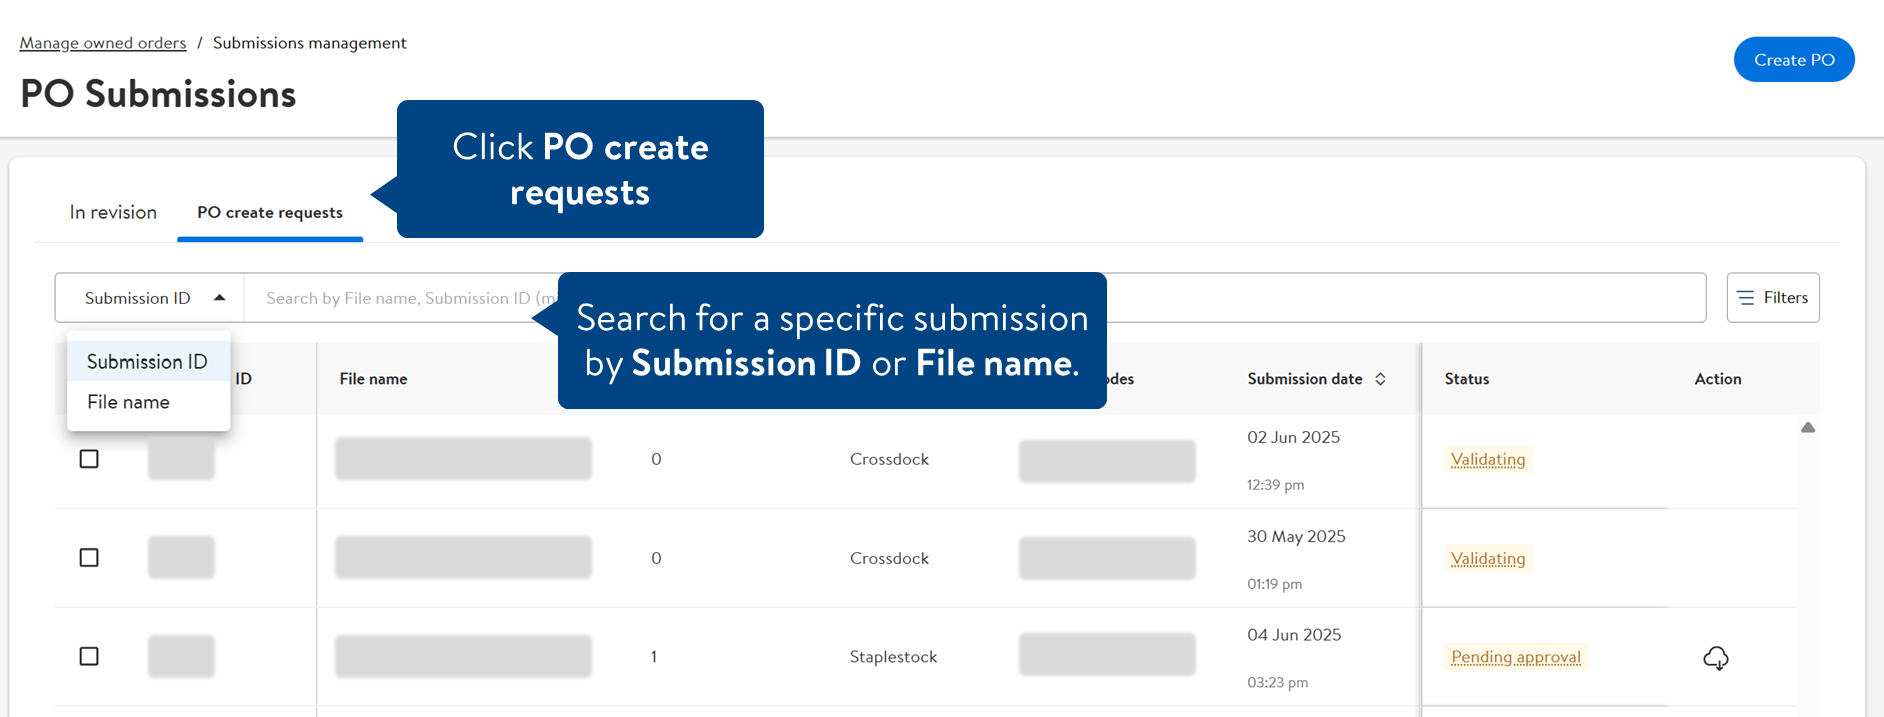
You can also view submissions by selecting Orders > PO submissions in the left navigation menu.
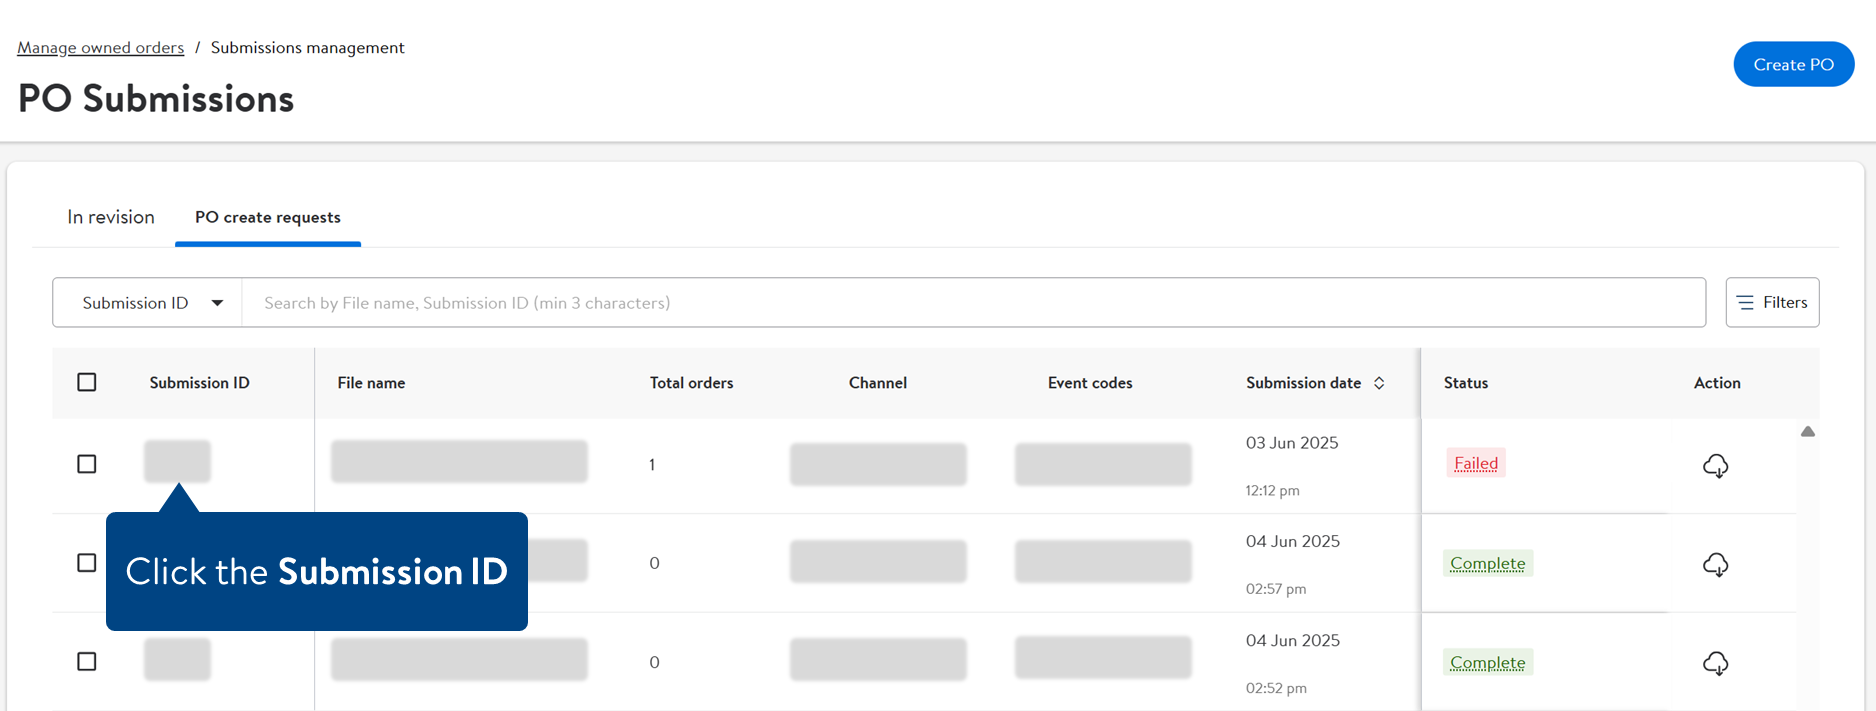
Under PO create requests, use the search bar to find a specific submission by the Submission ID or File name.
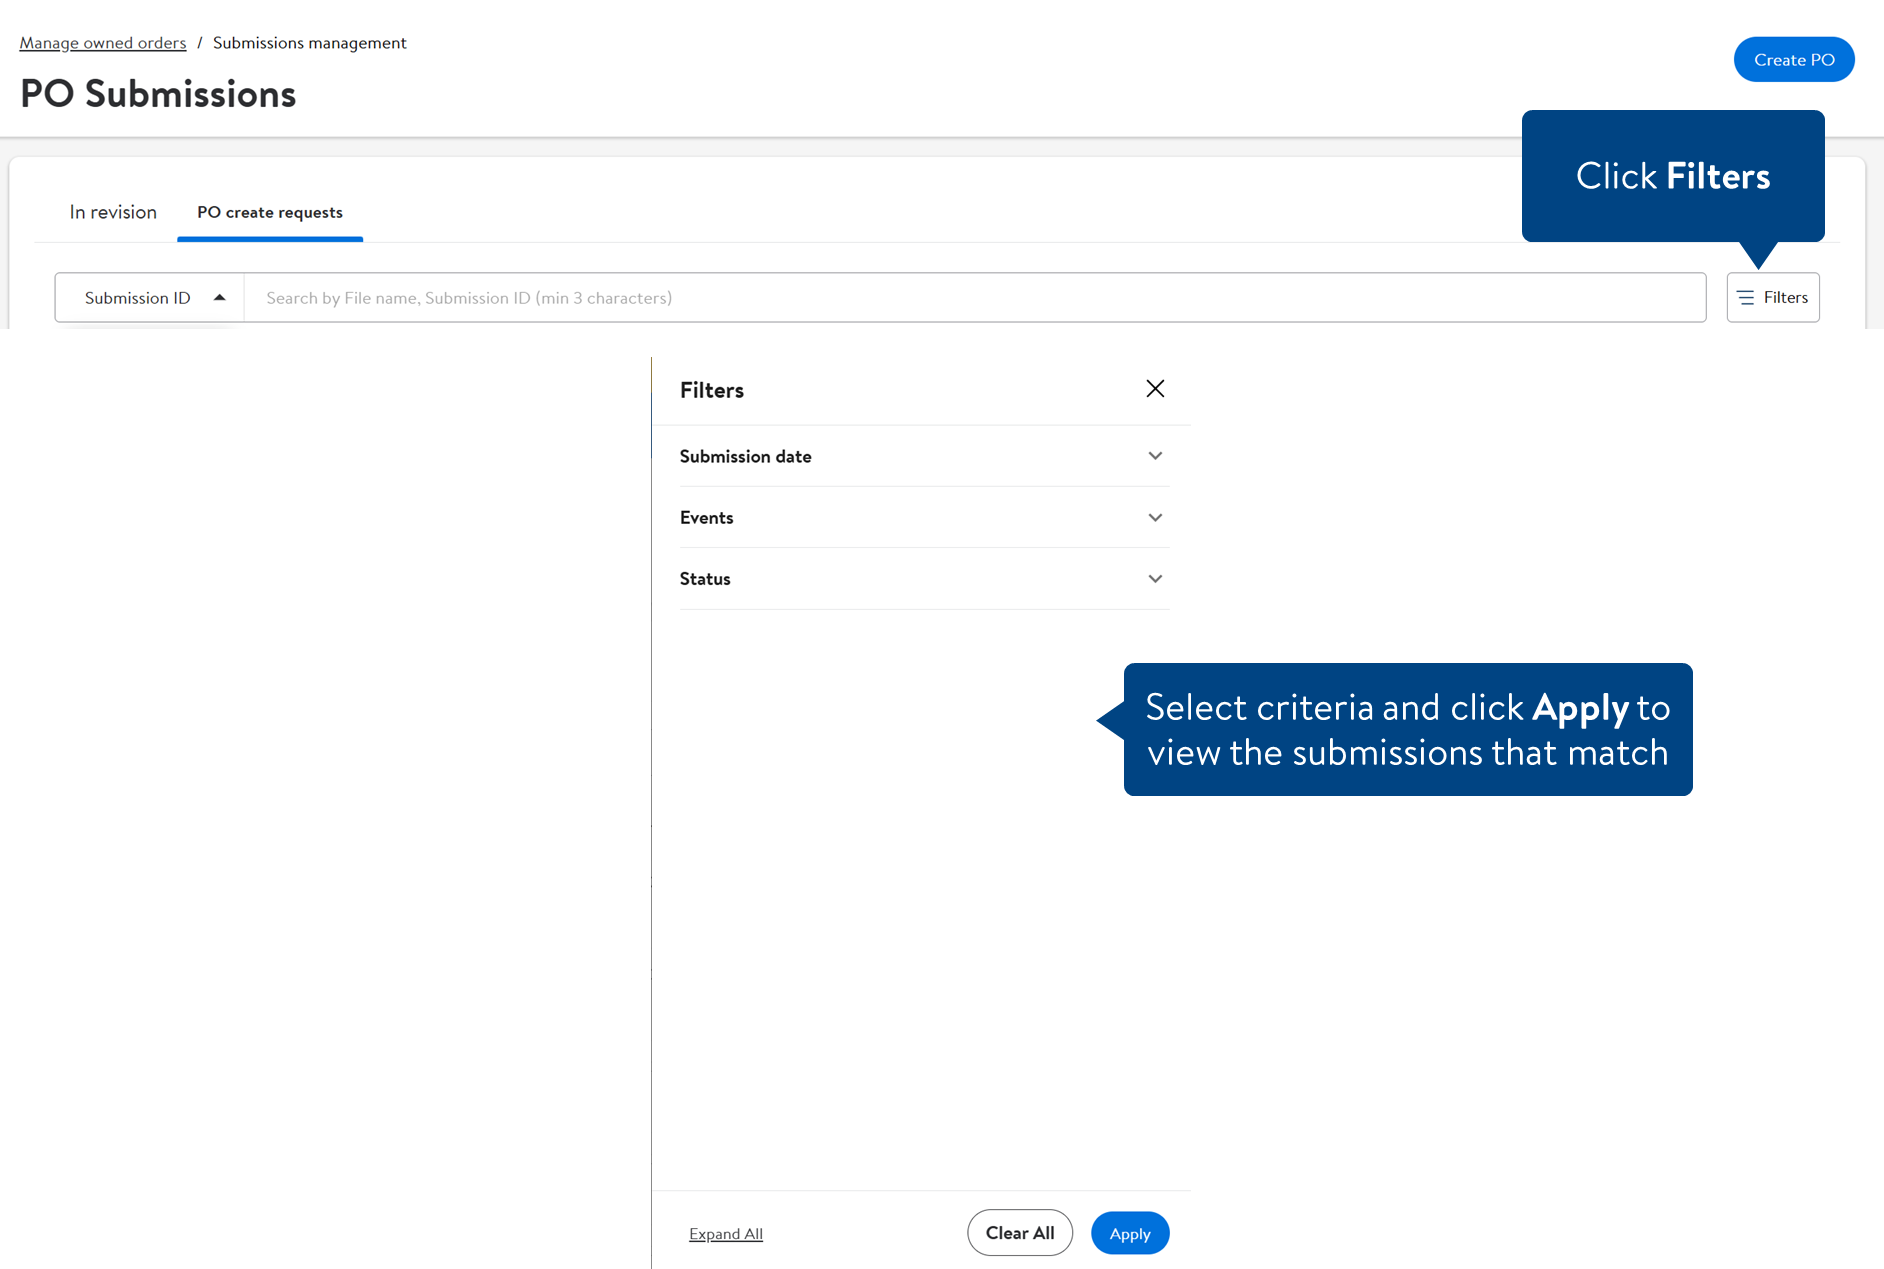
Click Filters to find a range of submissions by the Submission date, Events and/or status.
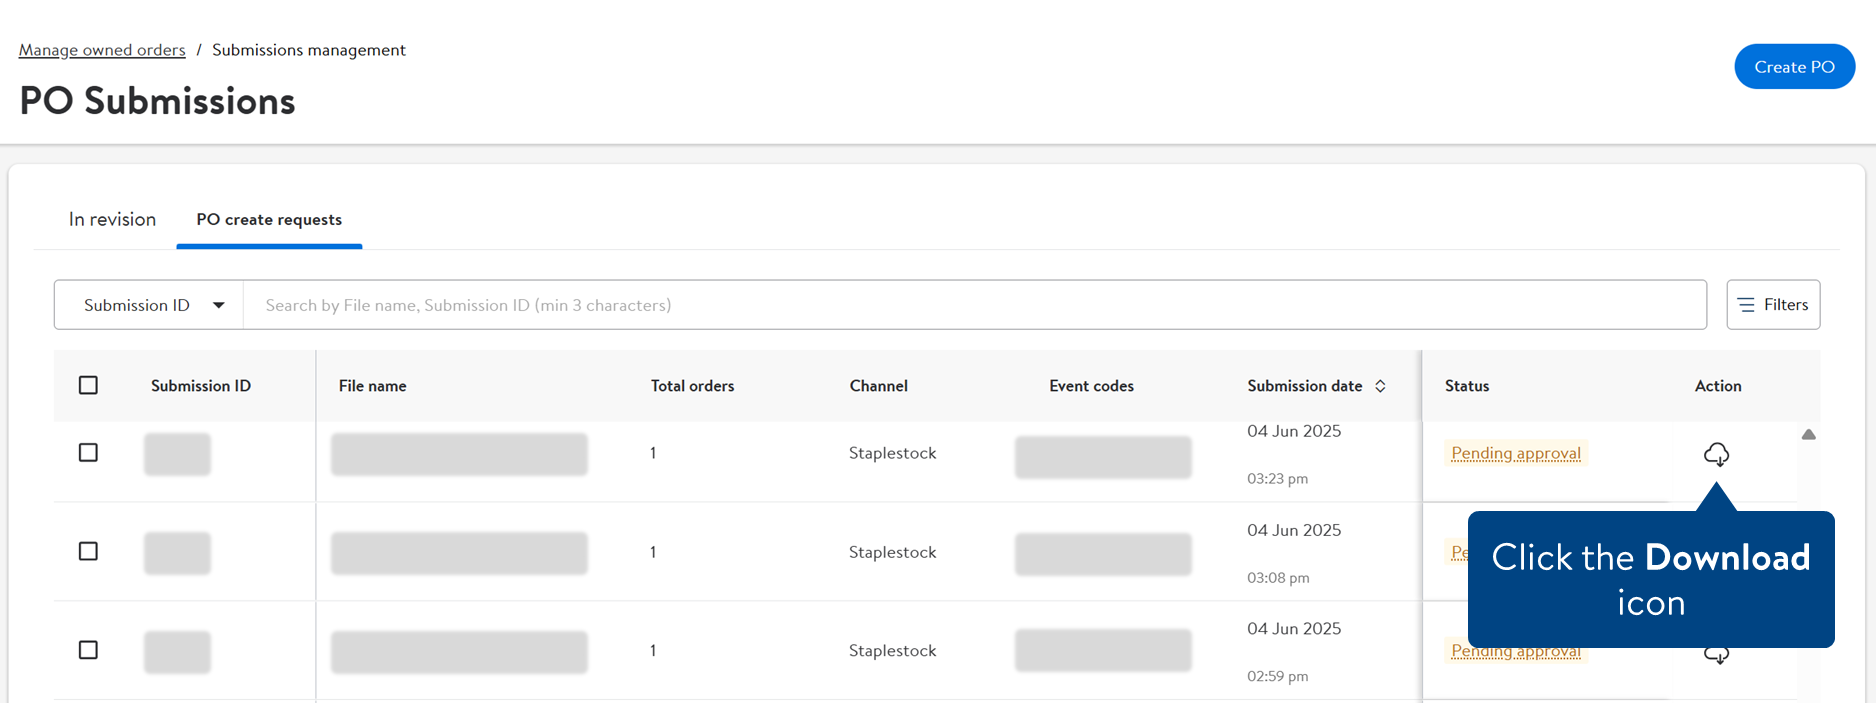
Submissions are organized by the Submission ID and include the file name, Total Orders, Channel, Event codes and status. Under the Actions column, click the download icon to download submission details.
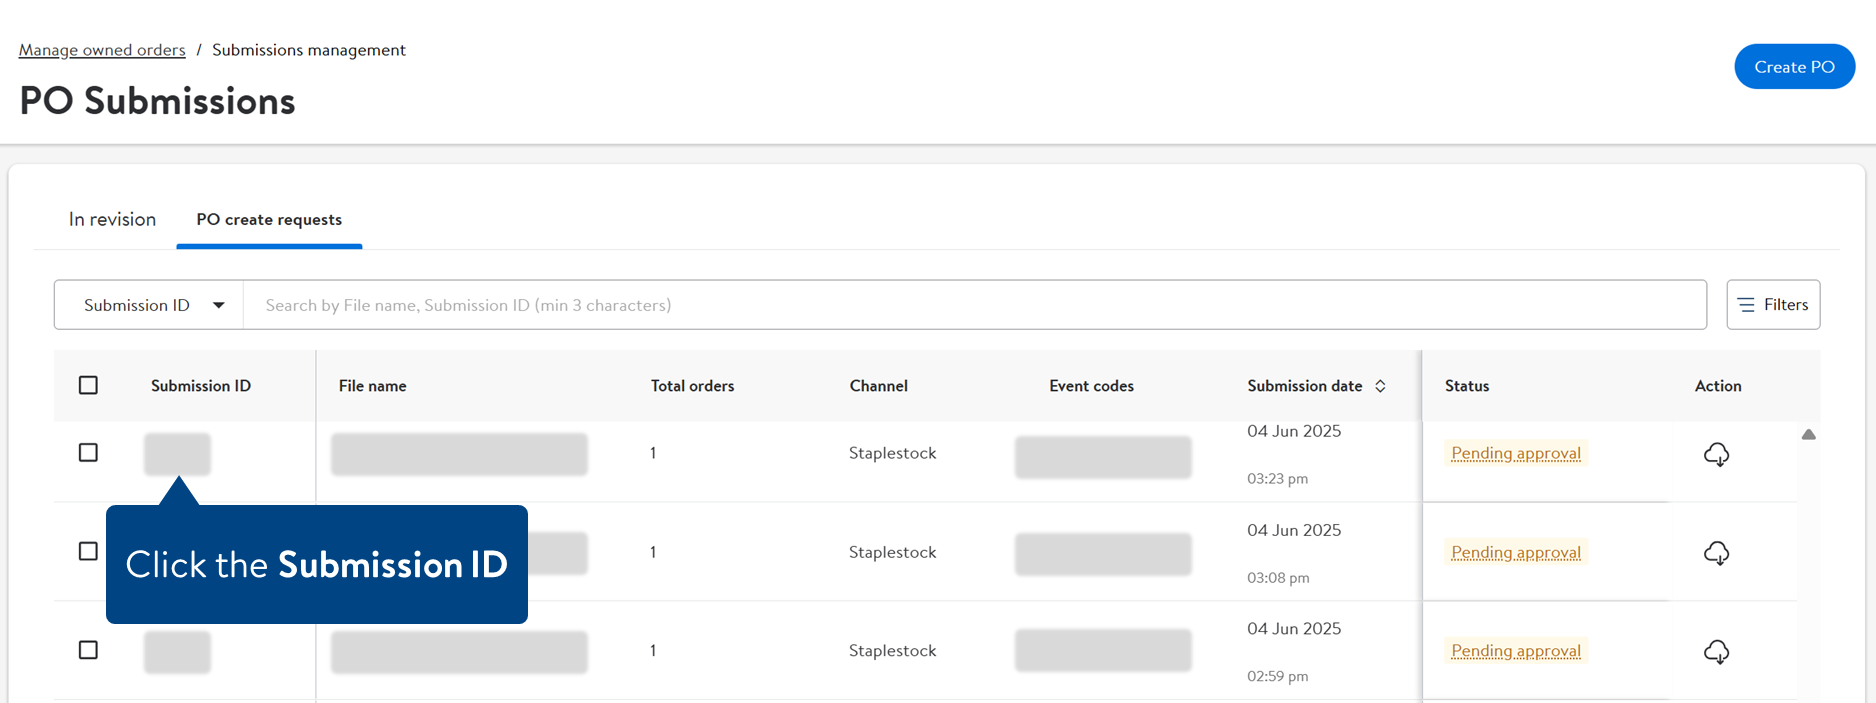
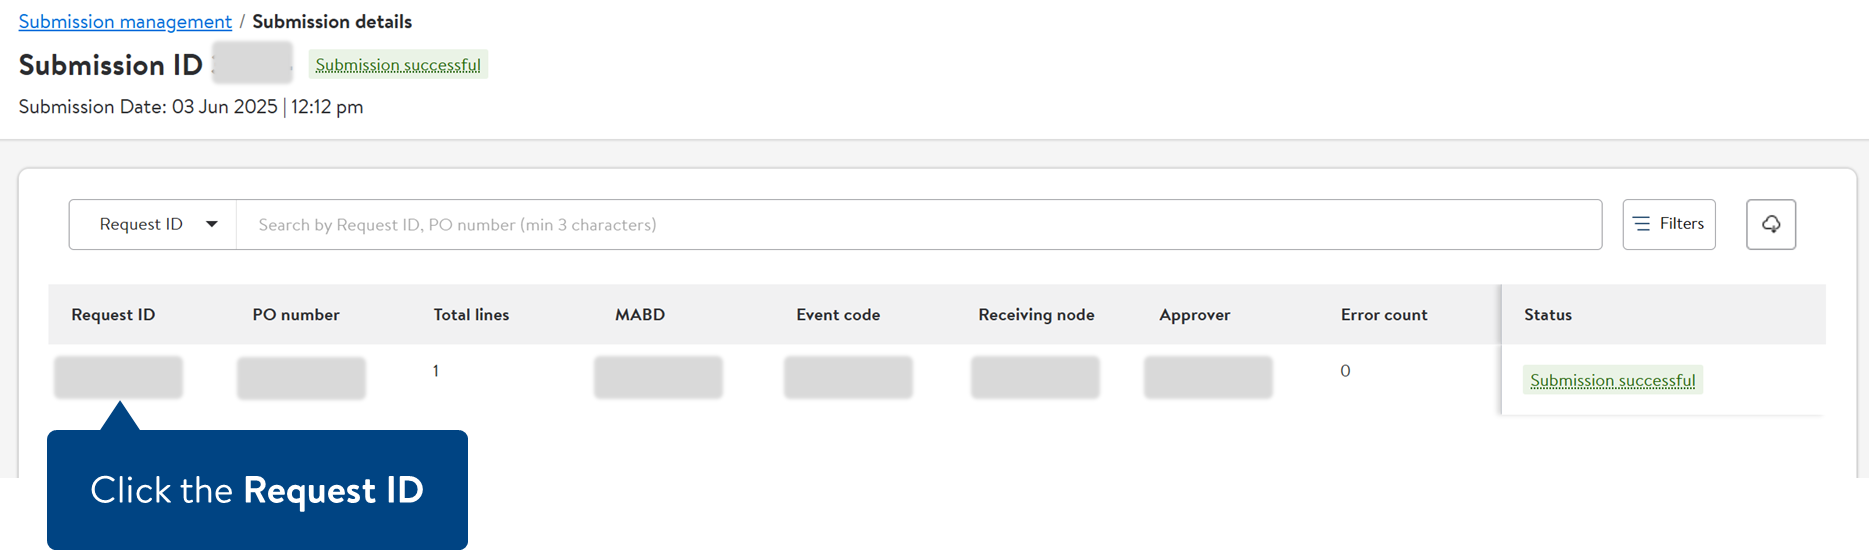
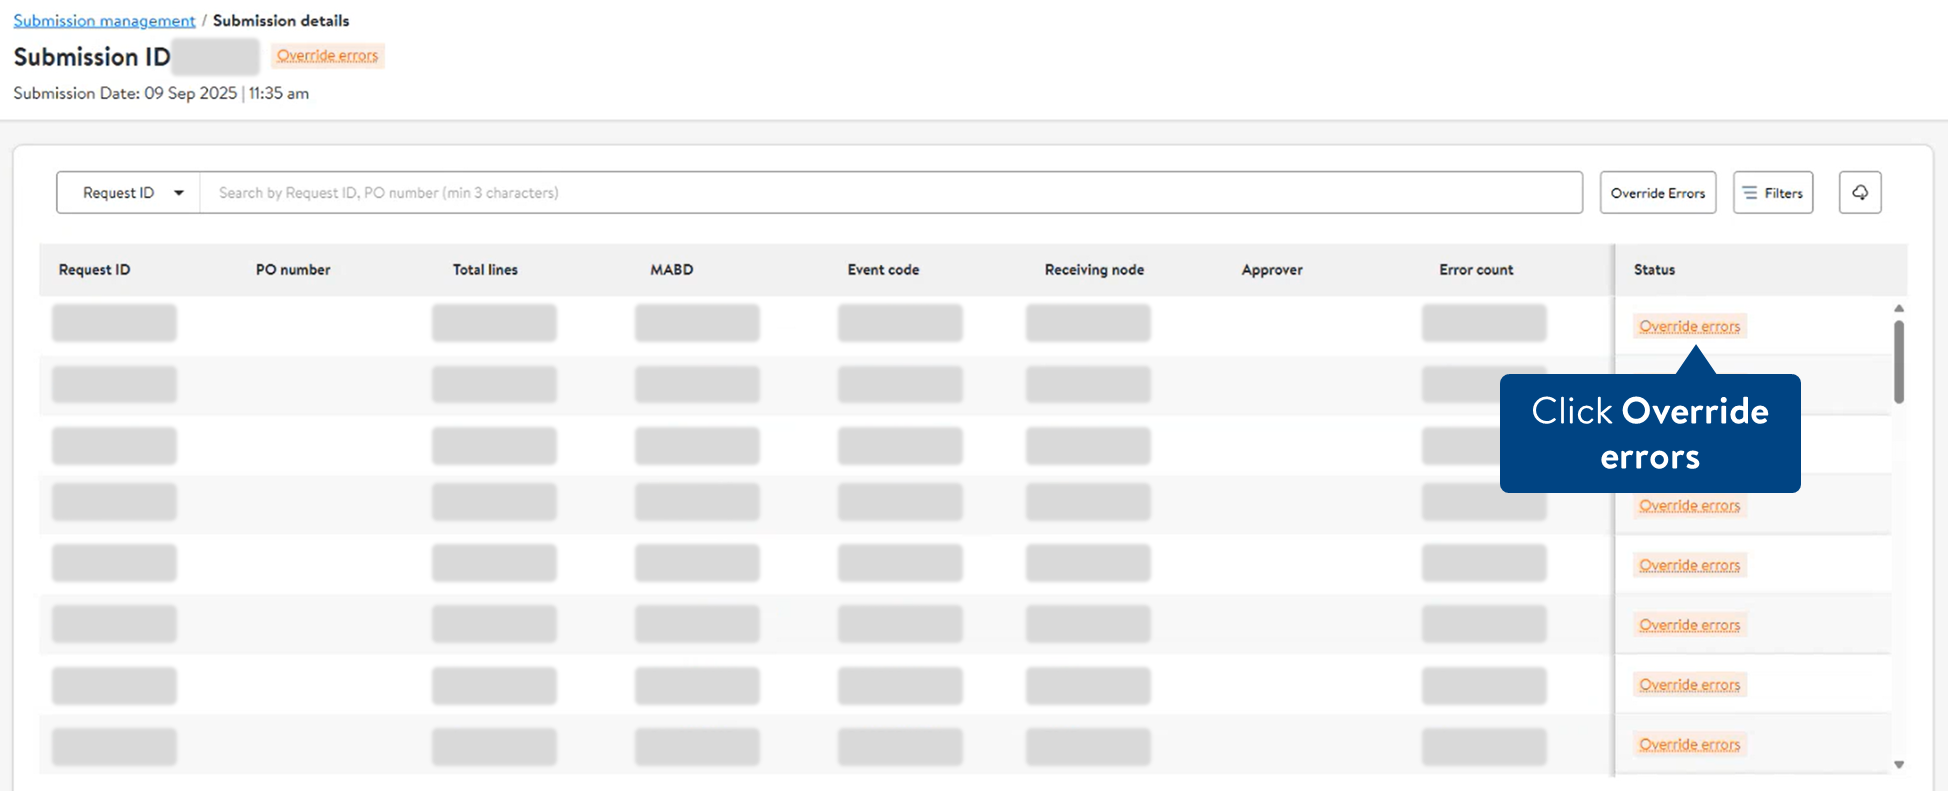
Select the Submission ID to view details of the PO including Request ID(s), PO number(s), Total Lines, MABD, Event code, Receiving node, Approver, Error count and Status.
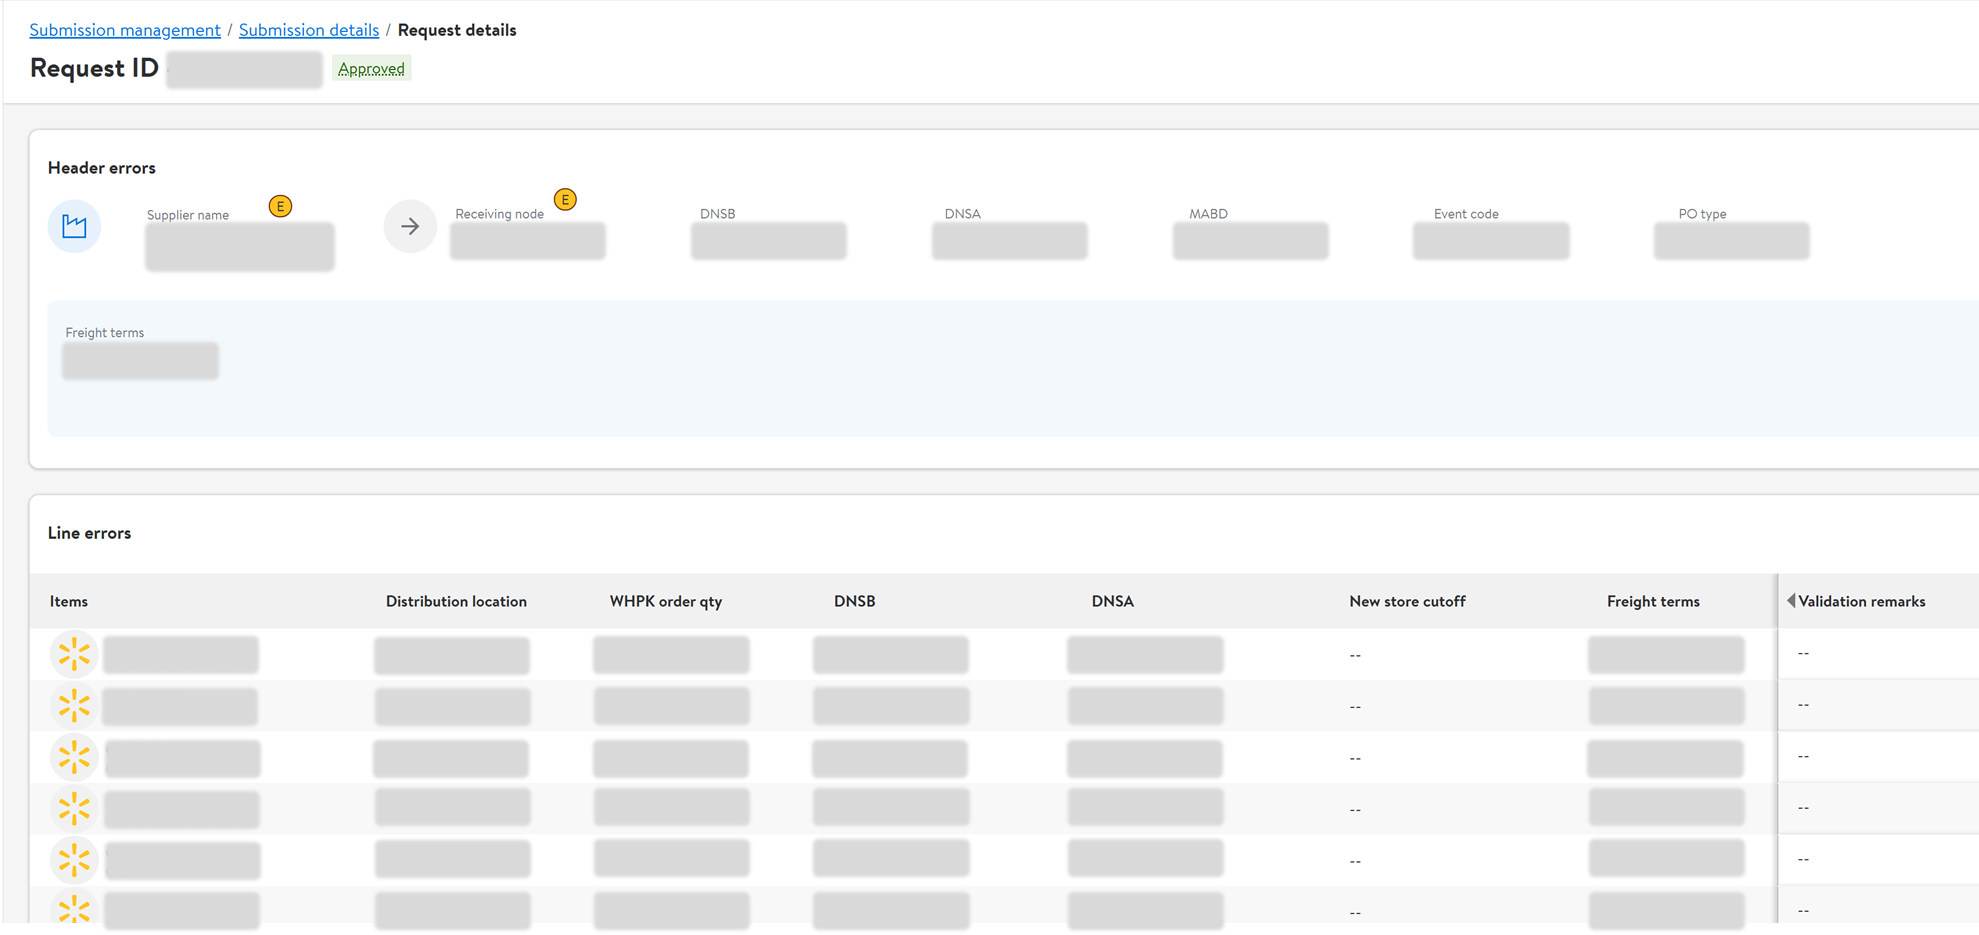
Select the Request ID to view Header and Line errors.
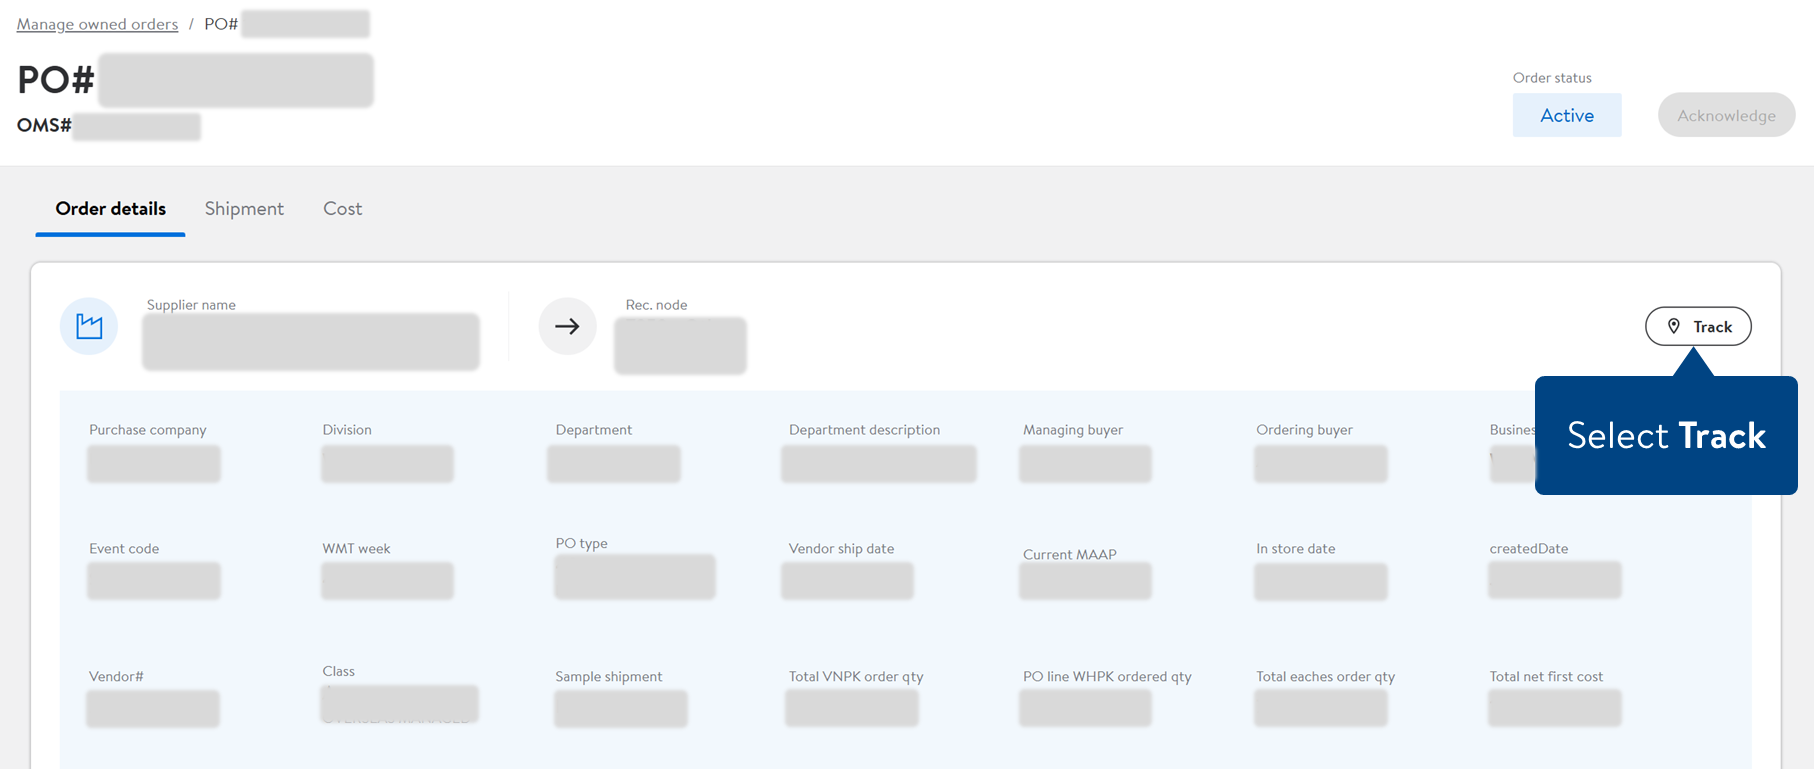
Select the PO number to view all key PO order details.
Select Track for additional visibility.
Status and Overrides
Status
Description
Submission Successful
Your request has been submitted and is beginning the validation process.
Pending Approval
Your request has been validated and is awaiting required workflow approvals.
Failed
Validation failed. Please download the error file, correct the issues and resubmit.
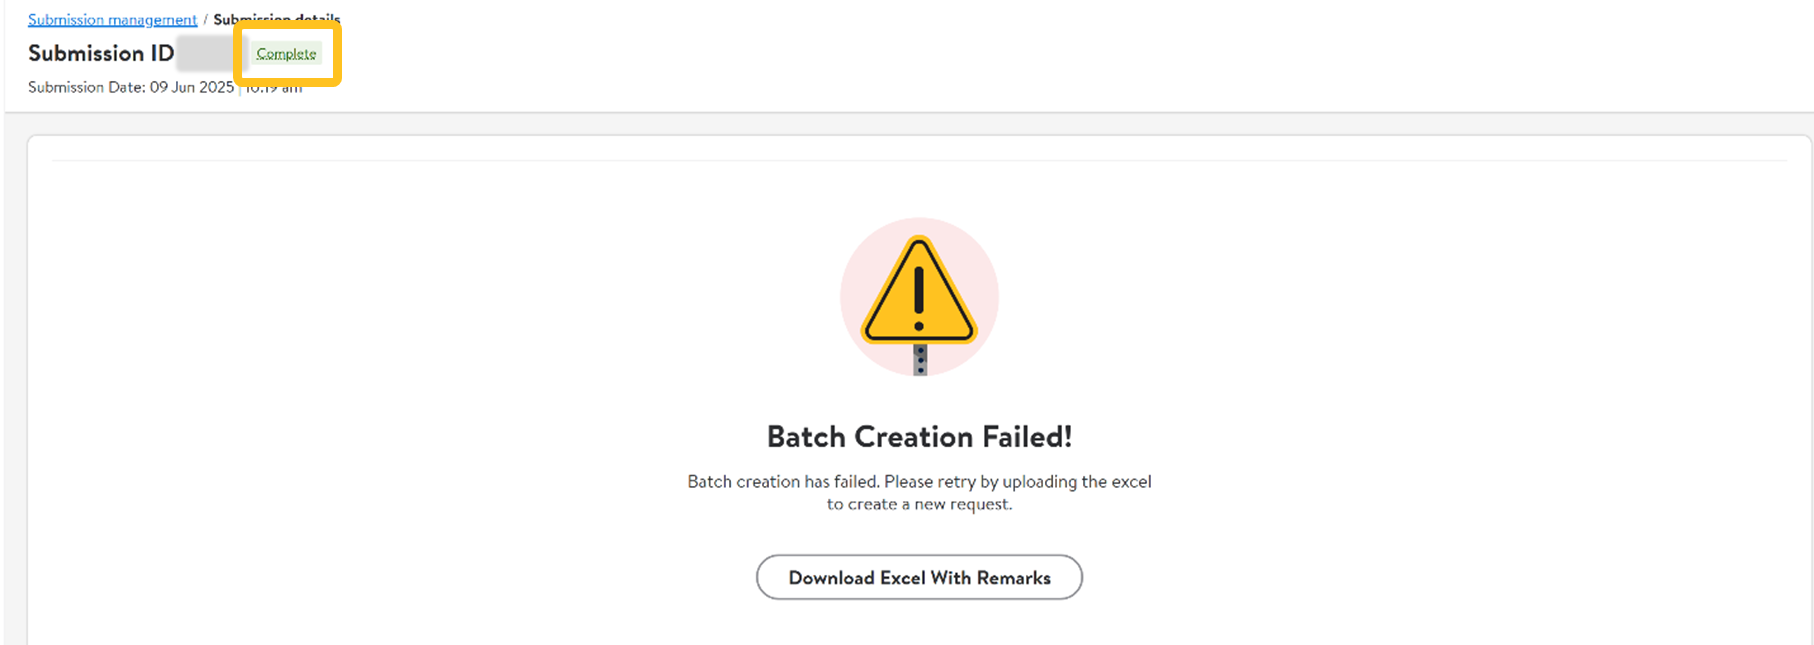
Completed
The submission has been reviewed. No further action is needed.
Validating
The system is running validations against item validity, alignment, and order details.
Rejected
Your request has been rejected by a Walmart associate or automatic threshold.
Approved
Your request has been approved. Orders are created and now active.
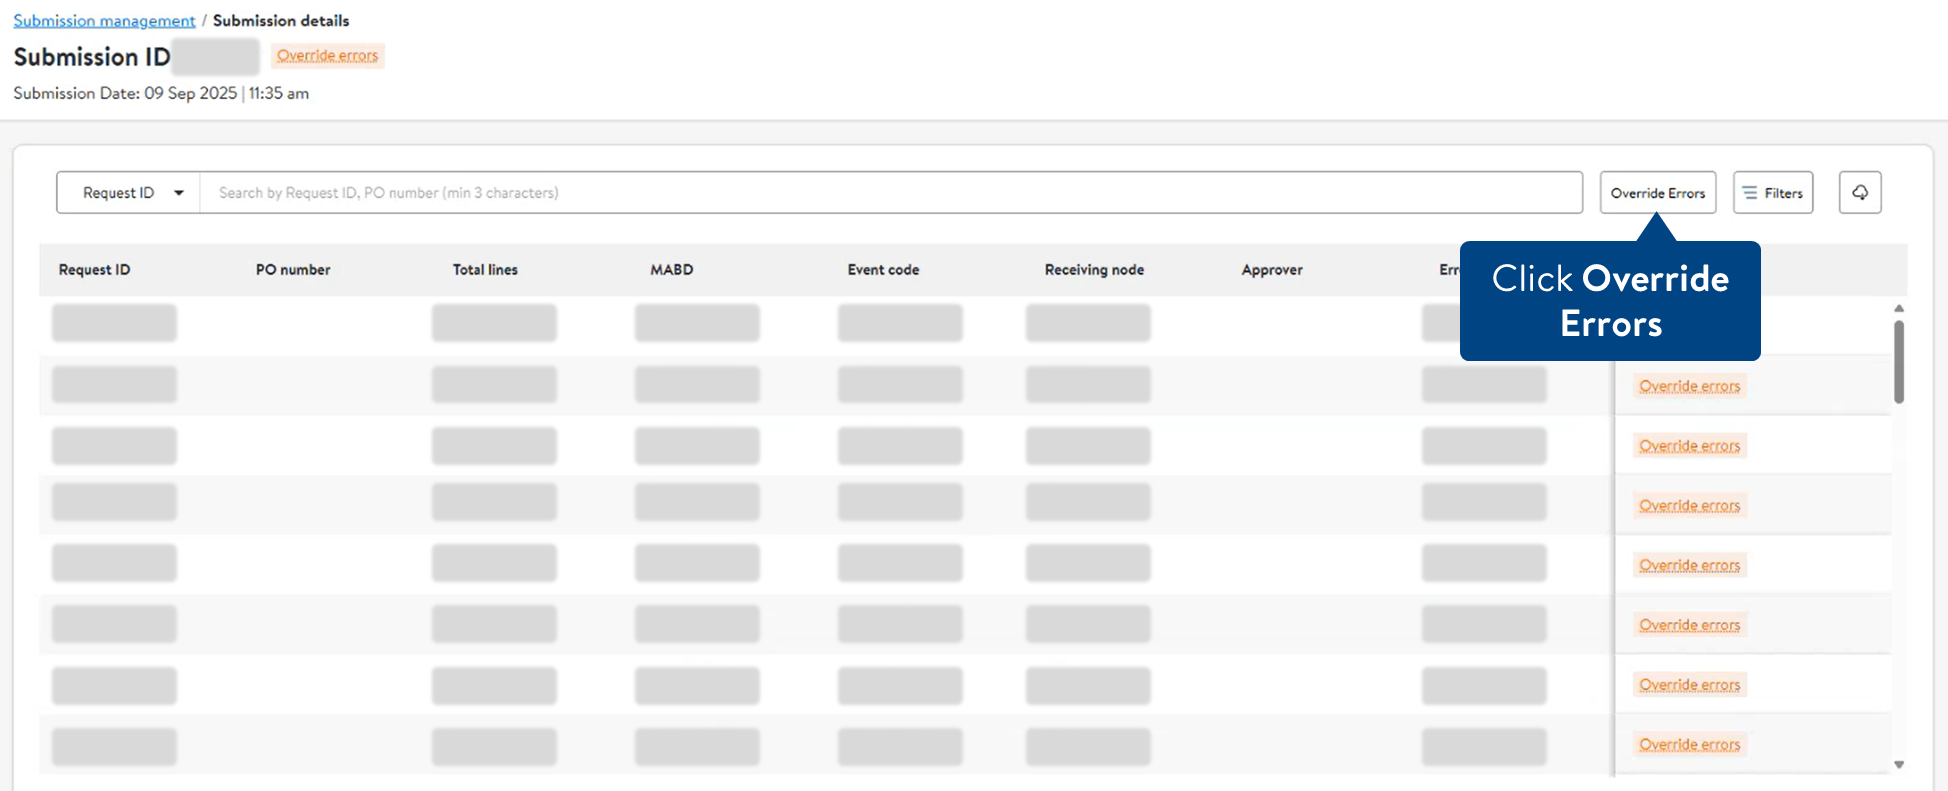
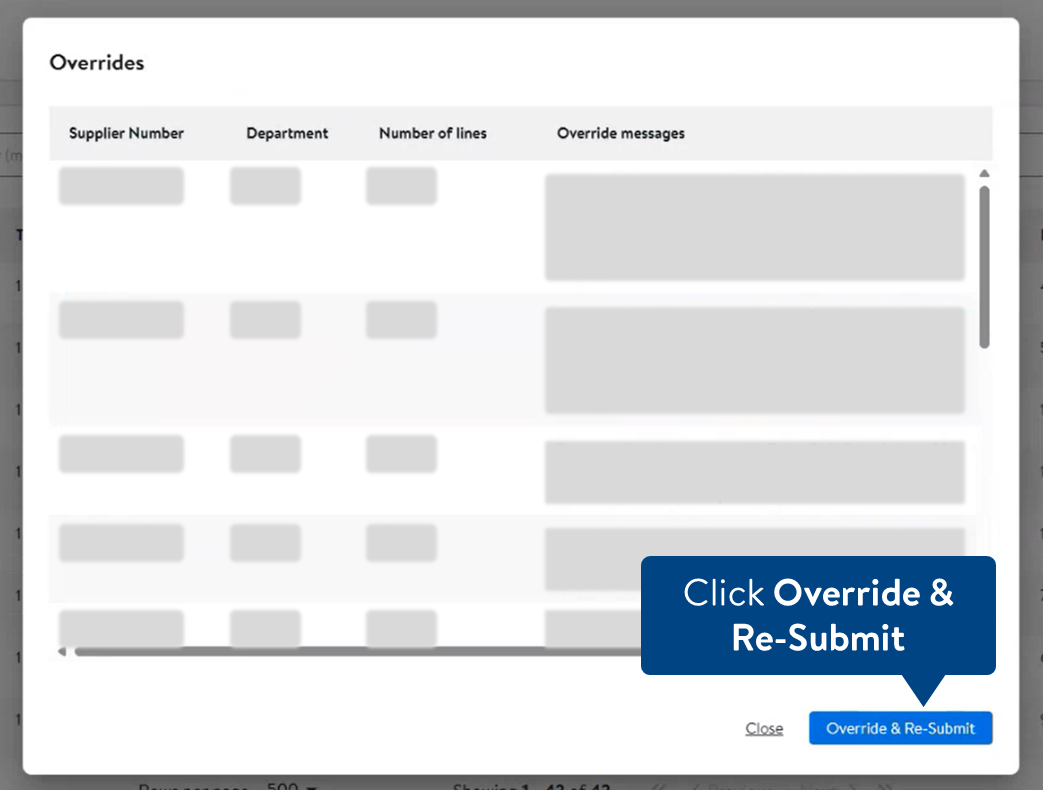
Override errors
The system has found issues that need review. Please approve or reject the overrides to continue.
For Override errors status, you can review and re-submit two ways to continue.
Click the Override Errors button for a summary view of all overrides.
Review the override messages for all request IDs, then select Override & Re-submit.
OR
Click Override errors in the Status column to view for a specific Request ID.
Review validation remarks, then select Override and Resubmit.
Troubleshooting
Troubleshooting Failed Uploads
For failed uploads, hover over the error message to see why the upload failed.
File failed to upload because the wrong template was used for the selected channel method. To correct the error, adjust the selected Channel Method to the template used.
Troubleshooting Failed Submissions
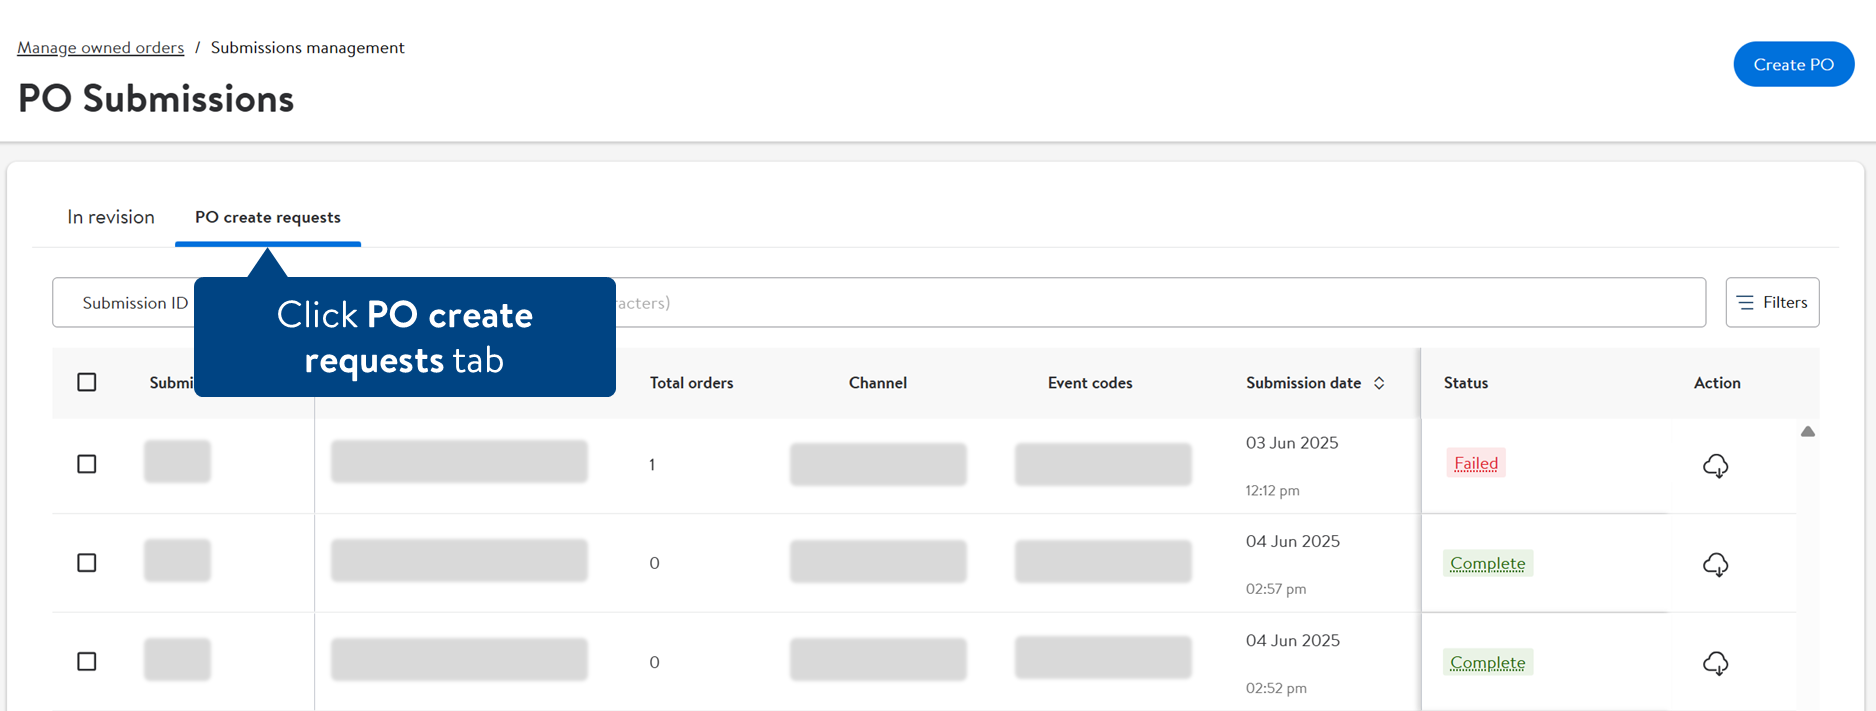
Select View Submissions.
Click on the PO create requests tab.
Click on the submission ID of the failed submission.
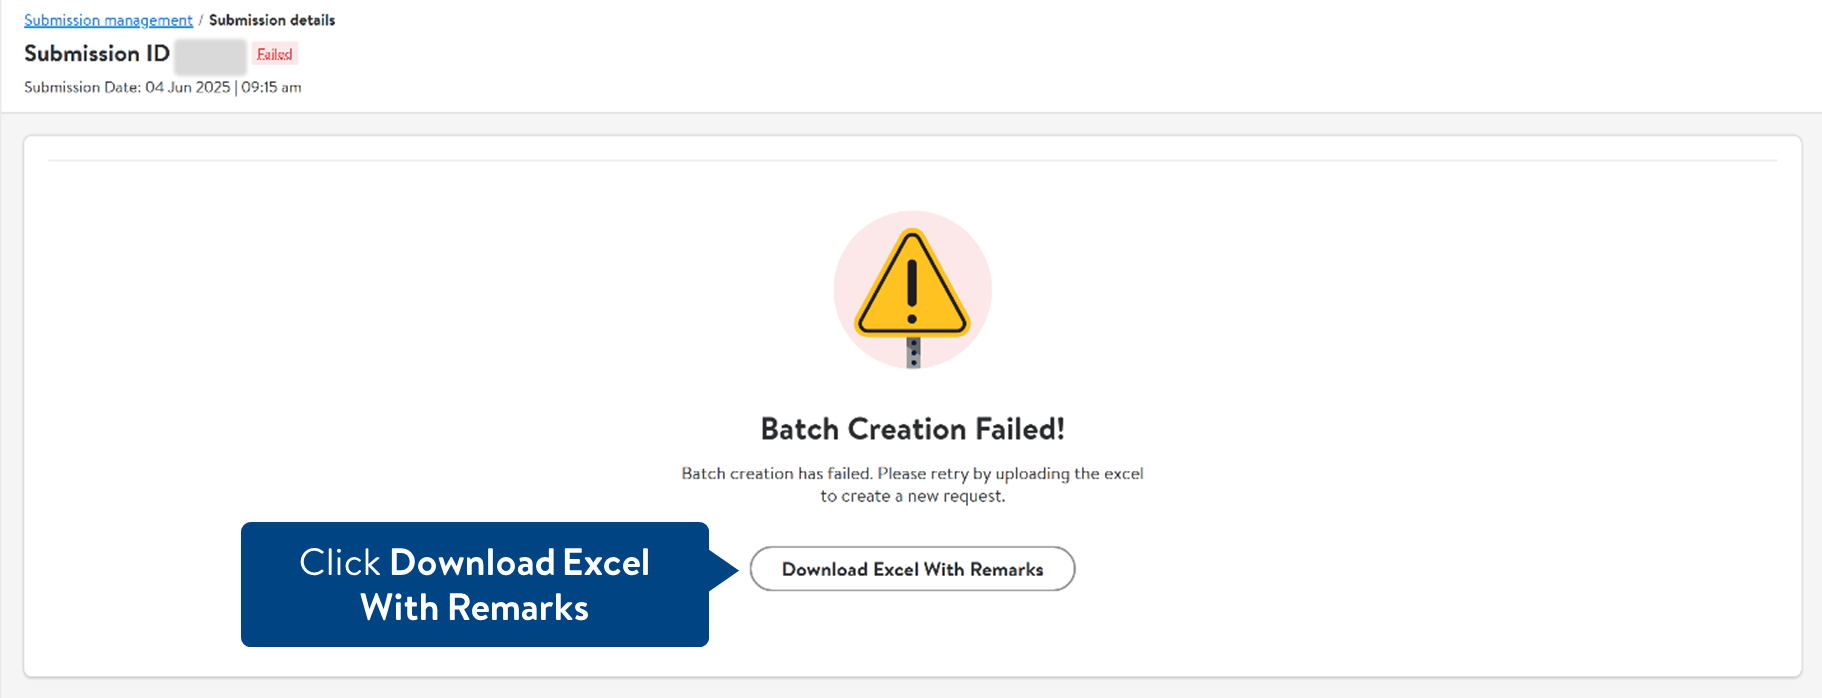
Click Downloadexcel with remarks.
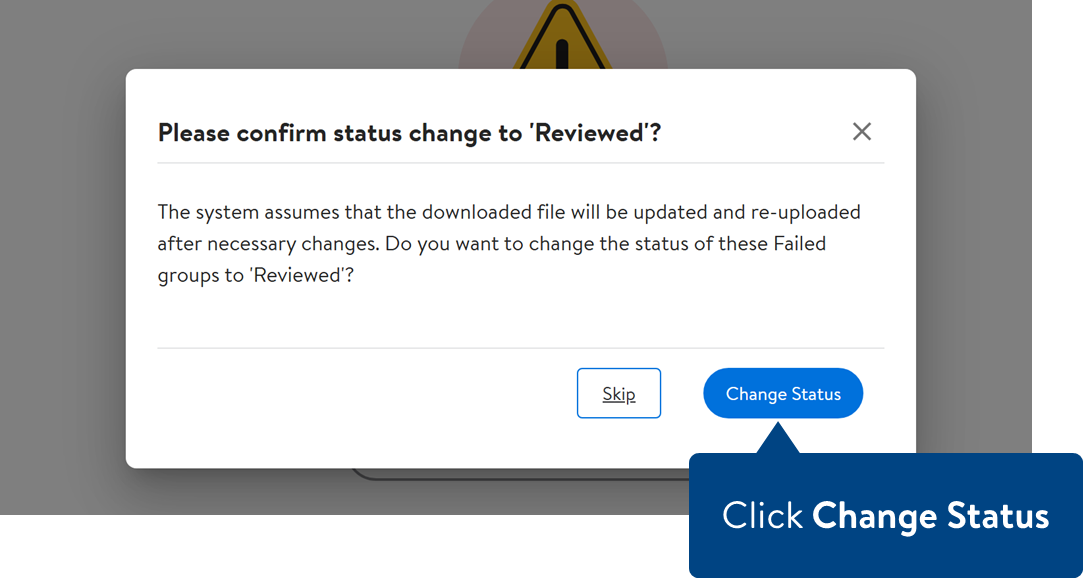
By clicking Change Status, the PO line will update to Reviewed.
The submission status will change to Complete to reflect in the system that an action has been taken to resolved the failed status.
In the downloaded file, review the errors.
In the original file uploaded, make the corrections. Once all errors have been corrected, save the file to your computer.
Click Orders > PO management in the left navigation menu to return to the Order Management page.
Click Create PO.
In PO details, select a Reason and Channel Method.
Select Choose file to upload the corrected file from your computer.
Uploading a file will automatically begin the PO creation process.
Error Messages
Error Message
Action
DSNA_Date field is mandatory & should be in MM/DD/YY format.
DNSB_Date field is mandatory & should be in MM/DD/YY format.
MABD_Date field is mandatory & should be in MM/DD/YY format.
In the original file, provide the correct date in the MM/DD/YY format, save and follow PO creation process.
Co-managed 6-digit vendor number not matching with item's vendor number.
In the original file, remove line or update with item number, save and follow PO creation process.
The division is invalid for this store., Incorrect Store/Club type.
In the original file, remove line or update with valid Store/Club, save and follow PO creation process.
Invalid Event
Event Code_String field is mandatory.
EVENT ENTERED IS LESS THAN 10 CHARACTERS
In the original file, provide an Event Code. Event Code requires minimum 10 characters, save and follow PO creation process.
Receiving Node is null from Enrich response. Alignment not found.
Invalid distribution location entered. In the original file, provide the correct distribution location, save and follow PO creation process.
We've faced a technical error while processing this group. Please re-upload a fresh request for this order.
Re-upload original file via the PO creation process.
View and Download POs
If you have both Owned and DSV orders, you will see two tabs. Click the Owned tab to view data for all Owned orders linked to your account.
If you only have Owned orders, you will not see these tabs. The page automatically defaults to all Owned orders linked to your account.
You can view Owned orders for all 6-digit and 9-digit agreement numbers or select specific numbers from the Supplier IDs filter.
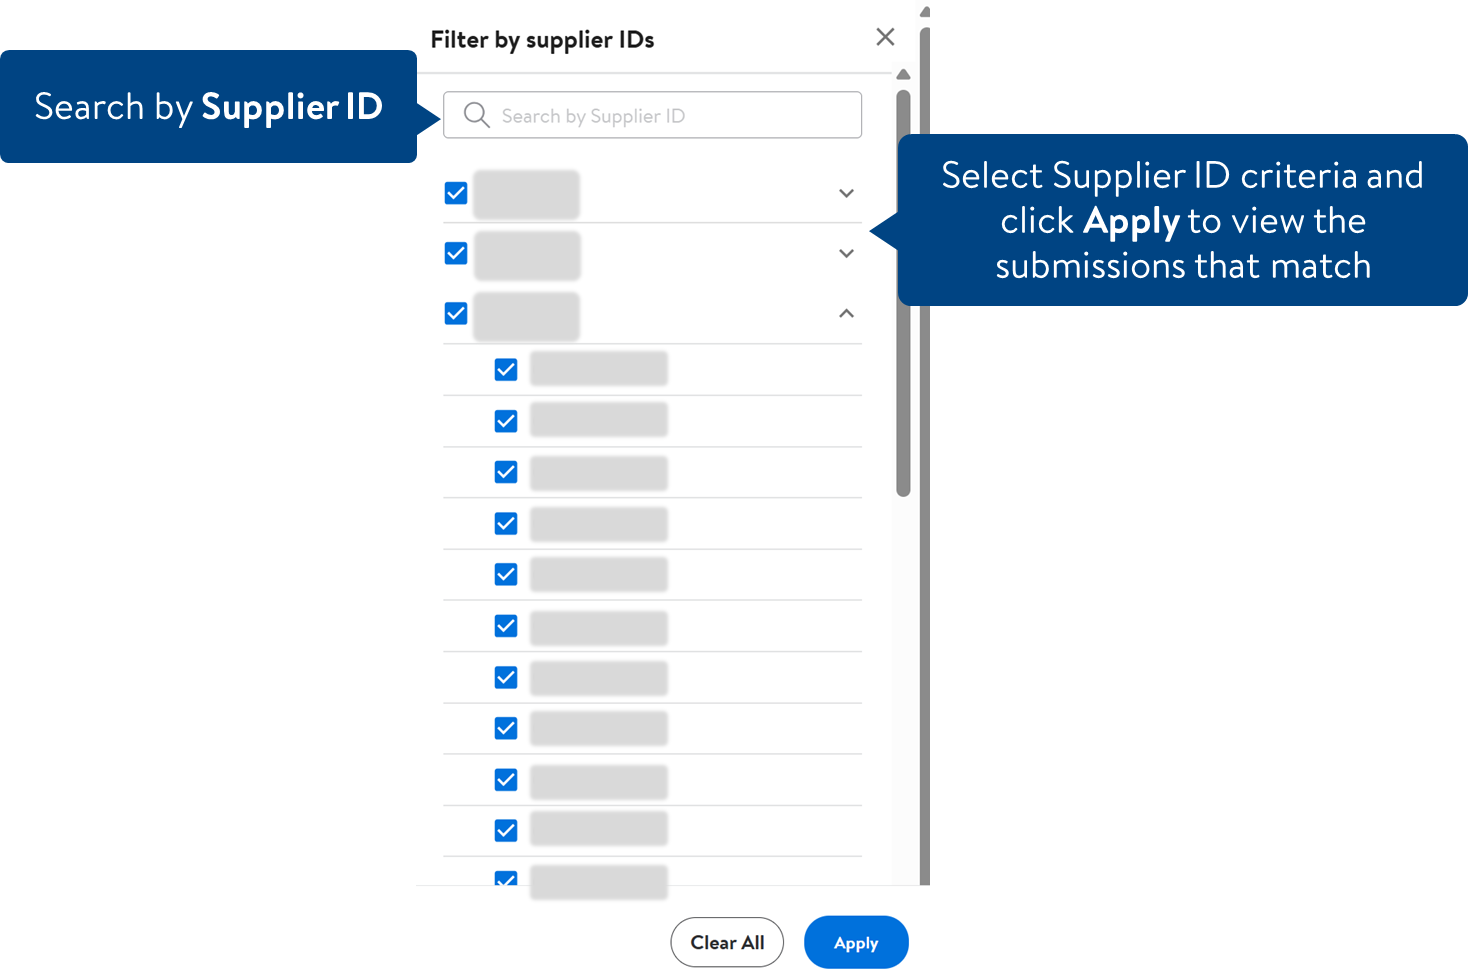
Search by Supplier ID, select/deselect 6-digit agreement numbers, or click the drop-down next to the 6-digit number to select 9-digit agreement numbers.
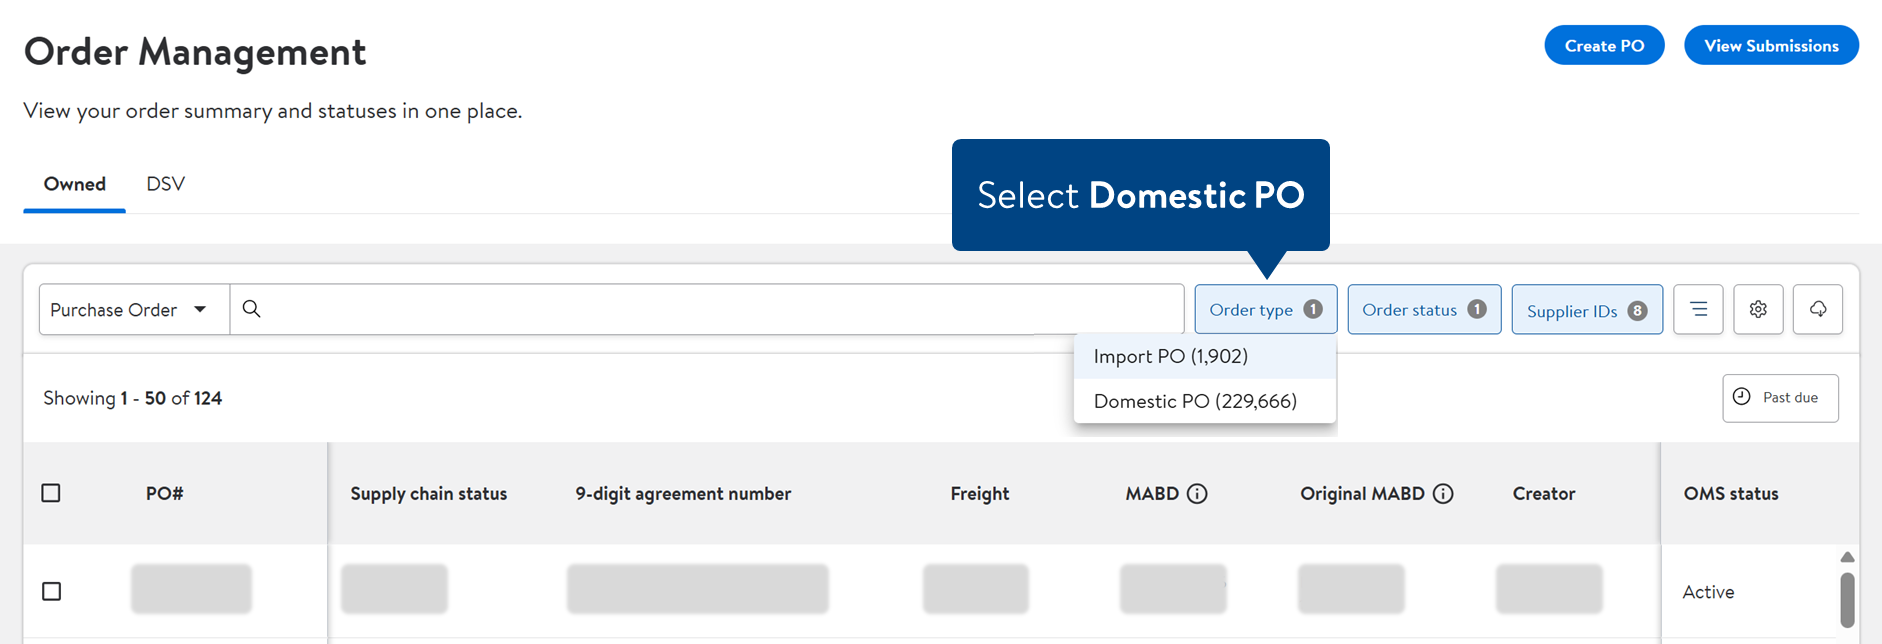
For domestic suppliers, select Domestic PO from the Order type filter.
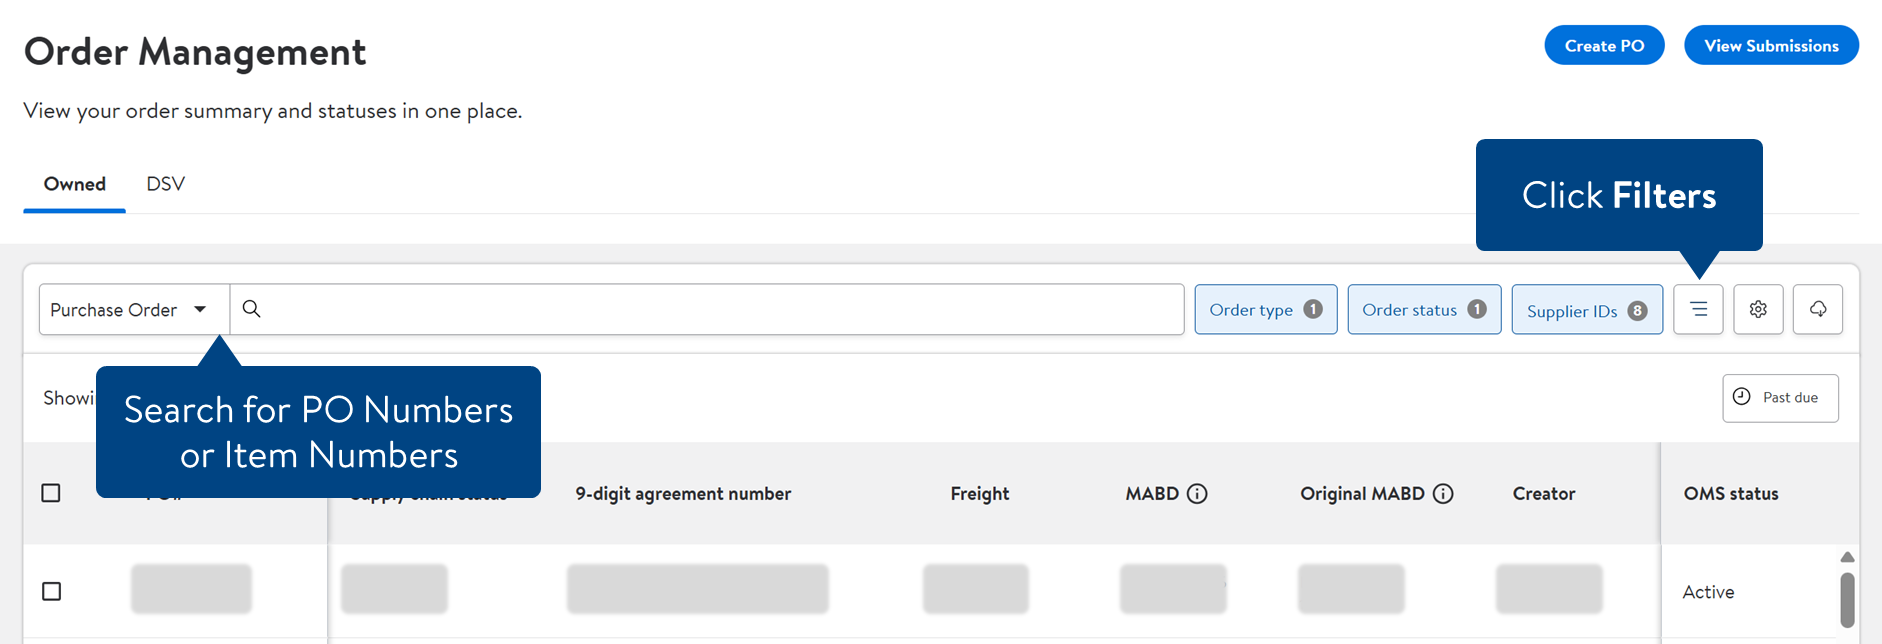
You can click the Search bar to search by PO Numbers or Item Numbers, or the filter button to narrow down your list of POs.
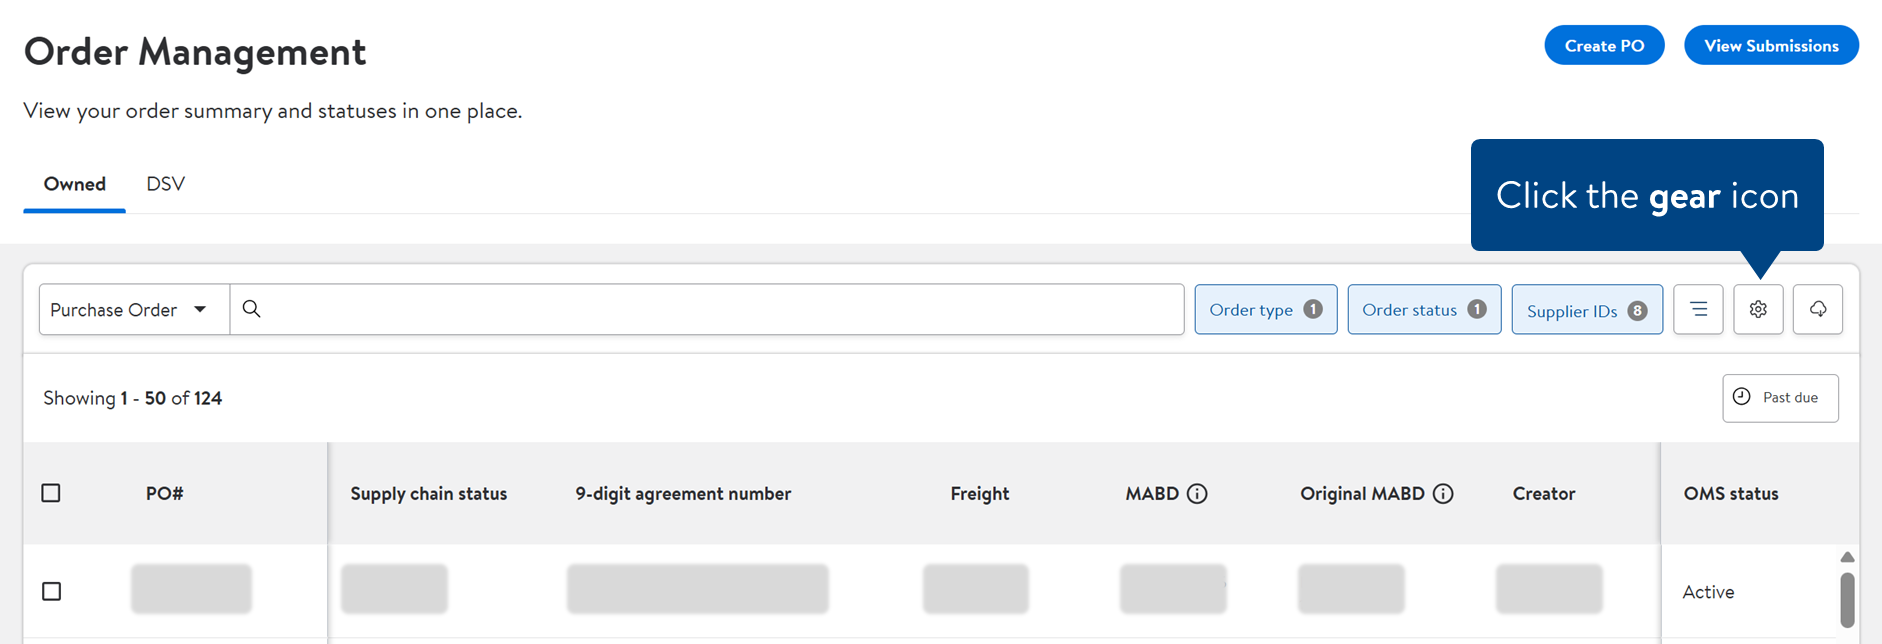
Click the gear icon to select the attributes you want to view in the table and the order in which they appear.
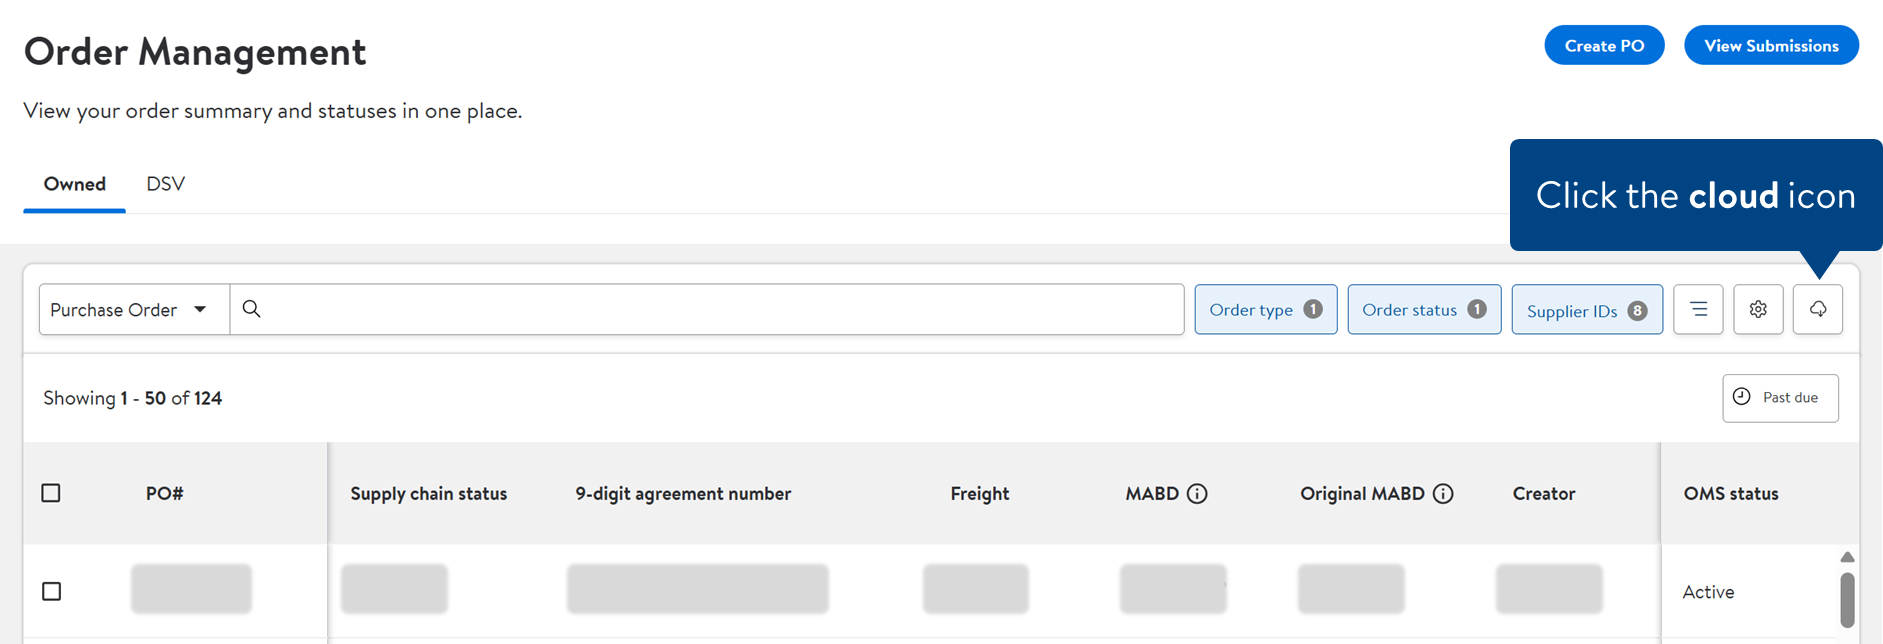
To view all of the data in an excel file, click the cloud icon to download.
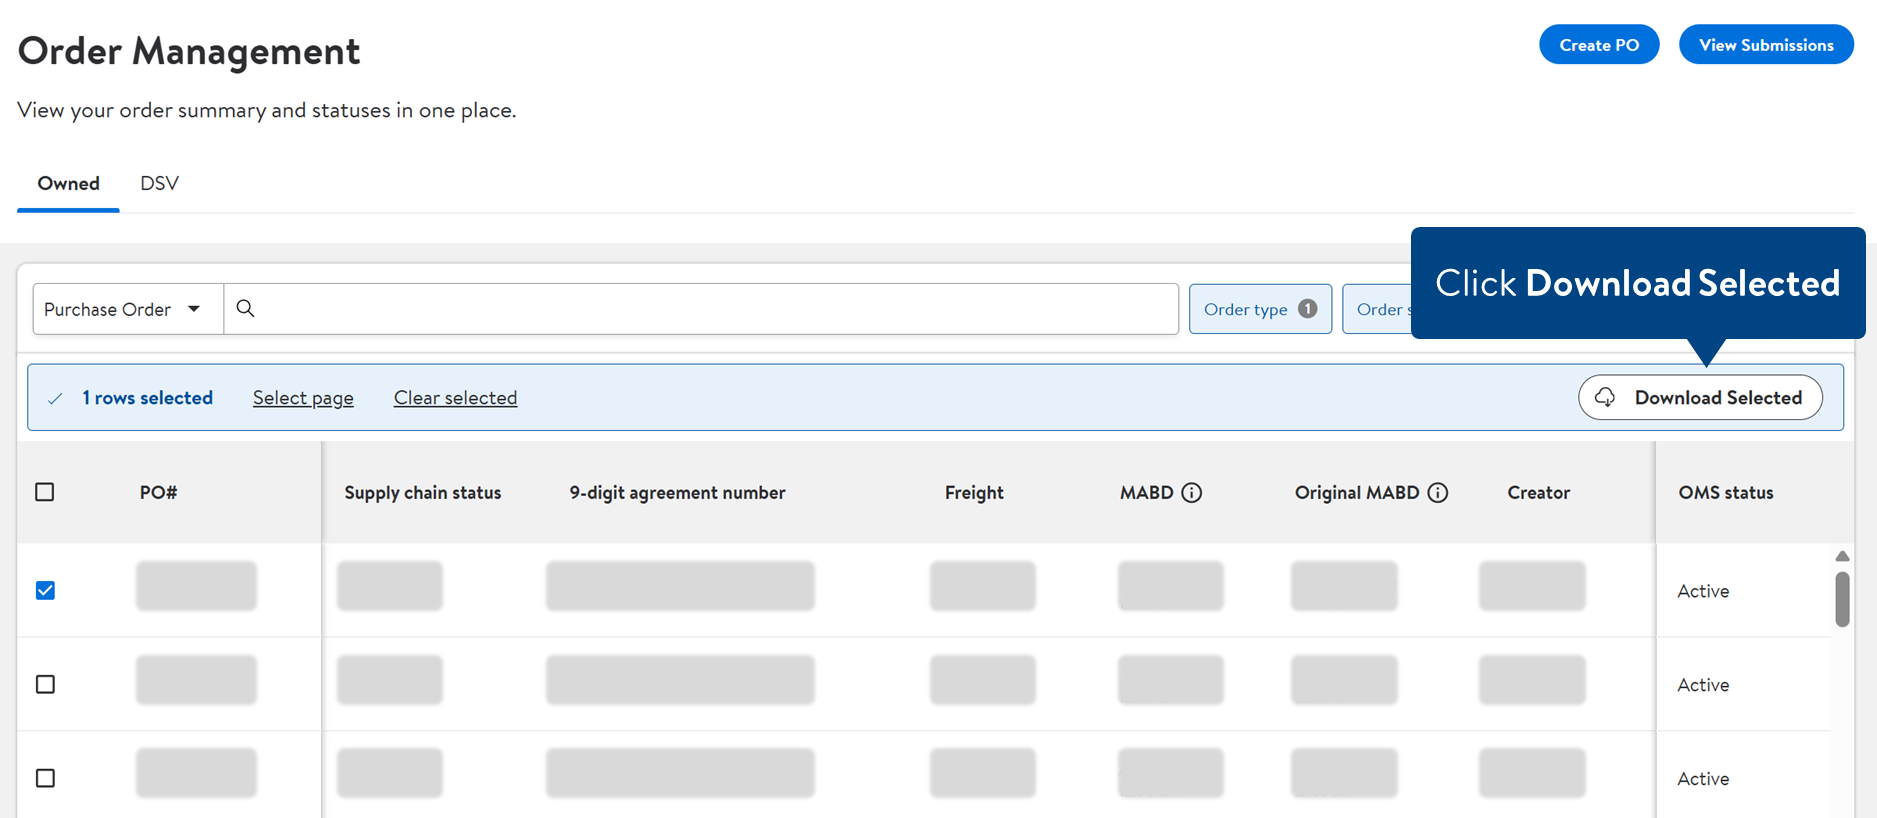
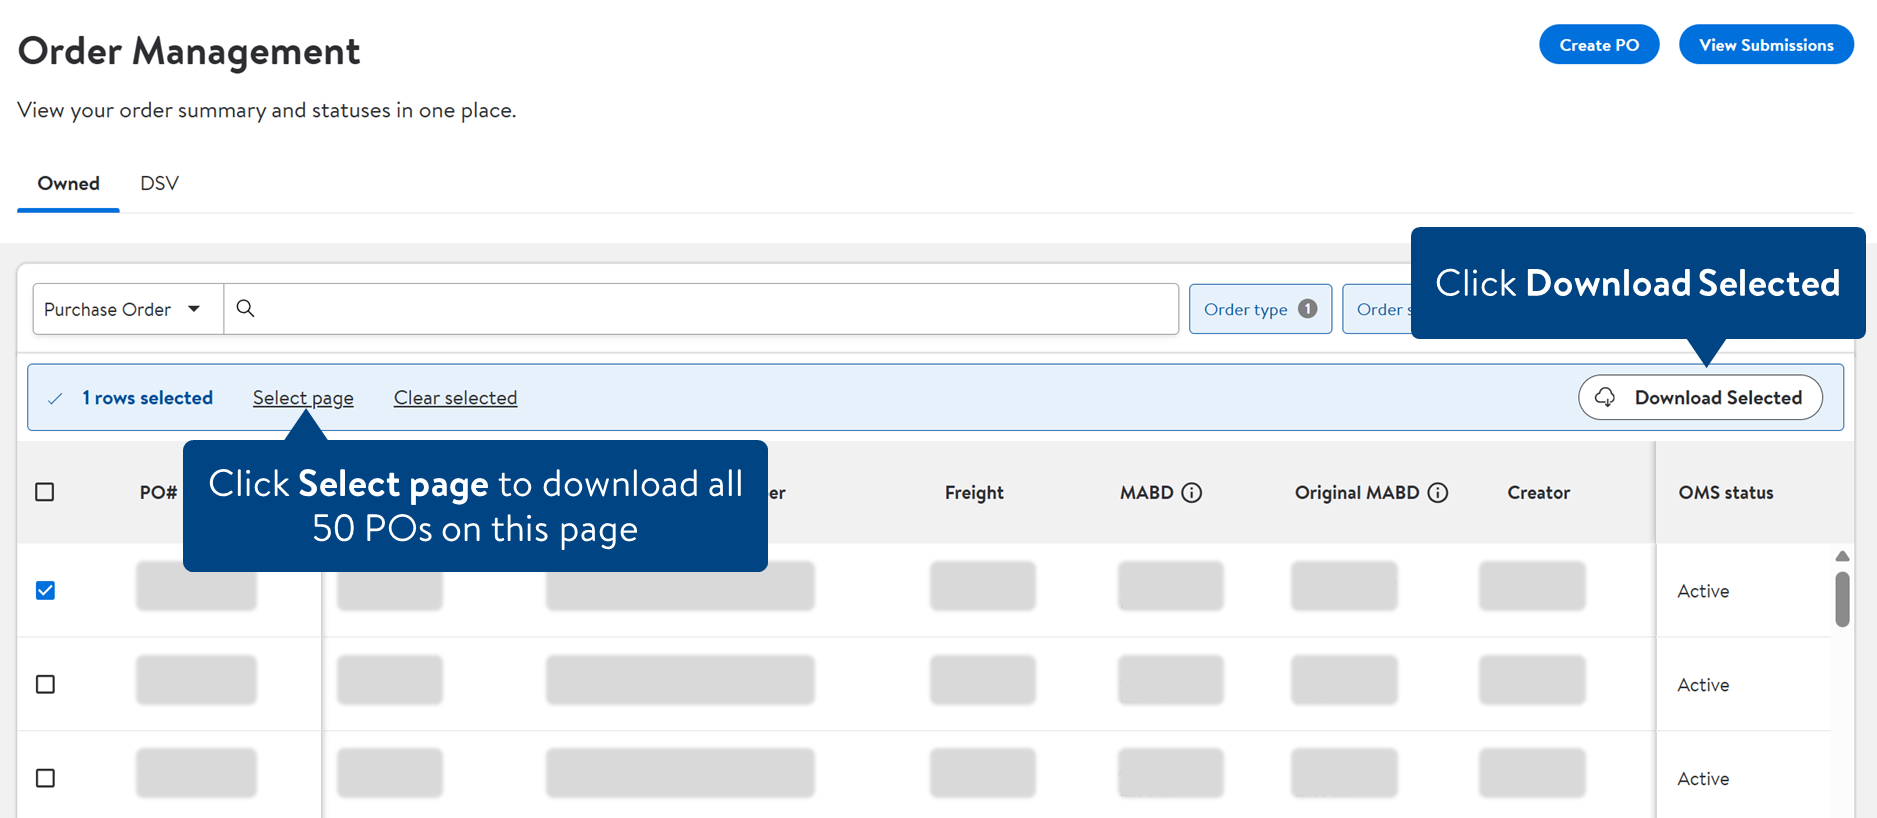
To download selected PO data, click the check boxes to select individual POs (up to 25). Then, click Download Selected.Or, click Select page to select all POs on the page. Then, click Download Selected.
Click Clear selected if you no longer want to download the selected POs.
Have Questions or Need Help?
If you experience any issues viewing your orders, please click "Help" in the top navigation menu and select "Manage tickets" to file a case ticket. Or, select "Chat" to get real-time help from our chat bot or click "Search articles" to search Supplier One HelpDocs.
Make sure to select the issue type Orders and Shipping.


 Use suggested date is based on supplier lead times.If Use suggested dates is selected, do not populate DNSB, DNSA and MABD columns in the template.
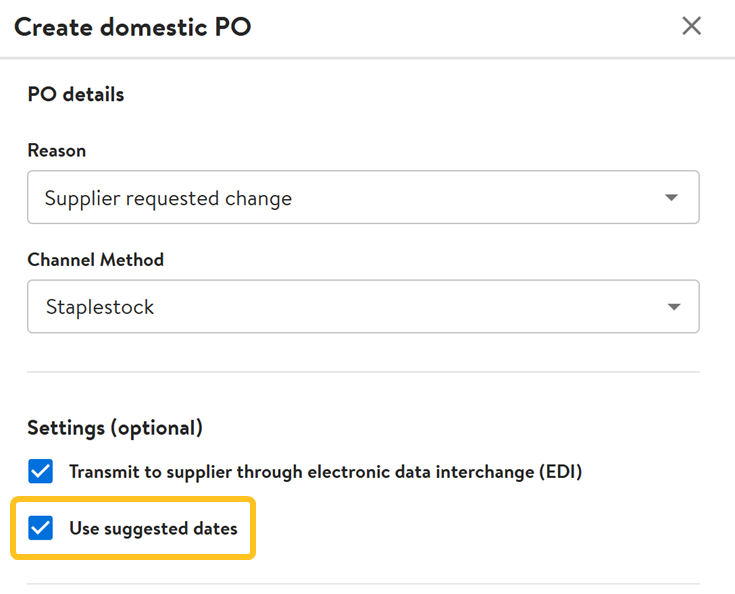


 If you only have Owned orders, you will not see these tabs. The page automatically defaults to all Owned orders linked to your account.
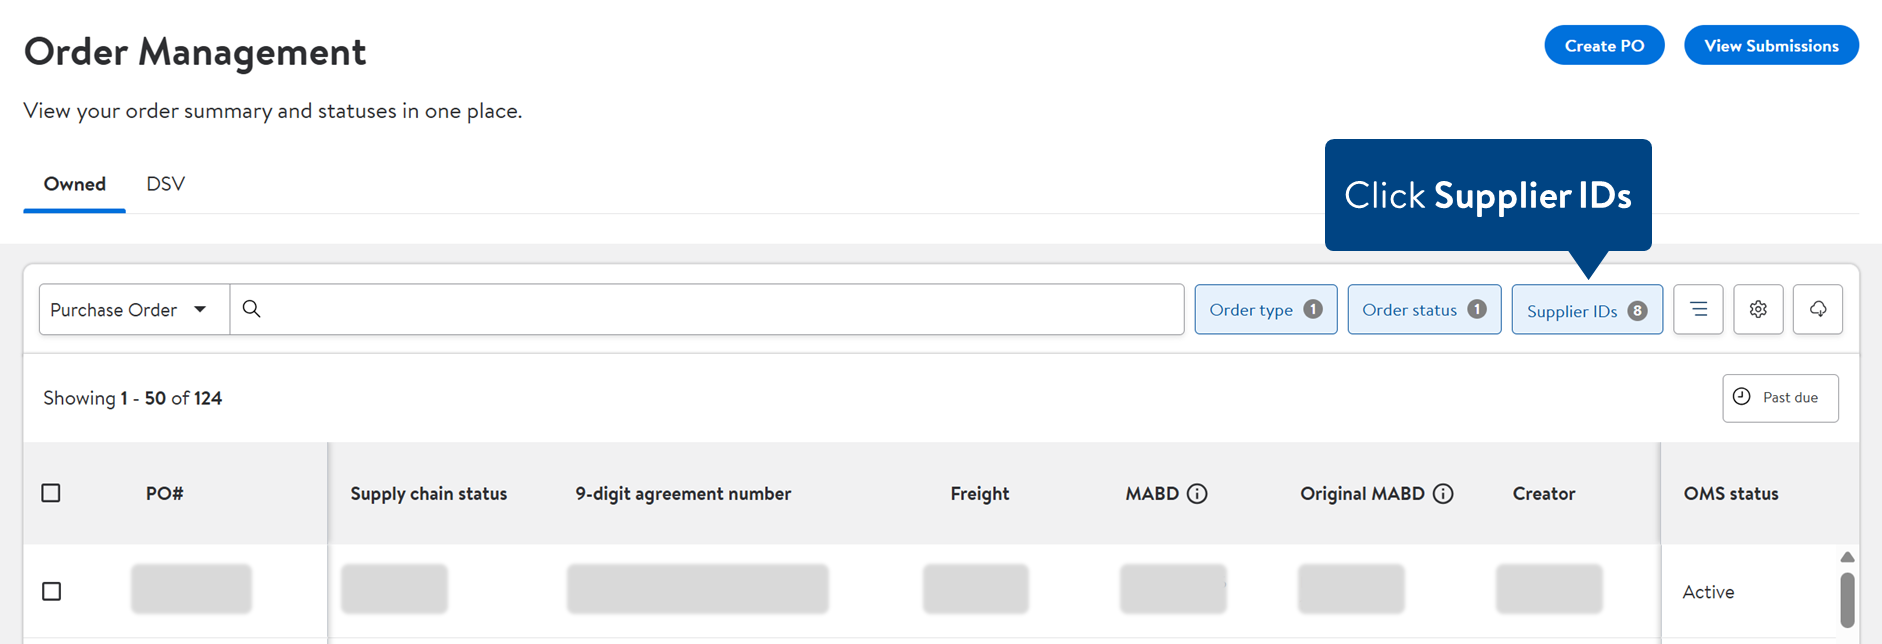
 Click Clear selected if you no longer want to download the selected POs.