Upload Images for Multiple Items
Maintenance is not yet supported in Supplier One for: Assortments, Import Shippers (General Merchandise), Pharmacy, and Fees. Please continue using your current processes (e.g., legacy workflows or systems).
Easily upload images for multiple items directly into Supplier One—no template or image URLs needed. (If you prefer to provide image URLs, you can export and complete a maintenance spreadsheet for Product Content & Site Experience.)
- Before you upload images, make sure they meet the recommended requirements.
- If you use Workhorse to upload Fashion imagery, please continue to use your existing processes.
To upload bulk imagery, you need to organize images into folders on your desktop. If you edit or upload images for selected items in the catalog, we'll create folders for you.
Create and Upload Folders from Your Desktop
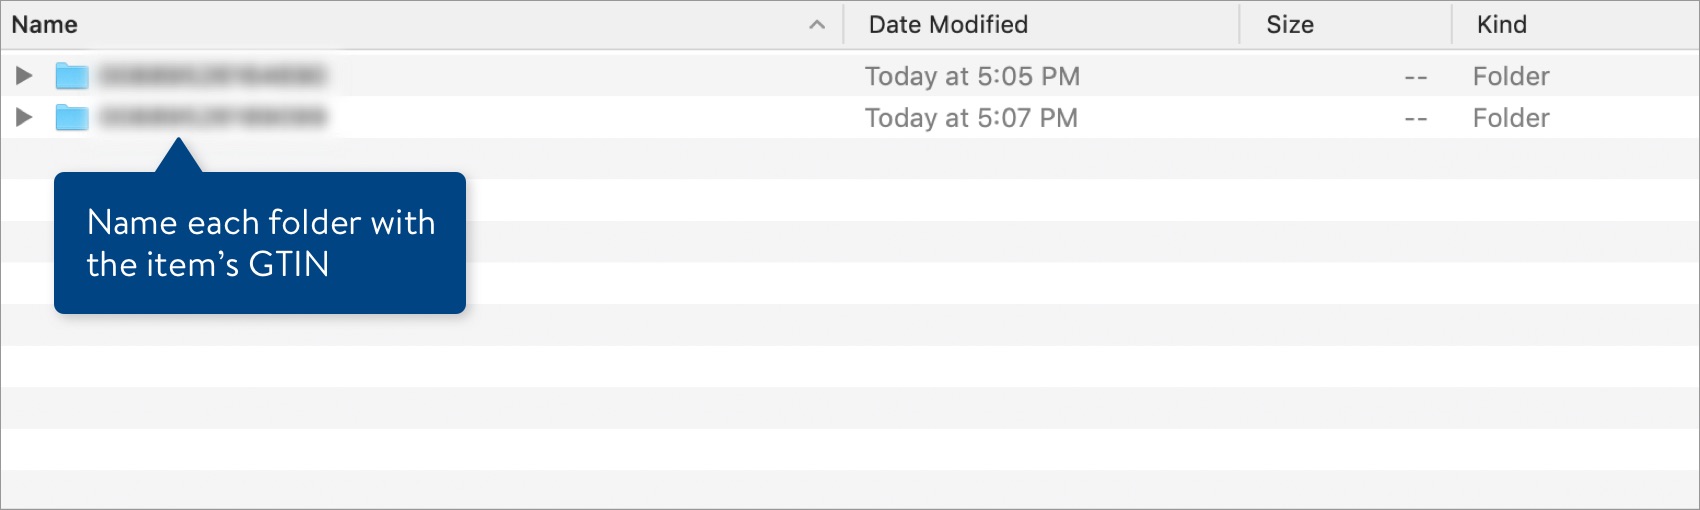
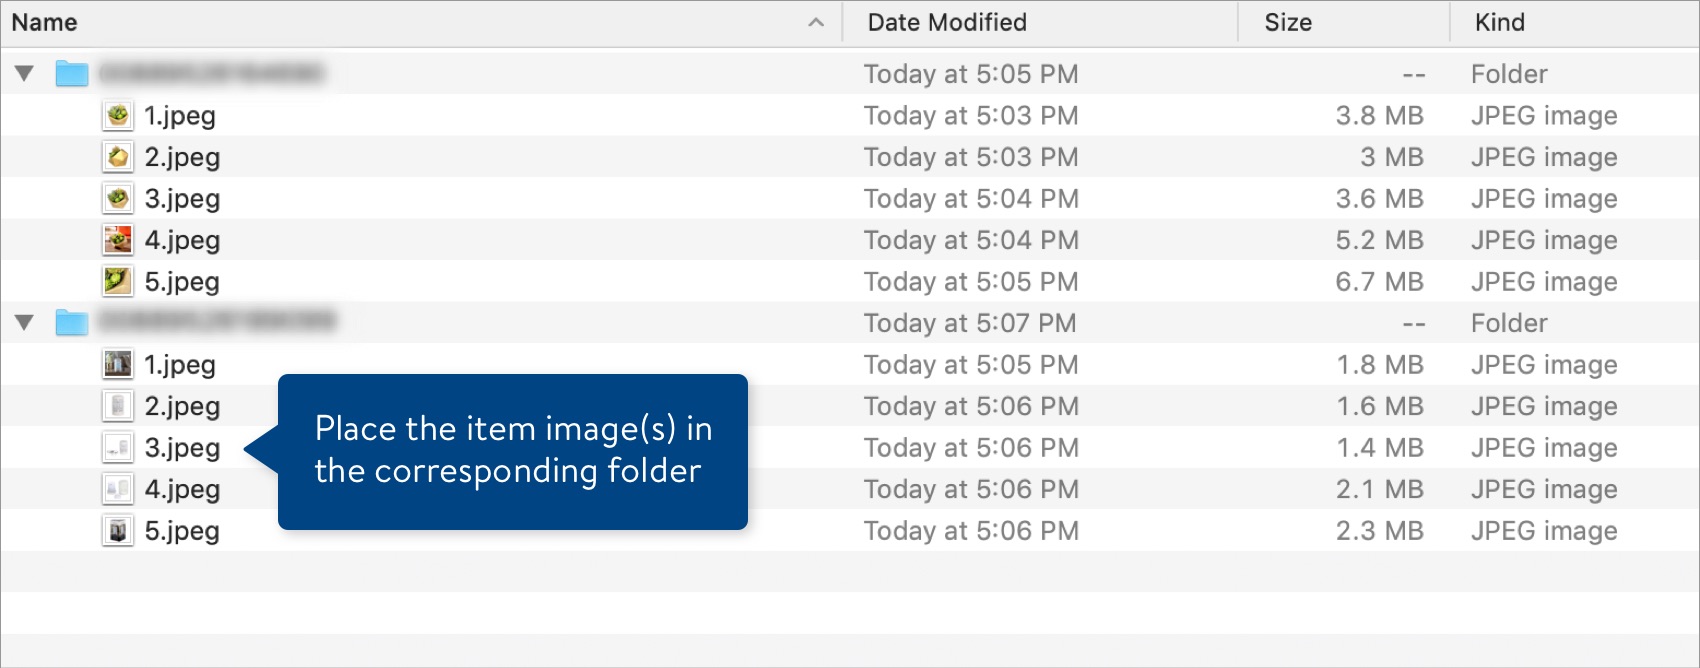
- Create a new folder for each item you are uploading images for. Name each folder with the item's 14-digit GTIN.
- Place the item image(s) in the corresponding folder.
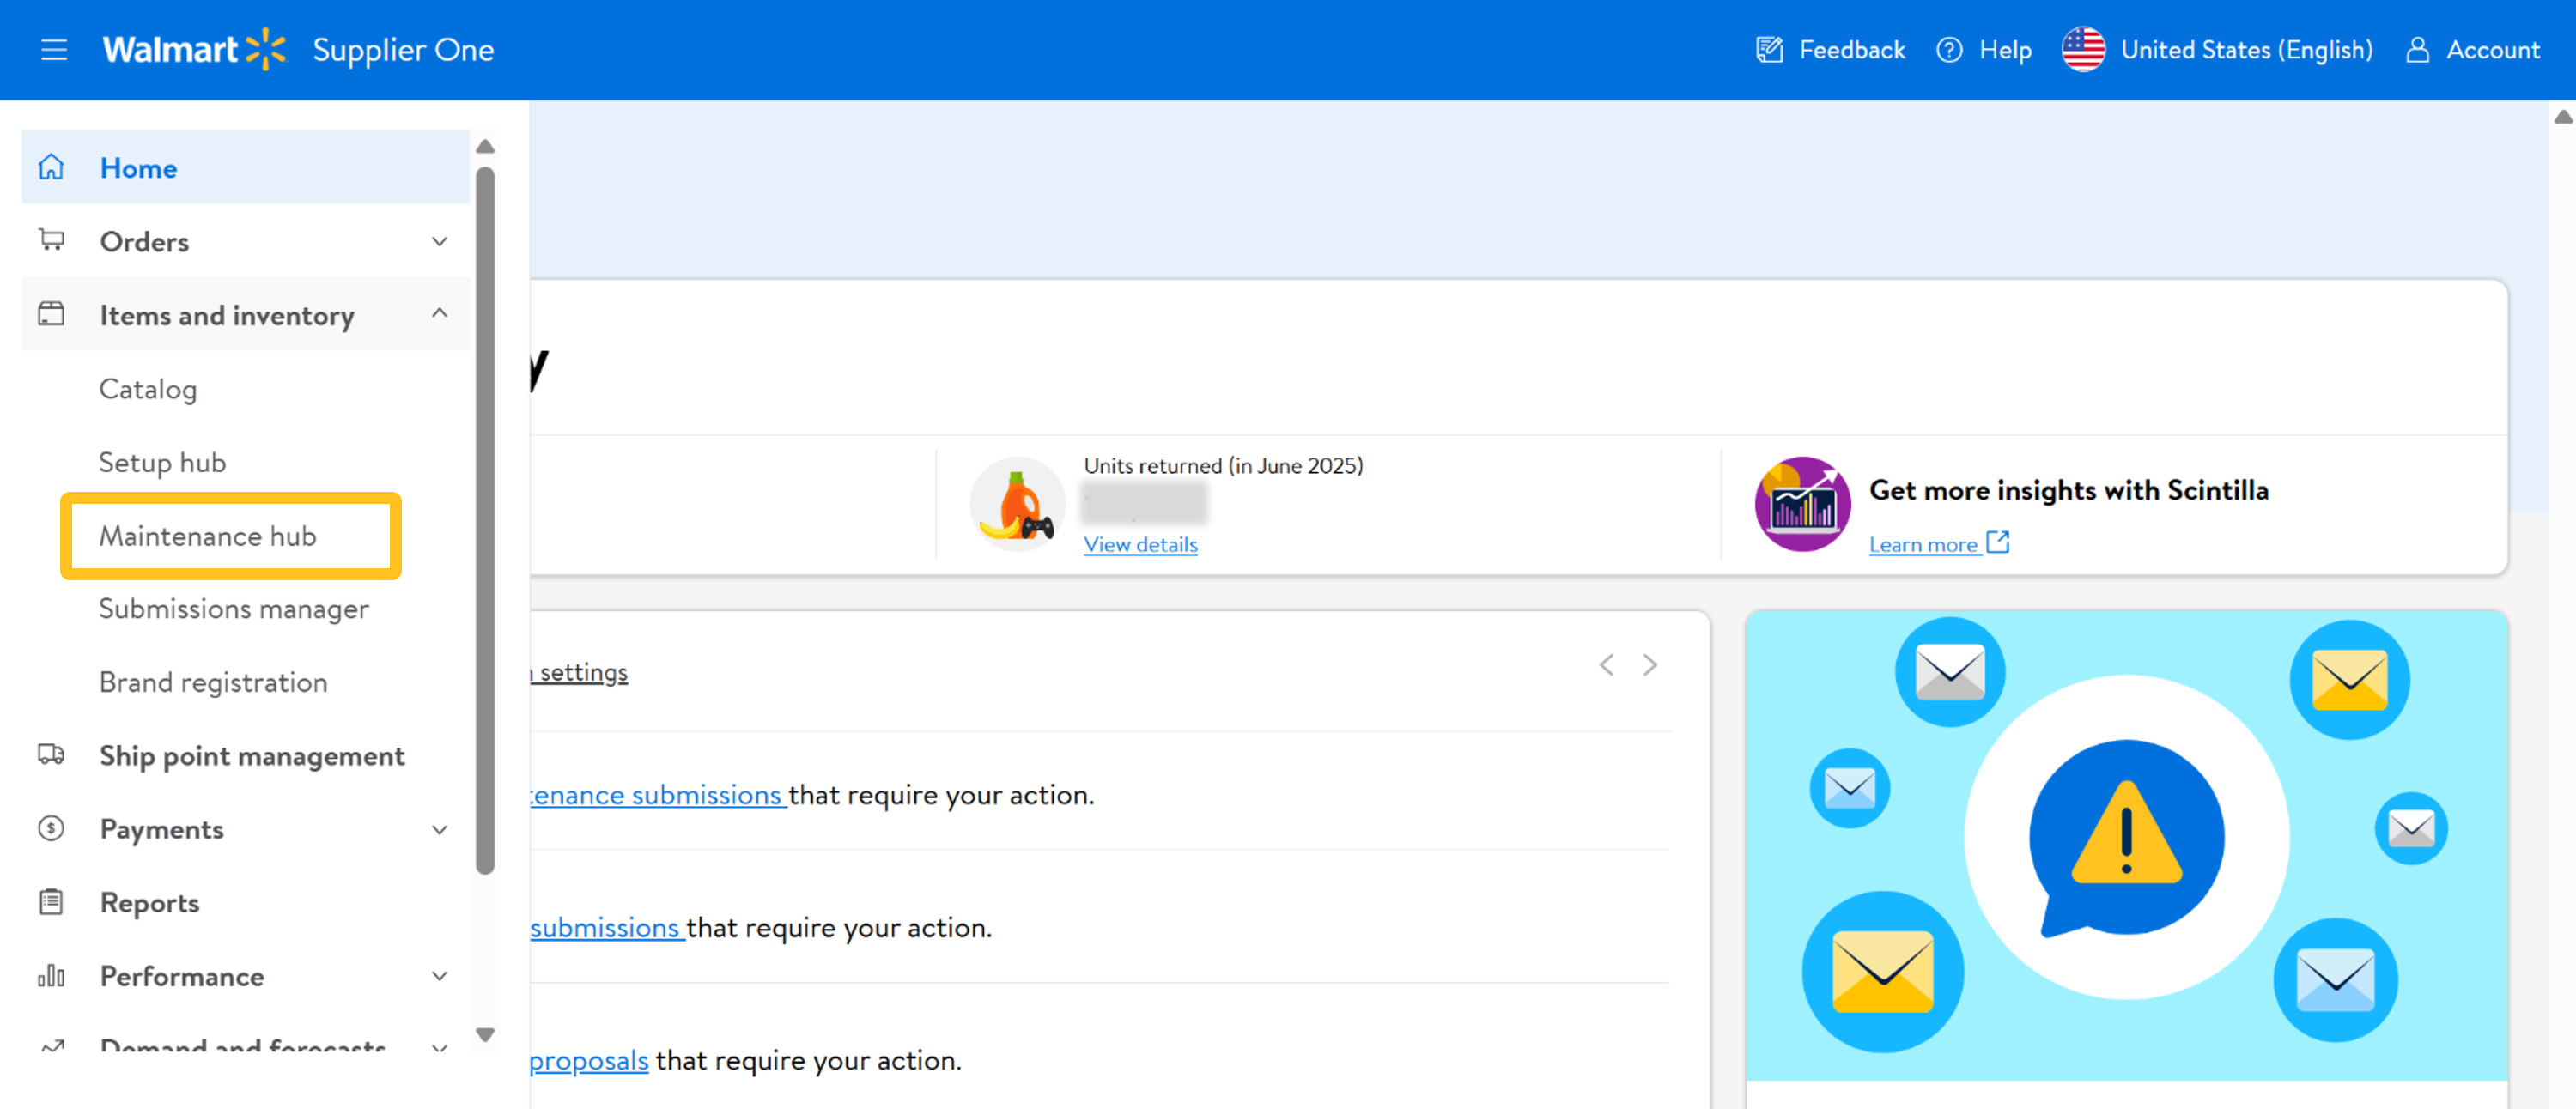
- In the left navigation menu of Supplier One, click Items and Inventory and select Maintenance Hub.
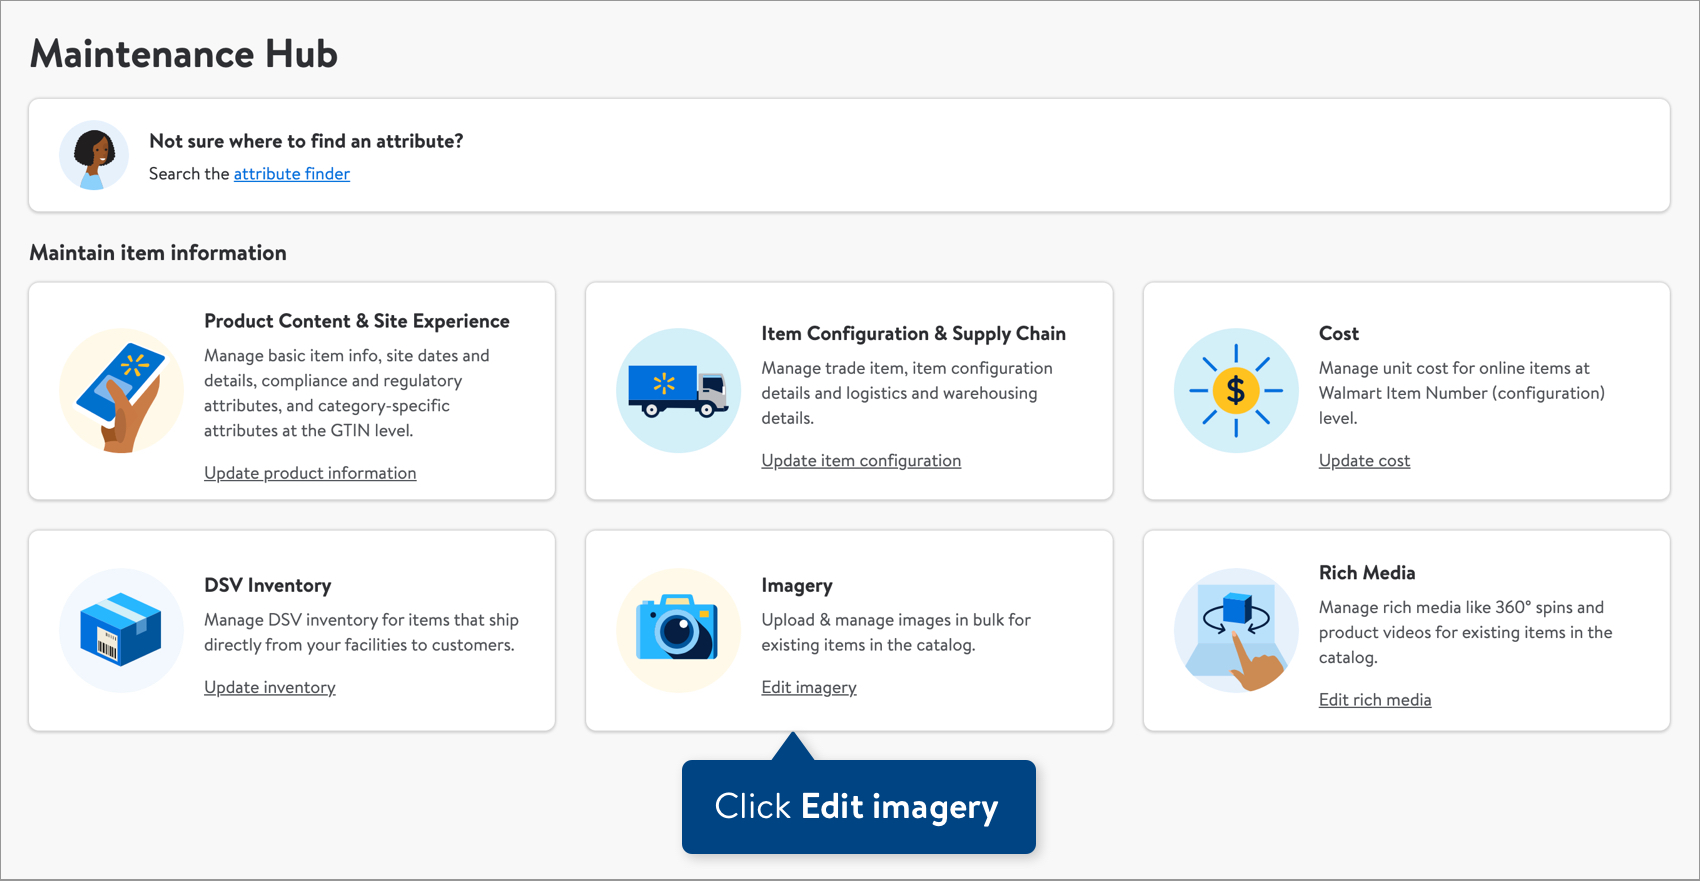
- On the Imagery tile, click Edit imagery.
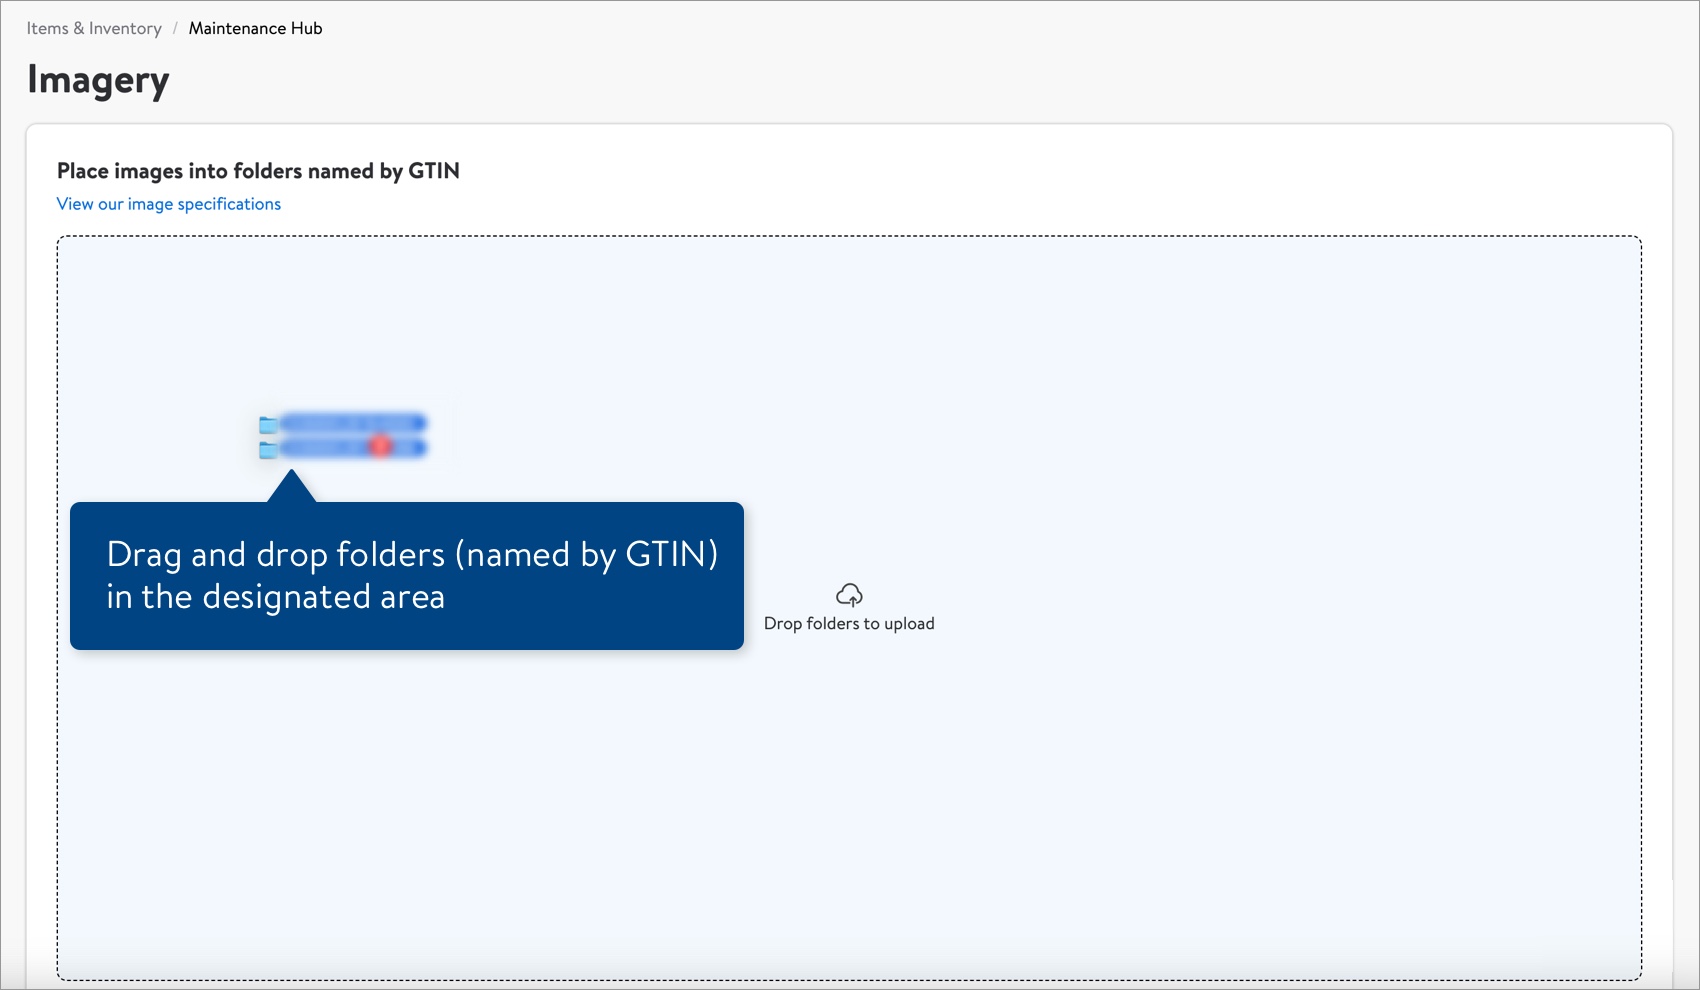
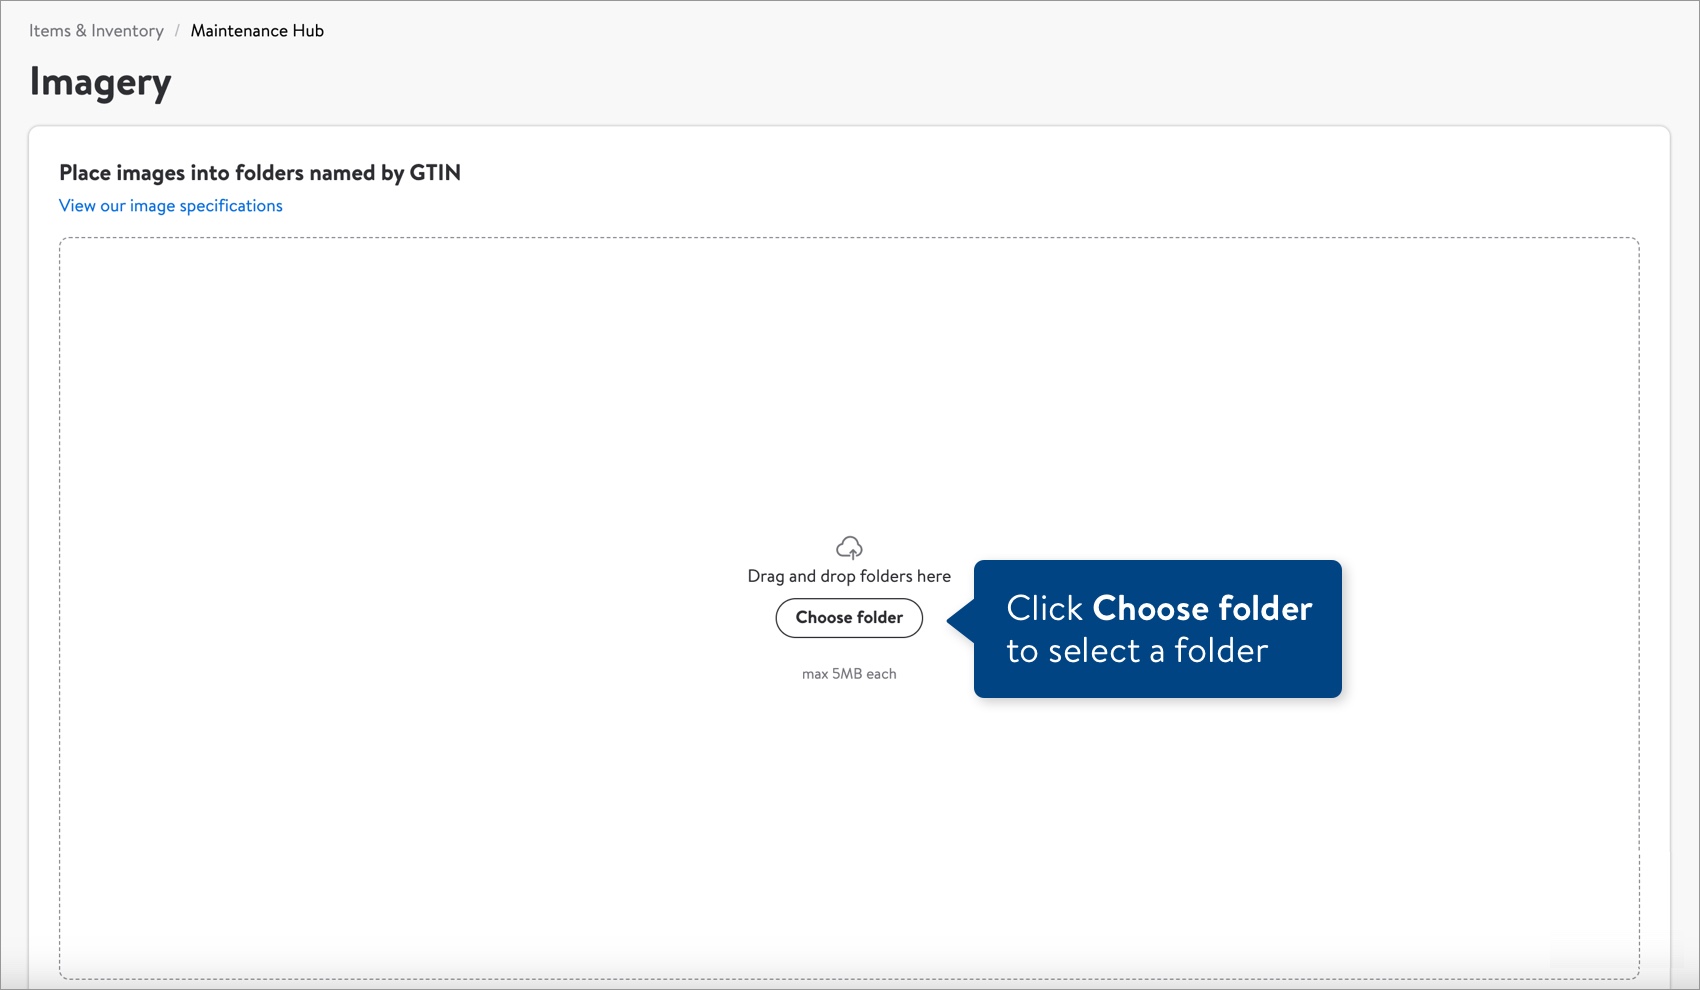
- There are two ways to upload your folders of images:
- Drag the folders onto your screen and drop them anywhere in the designated area.
- Click Choose folder to select a folder on your desktop.
 To select multiple folders of images at the same time, place them in a single folder (it can be named anything except for a GTIN).
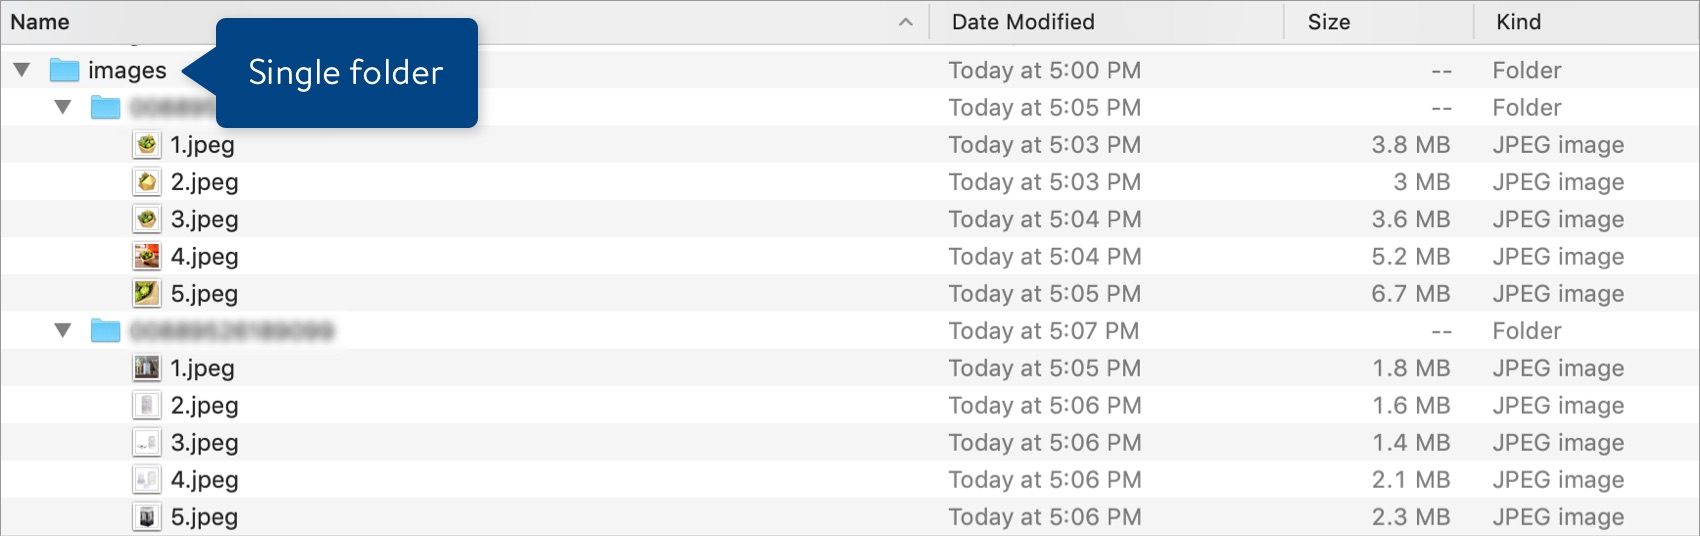 Once you've selected the single folder, click Upload. Your browser may pop up a message for you click Upload a second time.
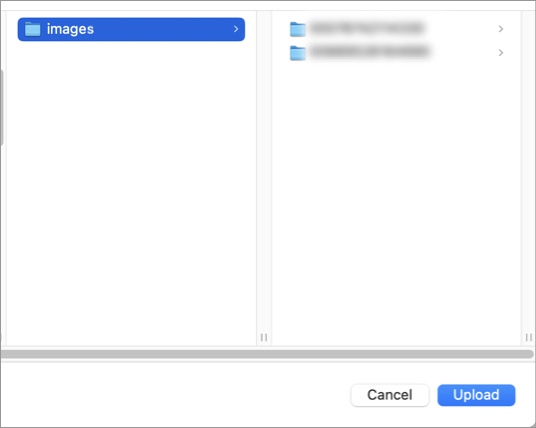
- Drag the folders onto your screen and drop them anywhere in the designated area.
Managing and Submitting Your Images
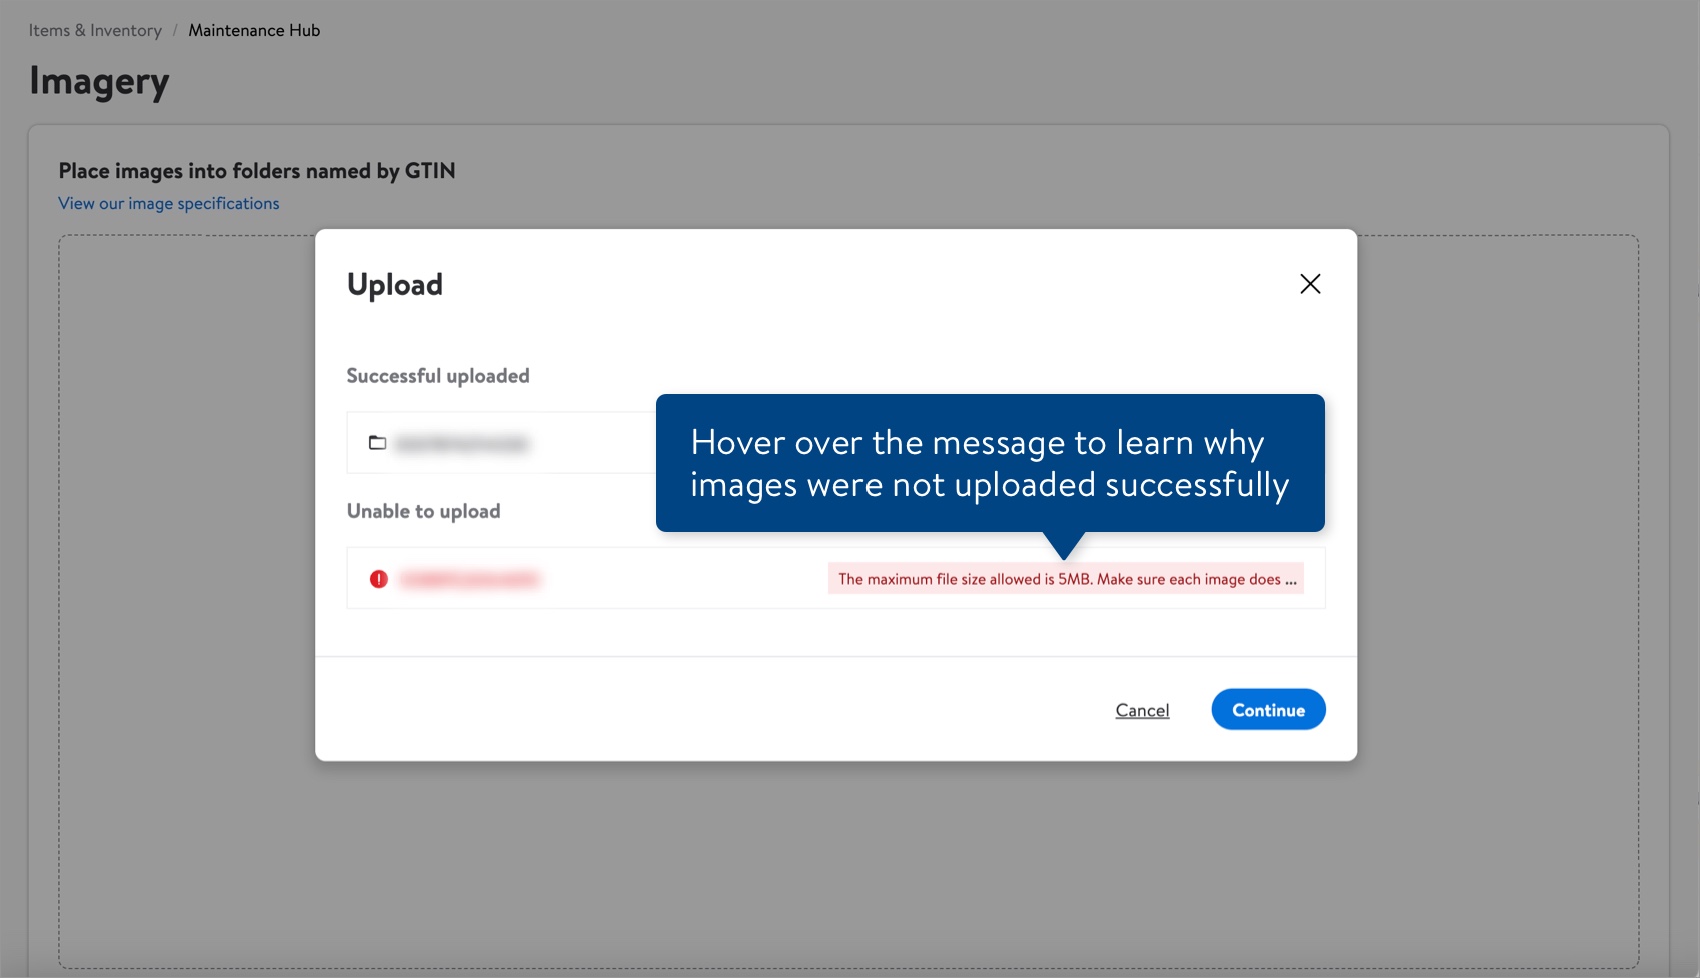
- We'll let you know if there are any issues with your upload (e.g., no record of the item, file format not supported, file size too big/small, duplicate naming, not the content owner, GTIN doesn't match any of your Supplier IDs). Click Cancel to fix the errors before trying your upload again, or click Continue to continue with the successfully uploaded images.
 If any items have existing images, you will need to select Add or Replace. Then, click the Save button.
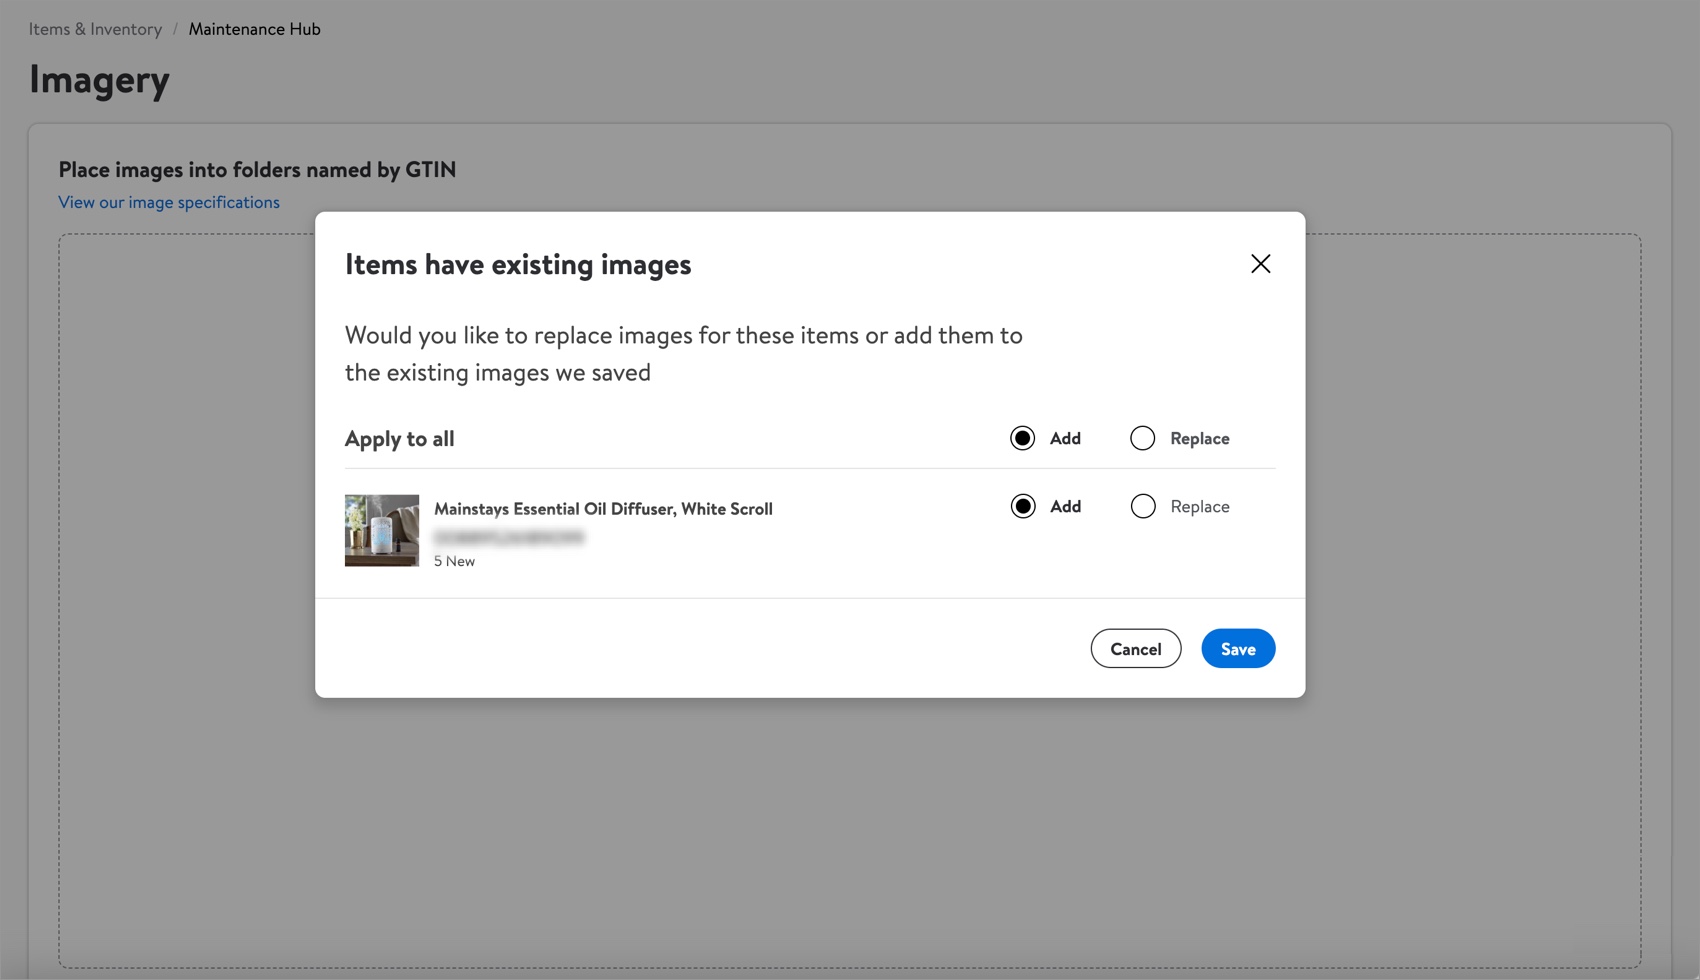
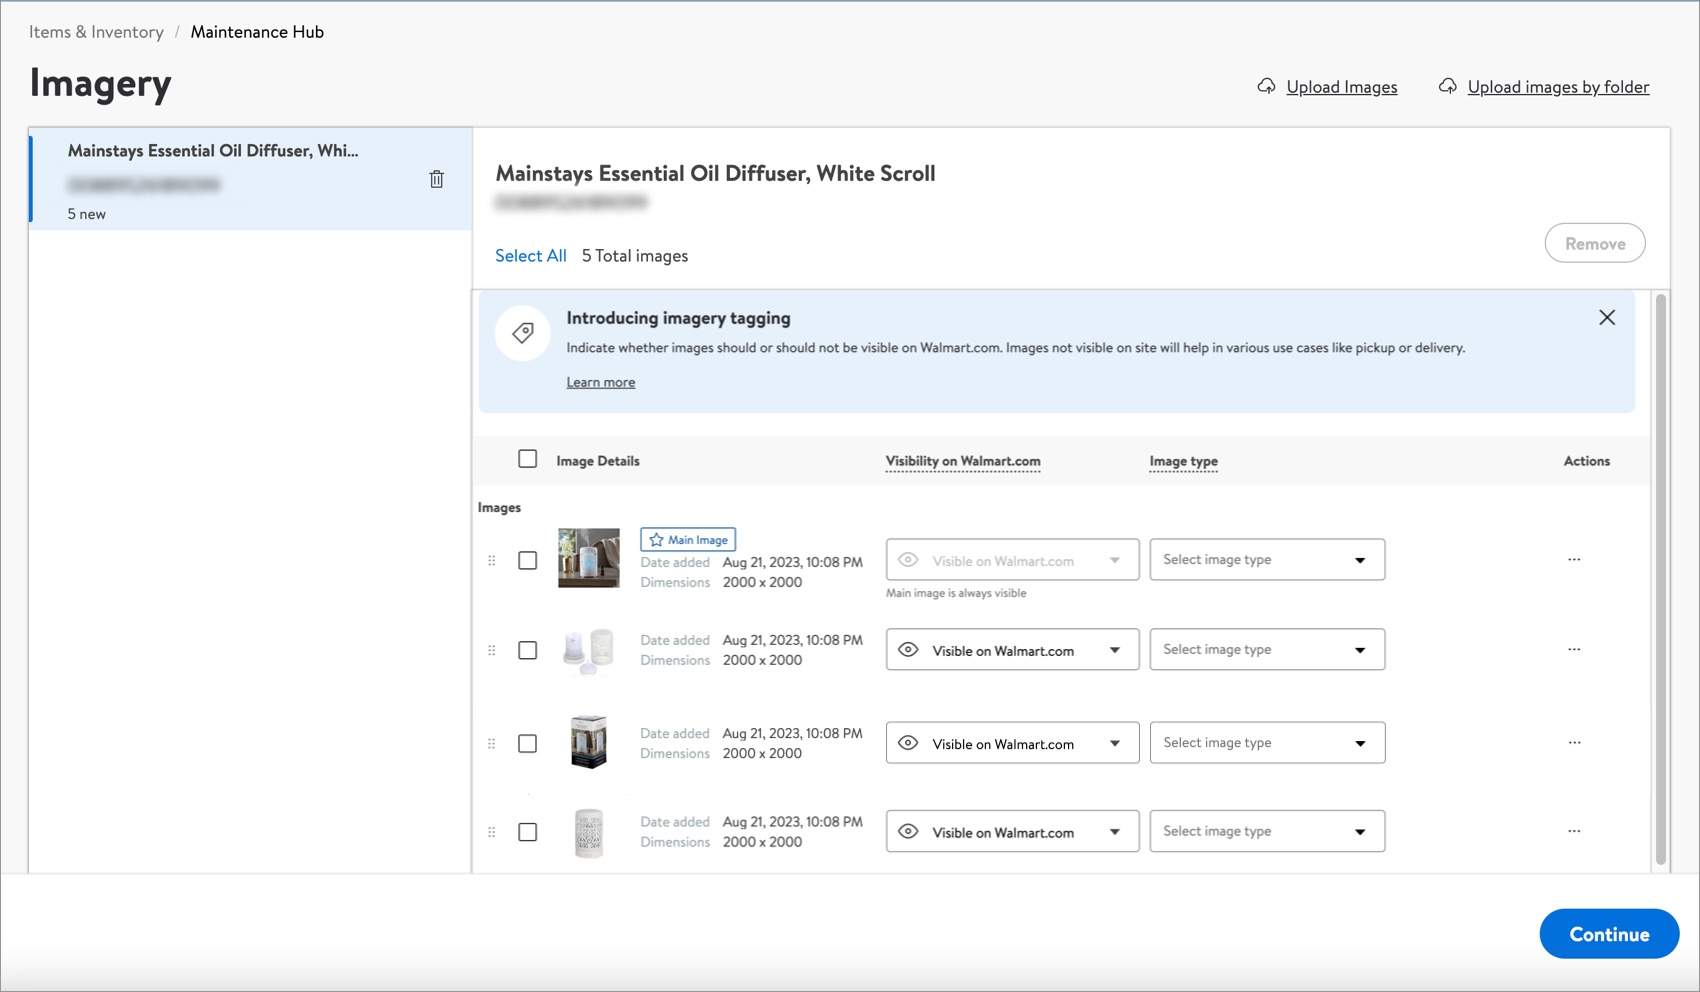
- Review the list of items and images. You can do many things on this page:
- Click the Continue button to complete your bulk image uploads.
- Provide a submission description for your image uploads. Then, click the Submit button.
Track Your Image Uploads
Read Track Your Submissions.
Have Questions or Need Help?
If you experience any issues viewing and managing your catalog, please click "Help" in the top navigation menu and select "Manage tickets" to file a case ticket. Or, select "Chat" to get real-time help from our chat bot or click "Search articles" to search Supplier One HelpDocs.
Make sure to select the issue type Items and Inventory.
For detailed instructions, refer to Manage Case Tickets.